
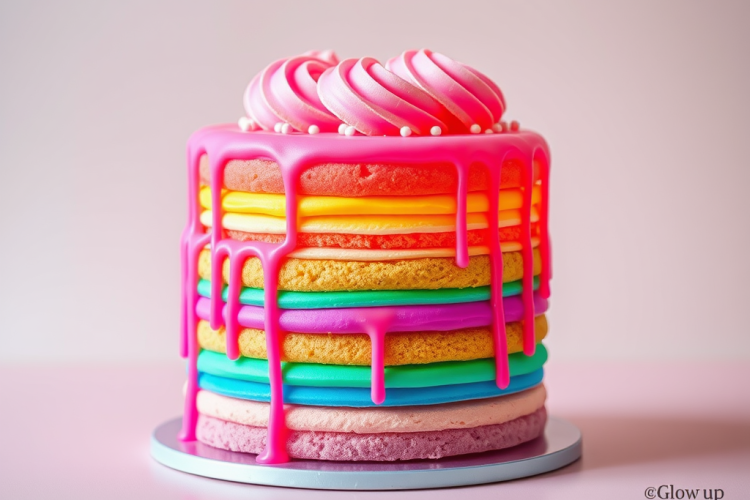
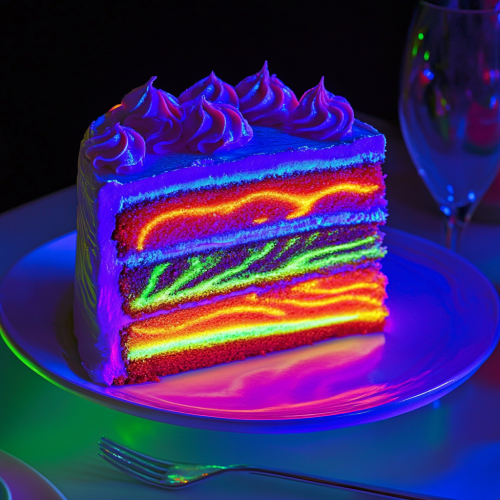
Imagine slicing into a cake that literally glows in the dark! The Neon Layer Cake isn’t just another pretty dessert – it’s an interactive light show that transforms any gathering into an unforgettable experience. With its vibrant, UV-reactive layers bursting with color, this showstopper has taken social media by storm for good reason. I’ve been fascinated by how something as simple as special food coloring can create such a magical effect under blacklight.
What makes this cake truly special is how it combines dramatic visual impact with genuinely delicious flavor. Unlike many novelty desserts that prioritize looks over taste, the Neon Layer Cake delivers on both fronts. Perfect for everything from glow-in-the-dark birthday parties to EDM-themed celebrations, this dessert has become the centerpiece of choice for hosts looking to create that “wow” moment when the lights go down. Let me show you how to create this glowing culinary masterpiece at home!
🍰 Believe it or not, you can make a cake just like this one! Check out CakeFlix for a free 7-day trial and learn step-by-step.

Neon Layer Cake
Equipment
- Mixing bowls
- Electric mixer
- 8-Inch Cake Pans
- Cooling rack
- Blacklight
Ingredients
- 3 cups all-purpose flour
- 2 1/2 tsp baking powder
- 1/2 tsp baking soda
- 1/2 tsp salt
- 1 cup unsalted butter softened
- 2 cups granulated sugar
- 4 large eggs
- 1 tbsp vanilla extract
- 1 1/4 cups tonic water for UV-reactive glow
- 1/2 cup buttermilk
- 1/4 tsp vitamin B2 powder optional, for enhanced glow
- 5 colors neon food coloring pink, green, blue, yellow, and purple
- 3 cups buttercream frosting for layering and decorating
Instructions
- Preheat the oven to 350°F (175°C) and grease five 8-inch cake pans.
- In a mixing bowl, whisk together the flour, baking powder, baking soda, and salt. Set aside.
- In a separate bowl, beat the butter and sugar with an electric mixer until light and fluffy.
- Add the eggs one at a time, beating well after each addition. Mix in the vanilla extract.
- Gradually add the dry ingredients, alternating with the tonic water and buttermilk, mixing until just combined.
- Divide the batter evenly into five bowls. Add a different neon food coloring to each bowl and mix until vibrant.
- Pour each colored batter into its own cake pan and bake for 20-25 minutes, or until a toothpick inserted in the center comes out clean.
- Let the cakes cool in the pans for 10 minutes, then transfer to a cooling rack to cool completely.
- Once cooled, layer the cakes with buttercream frosting between each layer.
- Frost the outside of the cake with a smooth buttercream finish or decorate with additional neon designs.
- Place the cake under a blacklight to reveal the glowing layers before serving.
Notes
- Storage: Store in the refrigerator for up to 3 days. Bring to room temperature before serving.
- Extra Glow: Use vitamin B2 powder (riboflavin) in the batter to enhance the glow under blacklight.
- Alternative Frosting: Add neon gel food coloring to buttercream for an even brighter effect.
The Eye-Catching Appeal of Neon Layer Cakes
The Neon Layer Cake has risen to prominence as the ultimate party showstopper. What makes these cakes so special is their spectacular UV-reactive properties that create an otherworldly glow when exposed to blacklight. This unique feature transforms an ordinary dessert into an interactive centerpiece that captivates guests the moment they see it.
Beyond their visual appeal, these cakes have gained popularity because they’re versatile enough for any celebration. From birthdays and graduations to festive spring celebrations and dance parties, a neon cake immediately sets a fun, energetic tone. The surprise element when you first reveal the cake under blacklight creates a memorable moment that guests will talk about long after the party ends.
What started as a niche trend among professional bakers has now become accessible to home bakers. The joy of seeing someone’s face light up (quite literally) when they see their glowing cake makes all the effort worthwhile. And unlike some other trendy desserts, the Neon Layer Cake actually tastes as good as it looks!
🍰 Want to make a cake just like this one? Try CakeFlix free today and start creating your own masterpiece!

The Fascinating History Behind Neon Desserts
The concept of Neon Layer Cakes emerged around 2015 as creative bakers began experimenting with UV-reactive food colorings. These innovative desserts were inspired by the growing popularity of neon aesthetics in fashion, design, and entertainment. Initially seen primarily at upscale events and nightclubs, these glowing creations quickly captured attention on Instagram and Pinterest, propelling them into mainstream popularity.
The technical breakthrough that made these cakes possible was the development of food-safe, UV-reactive colorings. Unlike traditional food dyes, these special pigments react dramatically under blacklight, transforming ordinary cake layers into glowing works of art. As dessert design trends evolved to emphasize experiences over mere consumption, the Neon Layer Cake perfectly met this demand.
By 2023, these cakes had become fixtures at themed parties, rave events, and even wedding receptions looking for something unconventional. Their popularity continues to grow as more home bakers discover how achievable these impressive desserts actually are with the right ingredients and techniques.
🍰 Believe it or not, you can make a cake just like this one! Check out CakeFlix for a free 7-day trial and learn step-by-step.

Essential Equipment and Ingredients
Creating your own glowing masterpiece requires specific tools and ingredients. Here’s everything you’ll need to make a perfect Neon Layer Cake:
Equipment:
- Three 8″×2″ round cake pans
- Cake goop or pan release spray
- Parchment paper
- Electric stand mixer with paddle attachment
- Several mixing bowls
- Rubber spatulas
- Offset spatula for frosting
- Cake leveler or serrated knife
- Cake turntable (optional but helpful)
- Blacklight (for viewing the final effect)
For the Cake Layers:
- 24 oz (about 5½ cups) cake flour
- 24 oz (about 3 cups) granulated sugar
- 1 teaspoon salt
- 2 tablespoons baking powder
- 1 teaspoon baking soda
- 10 oz (about 1¼ cups) egg whites, room temperature
- 6 oz (¾ cup) vegetable oil
- 18 oz (2¼ cups) buttermilk, slightly warm
- 12 oz (1½ cups) unsalted butter, softened
- 1 tablespoon vanilla extract
- UV-reactive neon food coloring in pink, green, blue, yellow, and orange
For the Buttercream Frosting:
- 8 oz (1 cup) pasteurized egg whites
- 32 oz (8 cups) powdered sugar
- 32 oz (4 cups) unsalted butter, softened
- 2 teaspoons vanilla extract
- ½ teaspoon salt
The most important ingredient is the UV-reactive food coloring – regular neon food coloring won’t glow under blacklight, so be sure to purchase specifically labeled “UV-reactive” or “blacklight-reactive” food colors. These can be found at specialty baking stores and online retailers that carry cake decorating supplies.
If you’re serious about trying unique desserts like this one, I’d recommend submitting your successful creations to our recipe feature section to inspire others!
Step-by-Step Instructions for Neon Layer Cake
Follow these detailed steps to create your own glowing Neon Layer Cake that will impress everyone at your next gathering:
Preparing the Cake Pans and Oven:
- Preheat your oven to 335°F (168°C).
- Prepare your cake pans by coating them with cake goop (a homemade pan release) or commercial pan spray.
- Cut parchment paper to fit the bottom of each pan and place inside for easy release.
Making the Cake Batter:
- In the bowl of your stand mixer, combine the cake flour, sugar, salt, baking powder, and baking soda.
- Add the softened butter and mix on low speed until the mixture resembles coarse sand.
- In a separate bowl, combine the buttermilk and oil.
- Slowly add the buttermilk mixture to the dry ingredients while mixing on low speed until just moistened.
- Gradually add the egg whites in 3 batches, mixing well between additions.
- Add vanilla extract and mix until just combined. Don’t overmix!
Creating the Neon Layers:
- Divide the batter equally into 5-6 bowls (depending on how many colors you want).
- Add different UV-reactive food coloring to each bowl – typically pink, green, blue, yellow, orange, and possibly purple.
- Start with a small amount of coloring and gradually increase until you achieve vibrant, intense colors. The batter should look very bright.
- Pour each colored batter into prepared cake pans, filling about ⅔ full.
Baking and Cooling:
- Bake at 335°F for 25-30 minutes or until a toothpick inserted comes out clean and the edges begin to pull away from the pan.
- Let the cakes cool in the pans for 10 minutes.
- Remove from pans and cool on wire racks for another 10 minutes.
- Wrap each layer in plastic wrap and freeze for 30 minutes to firm up for easier handling.

Making the Buttercream Frosting:
- In a clean mixer bowl, combine the pasteurized egg whites and powdered sugar.
- Mix on low speed until combined, then on high speed until stiff peaks form (about 5 minutes).
- Add the softened butter in chunks, mixing well between additions.
- Add vanilla extract and salt, then beat on high speed until the frosting is light and fluffy (about 8 minutes).
Assembling the Cake:
- Level each cake layer if needed, removing any domes for even stacking.
- Place your first layer on a cake board or serving plate.
- Spread a thin layer of buttercream evenly on top.
- Add the next colored layer and repeat until all layers are stacked.
- Apply a thin crumb coat of frosting around the entire cake and chill for 15 minutes.
- Finish with a final layer of buttercream, smoothing with an offset spatula.
For the ultimate reveal, turn off regular lights and use a blacklight to showcase your creation. The vibrant colors will glow dramatically, creating a truly spectacular dessert experience for everyone to enjoy! For more creative dessert ideas like this one, check out Whisk and Lavender Bakery’s fun desserts for inspiration.
Neon Layer Cake Recipe Card
Glowing Neon Layer Cake
Prep Time: 45 minutes | Cook Time: 30 minutes | Chilling Time: 45 minutes | Total Time: 2 hours
Serves: 12-14 people
Nutrition Information (per slice):
- Calories: 685
- Fat: 38g
- Saturated Fat: 23g
- Carbohydrates: 82g
- Sugar: 62g
- Protein: 5g
- Sodium: 230mg
- Fiber: 0.5g
Recipe Notes:
- UV-reactive food coloring is essential – regular neon colors won’t glow under blacklight.
- Room temperature ingredients create a smoother, more even batter.
- Don’t overmix the batter after adding the egg whites to maintain a light texture.
- The cake tastes best if served at room temperature, even if stored in the refrigerator.
Creative Variations and Pro Tips
The basic Neon Layer Cake recipe is just the beginning! Here are some exciting variations and modifications to make this dessert uniquely yours:
Variation Ideas:
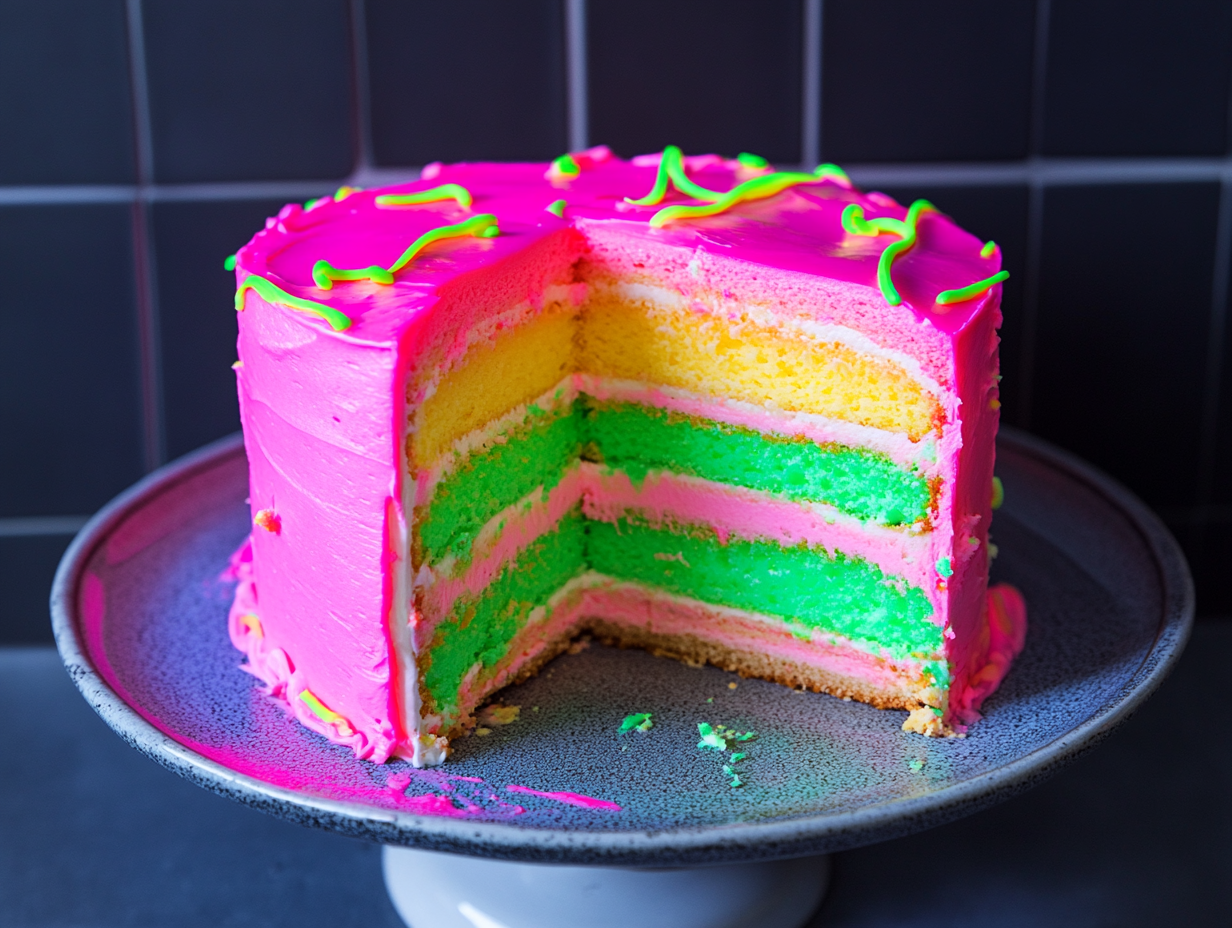
- Black and Neon Contrast: Create black cake layers alternating with neon-colored ones for a dramatic effect when sliced.
- Ombre Neon: Arrange cake layers in a gradient from one neon color to another for a beautiful transition effect.
- Hidden Design: Cut shapes within layers and fill with contrasting colored cake for surprise patterns when sliced.
- Neon Marble: Swirl multiple neon colors within each layer for a psychedelic marbled effect.
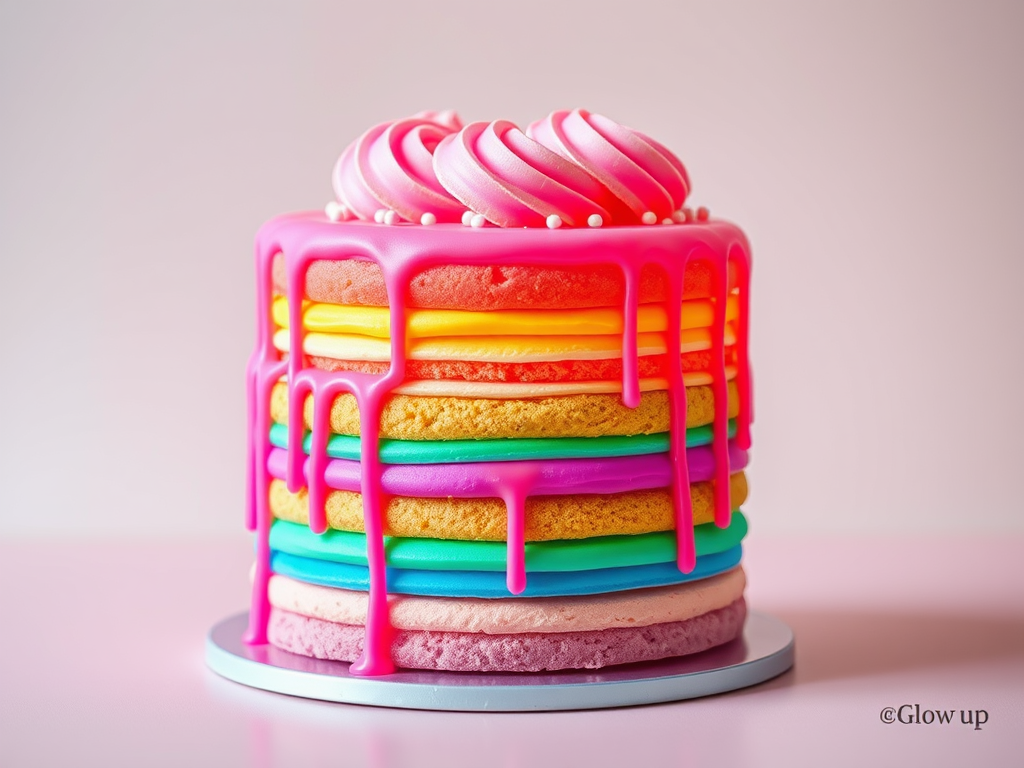
- Neon Drip: Add a UV-reactive glaze that drips down the sides of the cake for extra dramatic flair.
Pro Baker Tips:
- Use gel-based UV-reactive food colorings for the most vibrant results without affecting batter consistency.
- For the cleanest layers, freeze each cake layer for at least 30 minutes before trimming and stacking.
- Keep your buttercream smooth by ensuring all ingredients are at the proper temperature – butter should be softened but not melted.
- To make assembly easier, use a cake turntable and long offset spatula for frosting.
- Test your blacklight beforehand to ensure it works properly for the grand unveiling.
If you’re looking for even more creative dessert ideas, especially ones that are kind to the planet, check out these eco-friendly dessert options for Earth Day that pair wonderfully with special occasion cakes like this one.
For the most impressive presentation, serve your Neon Layer Cake in a darkened room with a strategically placed blacklight. Watch your guests’ faces light up with amazement when they see the glowing layers revealed as you slice into the cake!
Storing Your Neon Layer Cake Properly
Proper storage is crucial for maintaining both the flavor and visual impact of your Neon Layer Cake. Since this dessert requires significant effort to create, you’ll want to ensure it stays fresh and vibrant for as long as possible. Here’s a comprehensive storage guide to follow:
Short-Term Storage (1-3 days):
- Allow the Neon Layer Cake to cool completely before storing.
- Store at room temperature for up to 24 hours if your frosting doesn’t contain perishable ingredients and your room isn’t too warm.
- For longer freshness, refrigerate in an airtight cake container to prevent absorbing odors from the refrigerator.
- Remove from the refrigerator 1-2 hours before serving to allow the cake to come to room temperature, which improves flavor and texture.
Long-Term Storage (Beyond 3 days):
- When storing Neon Layer Cake in the freezer, wrap individual slices or the whole cake (uncut) in plastic wrap, then aluminum foil.
- Place in a freezer-safe container to prevent freezer burn and absorbing odors.
- Frozen cake will maintain optimal quality for up to 1 month.
- To thaw, transfer from freezer to refrigerator for 24 hours, then allow to come to room temperature before serving.
The good news is that the UV-reactive properties of the food coloring won’t diminish during storage, so your cake will still glow beautifully under blacklight even after being refrigerated or frozen. Just be aware that condensation can form when moving the cake from cold to warm environments, which might slightly affect the frosting’s appearance.
For those interested in making more specialized desserts that cater to various dietary needs, you might want to explore vegan dessert options that are gaining popularity. Many of the techniques used in this Neon Layer Cake can be adapted for plant-based versions!

Lighting Up Your Celebrations with Neon Brilliance
The Neon Layer Cake isn’t just a dessert – it’s an unforgettable sensory experience that transforms ordinary gatherings into extraordinary memories. There’s something magical about dimming the lights and watching faces light up with wonder as your cake begins to glow under blacklight. This interactive element makes it perfect for milestone birthdays, glow parties, raves, and any celebration where you want to create a moment of pure joy and surprise.
What makes this cake truly special is how it combines spectacle with substance. Unlike many novelty desserts that sacrifice taste for appearance, a well-made Neon Layer Cake is genuinely delicious. The buttermilk in the batter creates a tender crumb while the buttercream frosting provides the perfect creamy complement to the light, fluffy cake layers.
I’ve found that the effort invested in creating this showstopper pays off tenfold in the reactions it generates. There’s something deeply satisfying about mastering a dessert that seems so technically impressive but is actually quite achievable with the right ingredients and a bit of patience. If you’re looking to establish yourself as the go-to baker in your social circle, this is definitely the recipe to try!
Don’t forget to submit your favorite local bakeries that make amazing specialty cakes to our dessert shop business directory! And if you’re proud of your neon creation, why not share your own recipe variation on our recipe submission page? The world of creative baking thrives when we share our successes with each other!
For those who love expressing their passion for unique desserts beyond the kitchen, check out our churro and foodie-themed apparel shop where you can find fun accessories celebrating your love for creative treats like this glowing masterpiece!