

Whipping up desserts with your kids is a delightful way to bond and spark creativity in the kitchen. These 10 fun kid-friendly desserts to make together are designed to bring joy, laughter, and a touch of sweetness to your day. From simple no-bake treats to easy-bake goodies, these recipes are perfect for getting little hands involved in mixing, decorating, and creating. Whether you’re making colorful cupcakes, fun-shaped cookies, or playful fruit-based snacks, these kid-friendly desserts ensure that every step is both fun and rewarding. Let’s dive into these easy and exciting recipes that are as enjoyable to make as they are to eat!
DIY Ice Cream Sundae Bar

A DIY ice cream sundae bar is a fun and interactive way to let kids create their own delicious treats. With a variety of toppings and flavors, each child can customize their sundae to their liking. This activity not only satisfies sweet cravings but also encourages creativity and decision-making in a fun setting.
This simple dessert idea is perfect for family gatherings or kids’ birthdays. It’s a great way to bond while enjoying a treat that everyone loves. Plus, it’s super easy to set up, making it an ideal choice for busy parents looking for quick and easy desserts for kids to enjoy.
Ingredients
- 1 gallon of your favorite ice cream (vanilla, chocolate, or strawberry)
- 1 cup chocolate syrup
- 1 cup caramel sauce
- 1 cup whipped cream
- 1 cup sprinkles
- 1 cup chopped nuts (optional)
- 1 cup maraschino cherries
- 1 cup crushed cookies (like Oreos)
Instructions
- Prepare the Ice Cream: Set out the ice cream in a bowl or ice cream maker to soften slightly for easier scooping.
- Gather Toppings: Arrange all toppings in small bowls or containers on a table.
- Set Up the Bar: Place bowls of ice cream alongside the toppings for easy access. Provide spoons and bowls for each child.
- Build the Sundaes: Let each child scoop their desired ice cream into a bowl, and then add their choice of toppings.
- Finish with Drizzles: Top off each sundae with whipped cream, chocolate syrup, and a cherry on top.
Fruit Kabobs with Yogurt Dip

Fruit kabobs are a fun and colorful way to enjoy fresh fruits while making healthy desserts for kids. They’re not only visually appealing but also incredibly tasty, combining the sweetness of fruits with a creamy yogurt dip. This recipe is simple enough to make with your little ones, turning dessert time into a delightful family bonding experience.
These kabobs are perfect for a quick snack or a kid-friendly party dessert. You can let your creativity shine by choosing a variety of fruits, making this a versatile recipe that kids will love. Plus, it’s a great way to sneak in some healthy ingredients while keeping things fun!
Ingredients
- 1 cup strawberries, hulled
- 1 cup bananas, sliced
- 1 cup grapes, halved
- 1 cup melon, cubed
- 1 cup yogurt (plain or flavored)
- 1 tablespoon honey (optional)
- Skewers or popsicle sticks
Instructions
- Prepare the Fruit: Wash and cut strawberries, bananas, and melon into bite-sized pieces. Halve the grapes if needed.
- Assemble the Kabobs: Take a skewer and alternate threading pieces of fruit. You can follow any pattern or mix and match as you like.
- Make the Yogurt Dip: In a small bowl, mix yogurt with honey for extra sweetness if desired.
- Serve: Arrange the kabobs on a plate and serve with the yogurt dip on the side for dipping.
Chocolate-Dipped Fruit
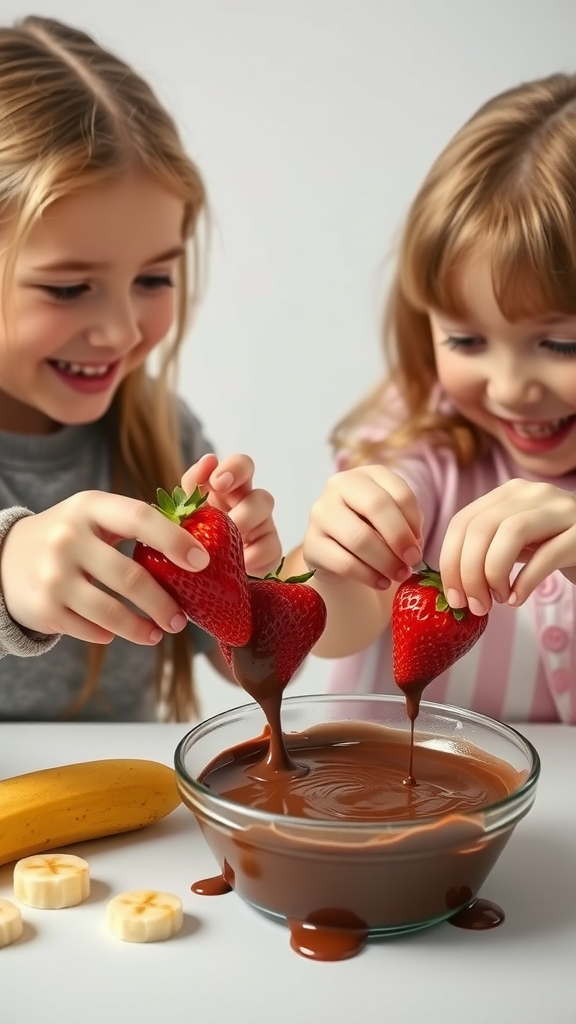
Chocolate-dipped fruit is a delightful treat that combines the sweetness of fresh fruit with the rich taste of chocolate. It’s a simple and fun dessert that kids can easily help make, making it a perfect choice for family cooking sessions. This recipe not only satisfies sweet cravings but also adds a touch of creativity to snack time.
Whether you’re looking for kid-friendly dessert recipes for a birthday party or just a fun way to enjoy healthy snacks, chocolate-dipped fruit fits the bill. With minimal ingredients and the option to customize with different fruits, it’s an interactive dessert kids will love. Get ready to dip and enjoy!
Ingredients
- 1 cup of chocolate chips (milk, dark, or white)
- 2 cups of fresh strawberries
- 1 medium banana
- 1 tablespoon of coconut oil (optional, for a smoother chocolate)
- Sprinkles or crushed nuts (optional, for decoration)
Instructions
- Prepare the Fruit: Wash the strawberries and pat them dry. Peel and slice the banana into thick rounds.
- Melt the Chocolate: In a microwave-safe bowl, combine the chocolate chips and coconut oil. Microwave in 30-second intervals, stirring in between, until smooth.
- Dip the Fruit: Hold each piece of fruit by the stem or with a fork and dip it into the melted chocolate. Allow any excess chocolate to drip off.
- Add Toppings (Optional): If desired, sprinkle crushed nuts or sprinkles over the chocolate-coated fruit before it sets.
- Chill: Place the dipped fruit on a parchment-lined tray and refrigerate for about 30 minutes or until the chocolate hardens.
- Serve: Enjoy your chocolate-dipped fruit as a sweet treat or a fun dessert for kids!
Chocolate Chip Cookie Decorating

Chocolate chip cookies are a classic favorite that everyone loves! They’re not just delicious; they’re also super fun to make and decorate with kids. The warm, gooey chocolate combined with a soft, chewy cookie creates a treat that will have everyone smiling. Plus, decorating these cookies together allows for creativity and personal touches, making them even more special.
This recipe is simple and perfect for family bonding. Kids can help with mixing, rolling, and, of course, decorating with their favorite toppings. It’s a great way to introduce them to baking while creating memories. Let’s dive into this fun baking project!
Ingredients
- 1 cup unsalted butter, softened
- 3/4 cup granulated sugar
- 3/4 cup brown sugar, packed
- 1 teaspoon vanilla extract
- 2 large eggs
- 2 1/4 cups all-purpose flour
- 1 teaspoon baking soda
- 1/2 teaspoon salt
- 2 cups chocolate chips
- Assorted sprinkles and toppings for decorating
Instructions
- Preheat the Oven: Start by preheating your oven to 350°F (175°C) and lining baking sheets with parchment paper.
- Make the Dough: In a large bowl, cream together the softened butter, granulated sugar, and brown sugar until light and fluffy. Beat in the vanilla and eggs until well combined. In another bowl, whisk together the flour, baking soda, and salt, then gradually add it to the butter mixture. Stir in the chocolate chips.
- Shape the Cookies: Use a cookie scoop or your hands to form balls of dough and place them on the prepared baking sheets, leaving space between each cookie.
- Bake: Bake in the preheated oven for 10-12 minutes or until the edges are golden brown. Remove from the oven and allow the cookies to cool on the baking sheets for a few minutes before transferring them to wire racks to cool completely.
- Decorate: Once the cookies are cool, set up a decorating station with sprinkles, chocolate chips, and any other toppings you like. Let the kids go wild decorating their cookies!
No-Bake Cheesecake Cups

No-bake cheesecake cups are a delightful treat that kids will love to help create. With a creamy, smooth filling and a crumbly crust, these desserts are both tasty and easy to put together. Perfect for a fun kitchen project, they require no baking and minimal ingredients, making them a great option for family bonding time.
These cheesecake cups are refreshingly light, and you can top them with a variety of fruits for a burst of flavor. They’re perfect for any occasion, from casual family dinners to celebrations. Plus, they make a wonderful choice for cooking with kids, as they can easily help layer the ingredients and choose their favorite toppings.
Ingredients
- 1 cup of graham cracker crumbs
- 1/4 cup unsalted butter, melted
- 2 cups cream cheese, softened
- 1/2 cup powdered sugar
- 1 teaspoon vanilla extract
- 1 cup whipped cream
- Fresh berries (strawberries, blueberries, raspberries)
- Mint leaves for garnish
Instructions
- Prepare the Crust: In a bowl, mix the graham cracker crumbs and melted butter until well combined. Press the mixture into the bottom of small cups or jars to form the crust.
- Make the Cheesecake Filling: In another bowl, beat the softened cream cheese, powdered sugar, and vanilla extract until smooth and creamy. Gently fold in the whipped cream until fully incorporated.
- Layer the Cups: Spoon the cheesecake filling over the crust in each cup, smoothing the top. Refrigerate for at least 2 hours to set.
- Add Toppings: Before serving, top each cheesecake cup with fresh berries and a mint leaf for a pop of color and flavor.
- Enjoy: Serve chilled for a refreshing dessert that everyone will enjoy!
Rainbow Cupcake Wrapping
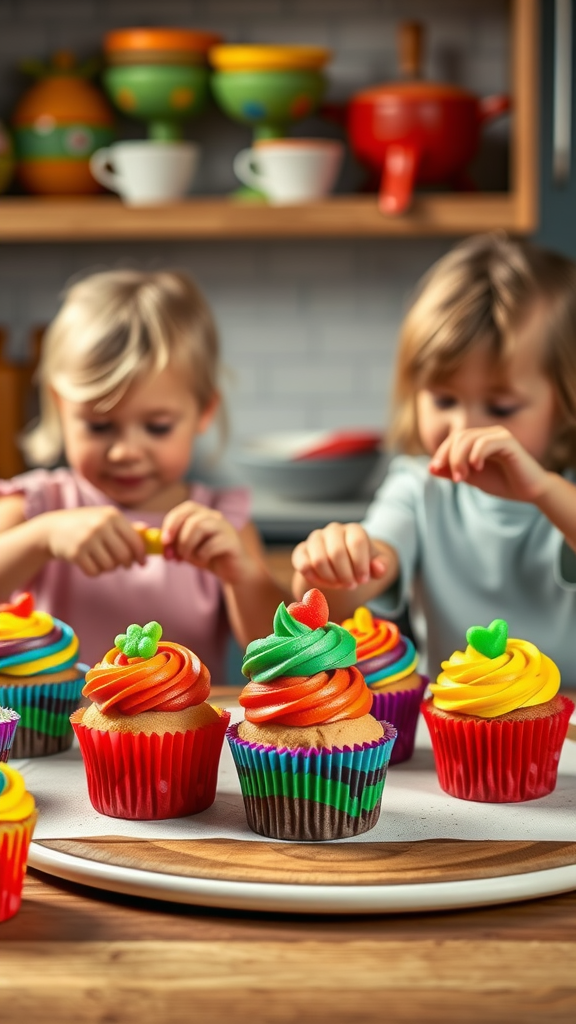
Rainbow cupcakes are a delightful treat that brings both color and sweetness to the table. These cheerful desserts are perfect for baking with kids, as they can help create a vibrant masterpiece using simple techniques. The taste is a fun mix of vanilla and bright colors, making each bite a little celebration!
This recipe is straightforward, making it an excellent choice for family-friendly desserts. Kids will enjoy decorating their own cupcakes with colorful frosting and candy toppings. Plus, it’s a great way to bond with your little ones while making something delicious together.
Ingredients
- 1 ½ cups all-purpose flour
- 1 cup granulated sugar
- ½ cup unsalted butter, softened
- 2 large eggs
- 1 teaspoon vanilla extract
- 1 ½ teaspoons baking powder
- ½ cup milk
- Food coloring (red, orange, yellow, green, blue, purple)
- 1 cup buttercream frosting
- Fun candies for decoration
Instructions
- Preheat the Oven: Start by preheating your oven to 350°F (175°C) and prepare a cupcake tin with paper liners.
- Mix the Batter: In a large bowl, cream together the butter and sugar until light and fluffy. Add the eggs one at a time, mixing well after each. Stir in the vanilla extract.
- Combine Dry Ingredients: In another bowl, whisk together the flour and baking powder. Gradually add this to the butter mixture, alternating with the milk, until well combined.
- Color the Batter: Divide the batter into six small bowls. Add a few drops of different food colorings to each bowl, mixing until you achieve your desired colors.
- Layer the Colors: In each cupcake liner, add spoonfuls of the colored batter one at a time to create layers. Use a toothpick to swirl the colors slightly for a beautiful effect.
- Bake: Bake in the preheated oven for 18-20 minutes or until a toothpick inserted in the center comes out clean. Allow cooling before frosting.
- Decorate: Once cooled, spread buttercream frosting generously on top of each cupcake. Let the kids add fun candies on top for extra flair!
S’mores in the Oven

S’mores in the oven is a fun and easy way to enjoy this classic treat without a campfire. These gooey, chocolatey delights are a hit with kids and are perfect for family bonding time in the kitchen. The combination of melted chocolate, toasted marshmallows, and crunchy graham crackers creates a sweet flavor that everyone loves.
This recipe is simple enough for little hands to help out, making it one of the best kid-friendly dessert ideas around. It’s quick to prepare, requires minimal ingredients, and results in a delicious treat that’s sure to please. Let’s dive into how to make these delightful s’mores!
Ingredients
- 1 cup chocolate chips
- 8 graham cracker squares
- 16 large marshmallows
- 1 tablespoon unsalted butter (optional, for greasing)
Instructions
- Preheat the oven to 400°F (200°C) and lightly grease a baking sheet with butter if desired.
- Arrange four graham cracker squares on the baking sheet, topping each with a generous amount of chocolate chips.
- Place four marshmallows on top of the chocolate chips for each graham cracker square.
- Bake in the oven for about 5-7 minutes, or until the marshmallows are golden brown and the chocolate is melted.
- Remove from the oven and immediately top with the remaining graham cracker squares. Gently press down to create a sandwich.
- Let them cool for a minute, then enjoy your delicious, homemade oven s’mores!
Homemade Fruit Popsicles

Homemade fruit popsicles are a fun and healthy treat that kids will love! These colorful, frozen delights are not only refreshing but also packed with real fruit flavors. They are simple to make, requiring just a few ingredients and minimal effort. Perfect for hot days, these popsicles offer a delightful way to enjoy a sweet treat without the guilt.
Making these popsicles together is a great bonding activity for families. Kids can choose their favorite fruits and help mix everything up. Whether you’re using strawberries, mangoes, or a mix of berries, the result is a tasty dessert kids can help make. These fun desserts are great for parties or just a sunny afternoon at home!
Ingredients
- 2 cups fresh fruit (like strawberries, mangoes, or blueberries)
- 1 cup fruit juice (like orange juice or apple juice)
- 1 tablespoon honey or maple syrup (optional)
- 1/2 cup yogurt (plain or flavored, optional)
- Ice pop molds
Instructions
- Prepare the Fruit: Wash and chop your chosen fruits into small pieces.
- Blend: In a blender, combine the fruit, juice, and sweetener if using. Blend until smooth. If you want some texture, reserve a handful of fruit pieces to add later.
- Add Yogurt: If using yogurt, gently swirl it into the blended fruit for a creamy effect.
- Pour into Molds: Fill your ice pop molds with the fruit mixture, leaving a little space at the top for expansion as they freeze. Add the reserved fruit pieces if desired.
- Insert Sticks: Place the sticks into the molds and freeze for at least 4-6 hours or until solid.
- Enjoy: To remove the popsicles, run warm water over the outside of the molds for a few seconds and gently pull the pops out. Enjoy your homemade fruit popsicles!
Mini Pancake Stacks
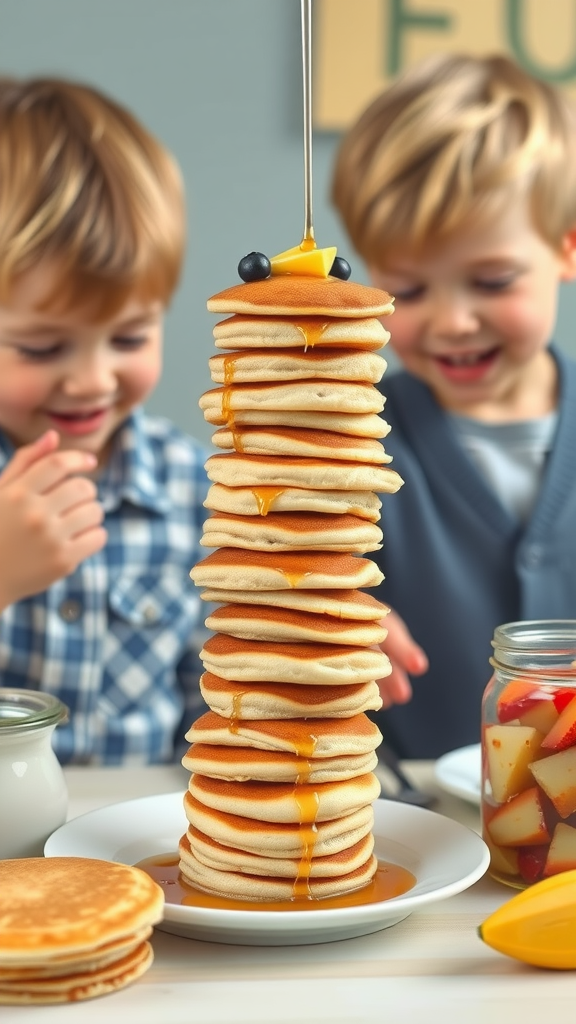
Mini pancake stacks are a delightful treat that kids will love making together. These fluffy little pancakes can be stacked high and topped with their favorite fruits and syrups. The taste is light and sweet, perfect for breakfast or a fun dessert. Plus, they are super simple to whip up, making them a great option for a family cooking session.
These mini stacks are not just about deliciousness; they are also a fantastic way to bond with your little ones in the kitchen. With minimal ingredients, this is one of those fun baking recipes for kids that will keep them engaged and happy. The best part? Everyone gets to create their own masterpiece! Here’s a quick and easy recipe for making these fun and safe desserts for kids.
Ingredients
- 1 cup all-purpose flour
- 2 tablespoons sugar
- 1 tablespoon baking powder
- 1/2 teaspoon salt
- 1 cup milk
- 1 large egg
- 2 tablespoons melted butter
- Cooking spray or additional butter for the skillet
- Maple syrup, fresh fruits, or chocolate chips for topping
Instructions
- Mix the Dry Ingredients: In a large bowl, whisk together the flour, sugar, baking powder, and salt.
- Combine the Wet Ingredients: In another bowl, mix the milk, egg, and melted butter until well combined.
- Combine and Mix: Pour the wet ingredients into the dry ingredients and stir until just combined. Don’t worry about lumps!
- Heat the Skillet: Preheat a non-stick skillet over medium heat and lightly grease it with cooking spray or butter.
- Cook the Pancakes: Pour small amounts of batter onto the skillet, about 2-3 inches in diameter. Cook until bubbles form on the surface, then flip and cook until golden brown on the other side.
- Stack and Serve: Stack the pancakes high on a plate, drizzle with maple syrup, and add fruits or chocolate chips as toppings. Let the kids get creative with their own mini pancake stacks!
Decorative Brownie Bites
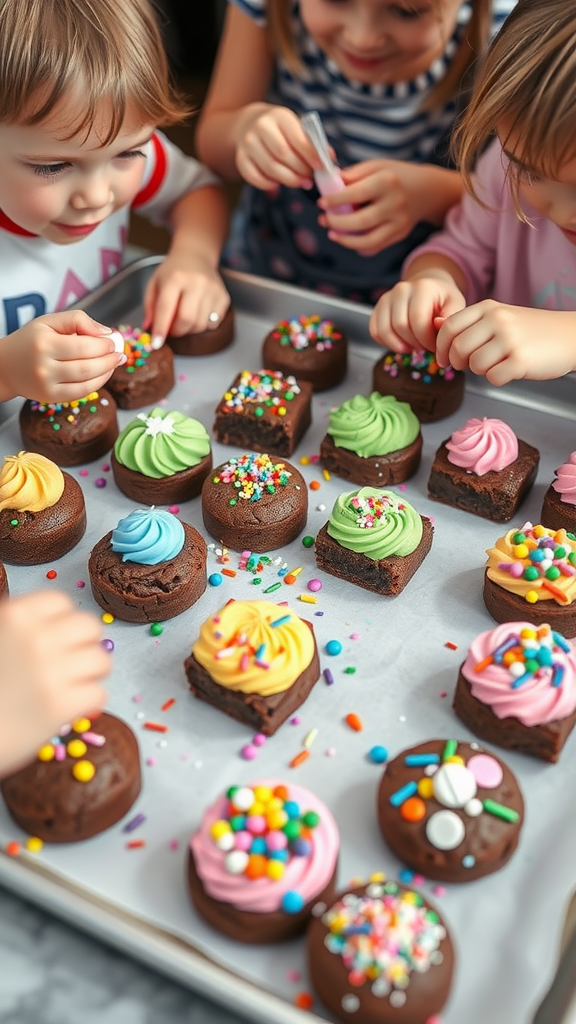
These decorative brownie bites are a fun and tasty way to spend time with kids in the kitchen. Rich, chocolatey, and topped with colorful frosting and sprinkles, they’re sure to be a hit with the little ones. The best part? They’re simple to make, so even preschoolers can join in on the fun!
This recipe encourages creativity, allowing kids to personalize their treats with different colors and toppings. Perfect for family bonding, birthday parties, or just a fun afternoon, these kid-friendly chocolate desserts will be a delightful experience for everyone involved.
Ingredients
- 1 box of brownie mix (plus ingredients required on the box)
- 1 cup frosting (various colors)
- Assorted sprinkles and toppings (like mini chocolate chips, candy pieces, or edible glitter)
Instructions
- Prepare the Brownies: Preheat your oven and prepare the brownie mix as directed on the box. Pour the batter into a greased baking pan.
- Bake: Bake according to the package instructions until a toothpick comes out clean. Let them cool completely.
- Cut and Decorate: Once cooled, cut the brownies into small bite-sized squares. Let the kids spread frosting on them and decorate with their favorite toppings.
- Enjoy: Share these fun and tasty treats with family or friends!
Create Memories One Dessert at a Time
If you’re looking for even more ways to enjoy desserts, explore our dessert directory, your ultimate guide to discovering local small-business dessert shops near you. Whether you’re searching for a cozy bakery, a charming café, or a specialty dessert spot, this directory connects you to nearby treasures offering an array of delicious treats. Supporting these local businesses is a wonderful way to enjoy unique flavors while contributing to your community. From family-owned bakeries to artisanal dessert makers, you’ll find plenty of inspiration and tasty options just around the corner.
For families who love creating in the kitchen, our collection of recipes is packed with kid-friendly ideas and options for every skill level. Whether it’s easy no-bake desserts, festive treats for holidays, or fun recipes to tackle on a rainy afternoon, you’ll find something to spark creativity and bring joy to your dessert-making adventures. Pairing the excitement of exploring local dessert shops with the satisfaction of making your own creations is a great way to turn dessert time into a fun, memorable tradition.
By blending the convenience of finding local dessert shops with the joy of home baking, you can make every occasion special. Imagine discovering a unique dessert at a small business near you, then using our recipes to recreate the experience with your kids. Whether you’re planning a family outing, hosting a celebration, or just enjoying a quiet day at home, our resources help you turn everyday moments into something extraordinary.
At Creme Filled Churros, we’re here to connect you with the best of both worlds—delicious local desserts near you and easy-to-follow recipes that bring the joy of baking to your kitchen. Let’s celebrate the magic of desserts, whether they’re discovered at a local shop or made with love at home!