

Craving something sweet but short on time? This collection of last-minute desserts is all about quick fixes that satisfy your sweet tooth without the stress. Perfect for unexpected guests or a sudden dessert craving, these easy-to-make recipes will have you whipping up delicious treats in no time!
Instant Banana Ice Cream with Nut Butter
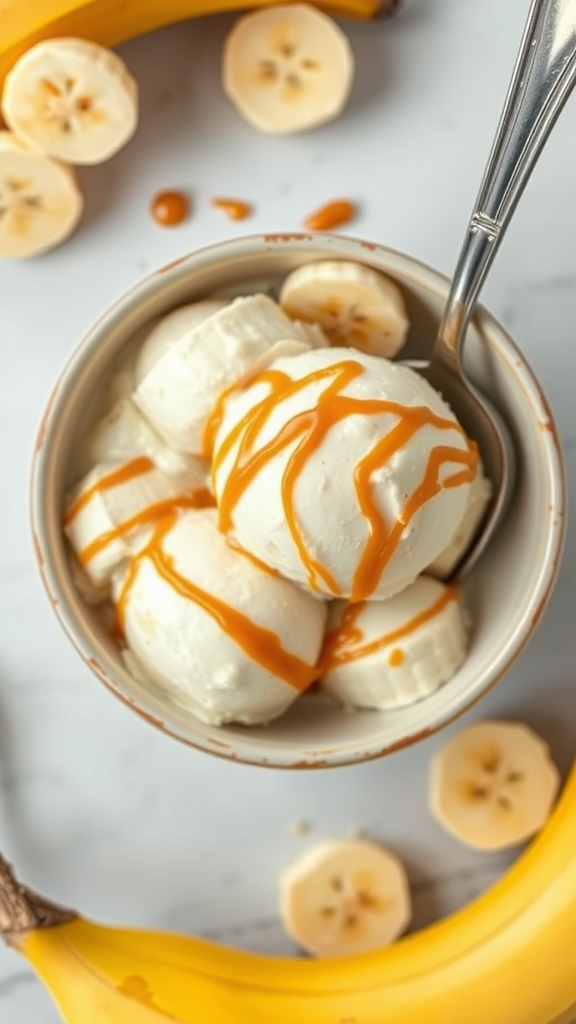
This creamy and delicious banana ice cream is perfect for when you’re short on time but craving something sweet and indulgent. Made with just a few simple ingredients, this healthy dessert comes together in minutes and offers endless flavor possibilities with your favorite nut butter toppings!
Ingredients
- 4 ripe bananas, peeled and sliced into coins
- 2 tablespoons almond butter (or your favorite nut butter)
- Optional toppings:
- Crushed nuts
- Chocolate chips
- Shredded coconut
- Fresh berries
Instructions
-
Prepare the Bananas
Peel and slice the bananas into small coins. Place the slices in a single layer on a baking sheet lined with parchment paper. Freeze for at least 2 hours, or until fully frozen. -
Blend the Bananas
Add the frozen banana slices to a high-speed blender or food processor. Blend until smooth and creamy, stopping to scrape down the sides as needed. This process may take 3–5 minutes. -
Add the Nut Butter
Once the bananas are fully blended into a creamy consistency, add the almond butter (or your preferred nut butter) and blend again until fully incorporated. -
Serve and Enjoy
Scoop the banana ice cream into bowls and serve immediately for a soft-serve texture. If you prefer a firmer consistency, transfer the ice cream to an airtight container and freeze for an additional 1–2 hours. -
Optional Toppings
Customize your ice cream by adding crushed nuts, chocolate chips, shredded coconut, or fresh berries on top before serving.
Prep Time
10 minutes (plus 2 hours freezing time)
Cook Time
0 minutes
Total Time
10 minutes (plus 2 hours freezing time)
Serving Size
Serves 2–3
Notes
- For extra sweetness, add a teaspoon of honey or maple syrup when blending.
- If the bananas are too hard to blend, let them thaw for 5 minutes or add a tablespoon of milk or non-dairy alternative.
- This recipe is naturally vegan and gluten-free.
Nutrition Information (Per Serving)
- Calories: 150
- Protein: 3g
- Fat: 4g
- Carbohydrates: 30g
- Fiber: 3g
- Sugar: 18g
How to Store
Store leftover banana ice cream in an airtight container in the freezer for up to 1 week. Let it sit at room temperature for 5–10 minutes before scooping.
Microwave S’mores in a Cup
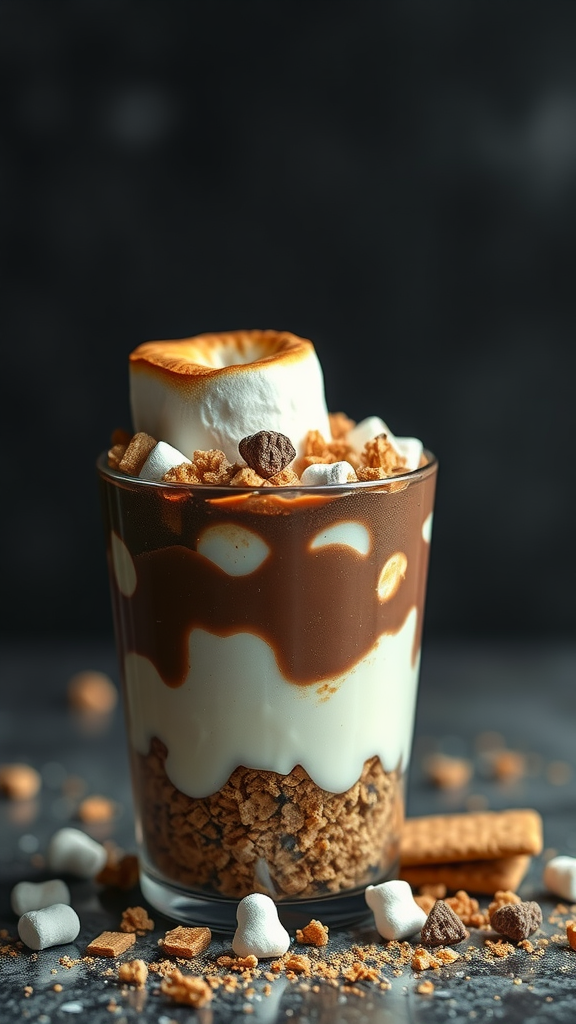
Satisfy your sweet tooth with this quick and gooey microwave s’mores dessert! Perfect for when you’re craving the classic campfire treat but don’t want to light a fire. This single-serving recipe comes together in seconds, combining the comforting flavors of graham crackers, melty chocolate, and fluffy marshmallows—all in a cup.
Ingredients
- 4 tablespoons graham cracker crumbs (about 2 graham crackers, crushed)
- 2 tablespoons chocolate chips or a small piece of a chocolate bar
- 4 large marshmallows or ½ cup mini marshmallows
- Optional toppings:
- Whipped cream
- Crushed graham crackers
- Drizzle of chocolate syrup
Instructions
-
Prepare the Cup
Use a microwave-safe mug or cup. Add 2 tablespoons of graham cracker crumbs to the bottom of the cup, spreading them evenly to create a base layer. -
Add the Chocolate
Place the chocolate chips or small chocolate pieces on top of the graham cracker layer. -
Layer the Marshmallows
Add the marshmallows on top of the chocolate layer, ensuring they are evenly distributed. -
Microwave the S’mores
Microwave on high for 15–20 seconds, or until the marshmallows puff up and the chocolate begins to melt. Be careful not to overcook, as marshmallows can expand quickly and overflow. -
Garnish and Serve
Sprinkle the remaining 2 tablespoons of graham cracker crumbs on top for a finishing touch. Add optional toppings like whipped cream, crushed graham crackers, or a drizzle of chocolate syrup if desired. Enjoy immediately while warm and gooey!
Prep Time
2 minutes
Cook Time
20 seconds
Total Time
2 minutes 20 seconds
Serving Size
Serves 1
Notes
- Use dark chocolate or milk chocolate depending on your preference.
- You can substitute mini marshmallows for large ones or use marshmallow fluff for easier layering.
- For a firmer texture, let the dessert cool for 1–2 minutes after microwaving.
Nutrition Information (Per Serving)
- Calories: 210
- Protein: 2g
- Fat: 9g
- Carbohydrates: 30g
- Fiber: 1g
- Sugar: 20g
How to Store
This dessert is best enjoyed immediately. If you need to store it, let it cool and cover the cup with plastic wrap. Reheat for 10 seconds in the microwave before eating. Do not store for more than a day as the texture may change.
Quick Berry Parfait with Yogurt
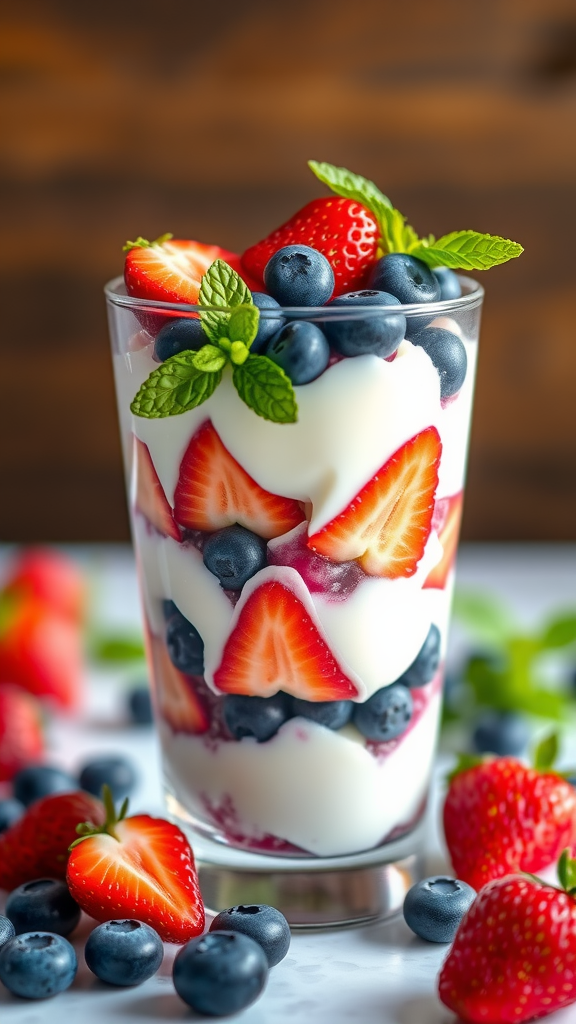
This quick and refreshing berry parfait is perfect for breakfast, a snack, or dessert. Fresh strawberries and blueberries are layered with creamy yogurt, creating a delightful mix of flavors and textures. It’s a simple yet elegant treat that you can whip up in minutes!
Ingredients
- 1 cup fresh strawberries, hulled and sliced
- 1 cup fresh blueberries
- 1 ½ cups plain or vanilla yogurt
- 2 tablespoons honey or maple syrup (optional, for sweetness)
- ½ cup granola or crushed graham crackers
- Optional toppings:
- Fresh mint leaves
- Chopped nuts
- Shredded coconut
Instructions
-
Prepare the Ingredients
Wash and dry the berries. Hull and slice the strawberries into bite-sized pieces. -
Sweeten the Yogurt (Optional)
In a small bowl, mix the yogurt with honey or maple syrup for added sweetness. Skip this step if you’re using sweetened yogurt. -
Layer the Parfait
In a tall glass or bowl, layer 2 tablespoons of yogurt at the bottom. Add a layer of strawberries, followed by blueberries, then a sprinkle of granola or crushed graham crackers. -
Repeat the Layers
Continue layering yogurt, berries, and granola until you fill the glass or use all ingredients. Aim for at least 2–3 layers for a visually appealing parfait. -
Garnish and Serve
Top with a dollop of yogurt, a sprinkle of granola, and optional toppings like fresh mint, chopped nuts, or shredded coconut. Serve immediately and enjoy!
Prep Time
5 minutes
Cook Time
0 minutes
Total Time
5 minutes
Serving Size
Serves 2–3
Notes
- Use your favorite combination of berries, such as raspberries, blackberries, or a mixed berry medley.
- Substitute Greek yogurt for a thicker texture or dairy-free yogurt for a vegan option.
- For a dessert parfait, layer with whipped cream instead of yogurt.
Nutrition Information (Per Serving)
- Calories: 190
- Protein: 6g
- Fat: 4g
- Carbohydrates: 32g
- Fiber: 3g
- Sugar: 18g
How to Store
Berry parfaits are best enjoyed fresh. If you need to prepare them in advance, assemble the layers without granola (to prevent sogginess), cover with plastic wrap, and refrigerate for up to 12 hours. Add the granola just before serving.
Chocolate Mug Cake in 5 Minutes
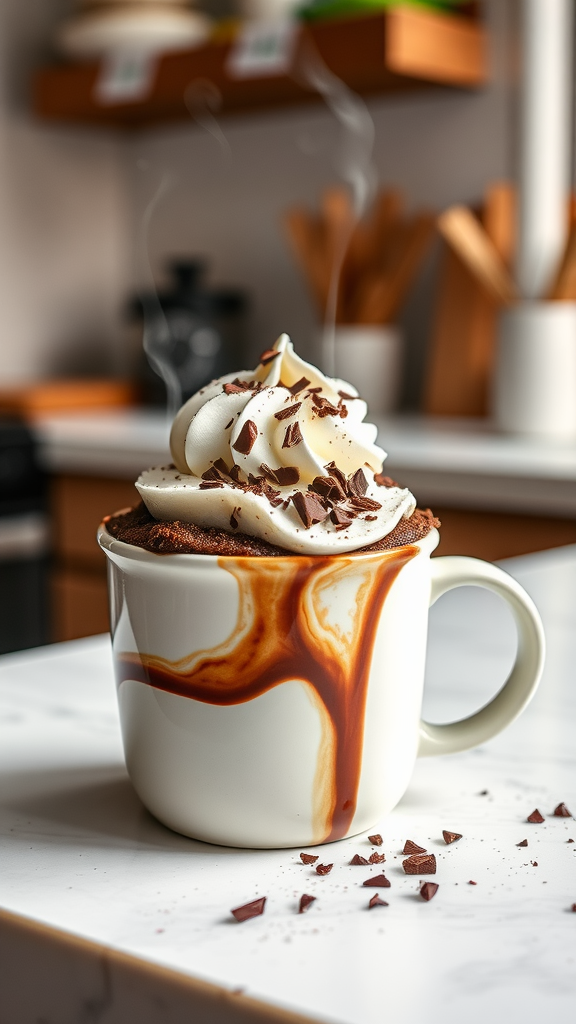
When you need a quick chocolate fix, this mug cake has your back! Made with simple pantry ingredients, this single-serving dessert comes together in just 5 minutes, delivering a warm, gooey treat that’s perfect for any time of day.
Ingredients
- 4 tablespoons all-purpose flour
- 2 tablespoons granulated sugar
- 2 tablespoons unsweetened cocoa powder
- 1/8 teaspoon baking powder
- Pinch of salt
- 3 tablespoons milk (or non-dairy alternative)
- 2 tablespoons vegetable oil (or melted butter)
- 1/4 teaspoon vanilla extract
- 1 tablespoon chocolate chips (optional, for extra gooeyness)
- Optional toppings:
- Whipped cream
- Ice cream
- Chocolate syrup
Instructions
-
Prepare the Mug
Use a microwave-safe mug (10–12 ounces) to prevent overflow. No greasing is required. -
Mix the Dry Ingredients
Add the flour, sugar, cocoa powder, baking powder, and salt to the mug. Mix well with a fork or small whisk to combine. -
Add the Wet Ingredients
Pour in the milk, vegetable oil, and vanilla extract. Stir until the batter is smooth and free of lumps. -
Incorporate Chocolate Chips (Optional)
Stir in the chocolate chips for a gooey center, or sprinkle them on top. -
Microwave the Cake
Microwave on high for 60–90 seconds. The cake should rise and set but remain slightly moist in the center. Start with 60 seconds and add increments of 10 seconds if needed. Avoid overcooking to prevent dryness. -
Garnish and Serve
Let the mug cake cool for 1–2 minutes. Add your favorite toppings, such as whipped cream, a scoop of ice cream, or a drizzle of chocolate syrup. Enjoy warm!
Prep Time
3 minutes
Cook Time
1–2 minutes
Total Time
5 minutes
Serving Size
Serves 1
Notes
- For a richer flavor, use dark cocoa powder.
- Adjust the sweetness by increasing or decreasing the sugar slightly.
- Add a pinch of instant coffee granules for a mocha twist.
- Cooking times may vary based on microwave wattage (test with shorter times if unsure).
Nutrition Information (Per Serving)
- Calories: 350
- Protein: 4g
- Fat: 18g
- Carbohydrates: 46g
- Fiber: 2g
- Sugar: 26g
How to Store
This mug cake is best enjoyed fresh. If you have leftovers (rare!), cover the mug with plastic wrap and store it at room temperature for up to 6 hours. Reheat in the microwave for 10–15 seconds before serving.
Coconut Macaroons with Dark Chocolate Drizzle

These golden, chewy coconut macaroons are a classic treat that’s quick to make and universally loved. Made with shredded coconut and a touch of sweetness, they’re baked to perfection and topped with a drizzle of rich dark chocolate for an irresistible finish.
Ingredients
- 2 ½ cups shredded sweetened coconut
- 2/3 cup sweetened condensed milk
- 1 teaspoon vanilla extract
- 2 large egg whites
- 1/4 teaspoon salt
- 1/2 cup dark chocolate chips (for drizzle)
- Optional toppings:
- Flaky sea salt
- Toasted coconut flakes
Instructions
-
Preheat the Oven
Preheat your oven to 325°F (165°C). Line a baking sheet with parchment paper or a silicone baking mat. -
Combine the Ingredients
In a large mixing bowl, combine the shredded coconut, sweetened condensed milk, and vanilla extract. Stir until evenly mixed. -
Whip the Egg Whites
In a separate clean bowl, use a hand mixer or whisk to beat the egg whites and salt until stiff peaks form. Gently fold the whipped egg whites into the coconut mixture. -
Scoop the Macaroons
Using a small cookie scoop or tablespoon, scoop mounds of the mixture onto the prepared baking sheet, spacing them about 1 inch apart. -
Bake the Macaroons
Bake for 20–25 minutes, or until the edges and tops are golden brown. Remove from the oven and let them cool on the baking sheet for 5 minutes before transferring to a wire rack to cool completely. -
Prepare the Chocolate Drizzle
Melt the dark chocolate chips in a microwave-safe bowl in 15-second increments, stirring after each interval until smooth. -
Drizzle the Chocolate
Using a spoon or piping bag, drizzle the melted dark chocolate over the cooled macaroons. Allow the chocolate to set before serving. -
Optional Garnish
Sprinkle with flaky sea salt or toasted coconut flakes for added texture and flavor.
Prep Time
10 minutes
Cook Time
20–25 minutes
Total Time
30–35 minutes
Serving Size
Makes about 20 macaroons
Notes
- Use unsweetened shredded coconut for a less sweet version.
- To toast the coconut, spread it on a baking sheet and bake at 325°F (165°C) for 5–7 minutes, stirring halfway through.
- Store macaroons in an airtight container at room temperature for up to 5 days.
Nutrition Information (Per Serving)
- Calories: 120
- Protein: 2g
- Fat: 8g
- Carbohydrates: 10g
- Fiber: 1g
- Sugar: 7g
How to Store
Store the macaroons in an airtight container at room temperature for up to 5 days. For longer storage, refrigerate for up to 2 weeks or freeze for up to 3 months. Thaw at room temperature before serving.
No-Bake Cheesecake Bites
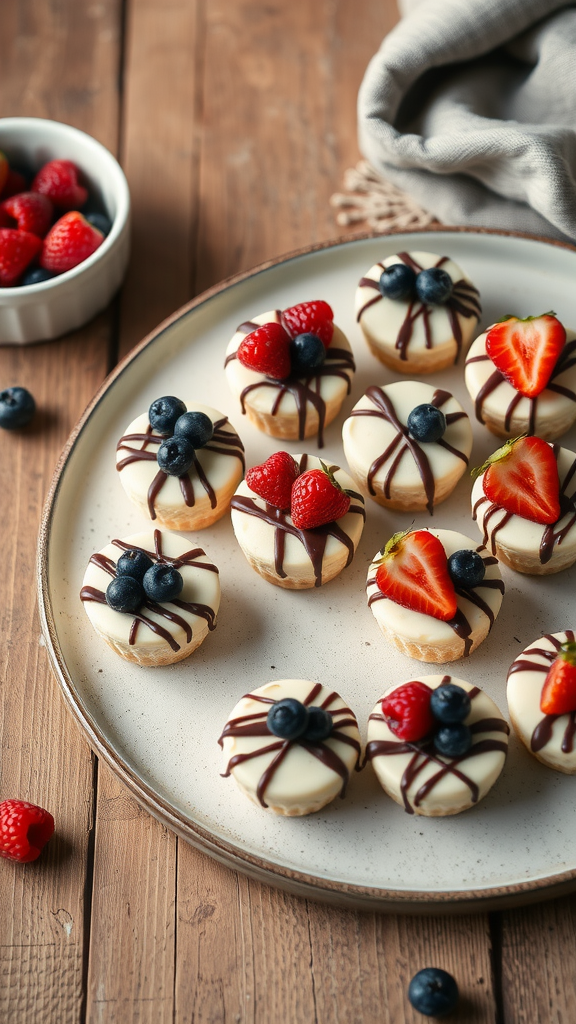
These no-bake cheesecake bites are a delightful, easy-to-make dessert perfect for any occasion. With a creamy cheesecake filling and a buttery cookie or graham cracker crust, these bite-sized treats are topped with fresh berries and a drizzle of chocolate for an elegant finish.
Ingredients
-
For the Cheesecake Filling:
- 8 oz (1 package) cream cheese, softened
- 1/4 cup granulated sugar
- 1 teaspoon vanilla extract
- 1/2 cup whipped cream or whipped topping
-
For the Crust:
- 1 cup graham cracker crumbs
- 3 tablespoons melted butter
- 1 tablespoon sugar
-
Optional Toppings:
- Fresh berries (e.g., strawberries, blueberries, raspberries)
- Melted chocolate for drizzling
- Shredded coconut or crushed nuts
Instructions
-
Prepare the Crust
In a small bowl, combine the graham cracker crumbs, melted butter, and sugar. Mix until the crumbs are evenly coated and have the texture of wet sand. -
Fill the Cups
Spoon about 1 tablespoon of the crust mixture into mini cupcake liners or silicone molds. Press firmly with the back of a spoon to form a base. Refrigerate for at least 10 minutes to set. -
Make the Cheesecake Filling
In a mixing bowl, beat the softened cream cheese, sugar, and vanilla extract until smooth and creamy. Gently fold in the whipped cream or whipped topping until fully incorporated. -
Assemble the Cheesecake Bites
Using a piping bag or spoon, add the cheesecake filling on top of the chilled crusts. Fill each cup to the top. -
Add Toppings
Decorate each bite with fresh berries, a drizzle of melted chocolate, or any desired toppings. -
Chill the Bites
Refrigerate the cheesecake bites for at least 1 hour to firm up before serving.
Prep Time
15 minutes
Chill Time
1 hour
Total Time
1 hour 15 minutes
Serving Size
Makes about 12 bites
Notes
- For a chocolate crust, substitute graham cracker crumbs with crushed chocolate cookies.
- These bites can be made up to 2 days in advance and stored in the refrigerator.
- Add lemon zest or a splash of lemon juice to the filling for a tangy twist.
Nutrition Information (Per Serving)
- Calories: 120
- Protein: 2g
- Fat: 8g
- Carbohydrates: 10g
- Sugar: 6g
How to Store
Store the cheesecake bites in an airtight container in the refrigerator for up to 3 days. For longer storage, freeze in an airtight container for up to 1 month. Thaw in the refrigerator before serving.
SEO Keywords
no-bake cheesecake bites, mini cheesecake recipe, easy no-bake desserts, quick cheesecake bites, no-bake cheesecake with graham cracker crust, cheesecake bites with berries, chocolate-drizzled cheesecake bites, no-bake party desserts, creamy cheesecake bites, individual cheesecake desserts.
Raspberry Almond Thumbprint Cookies
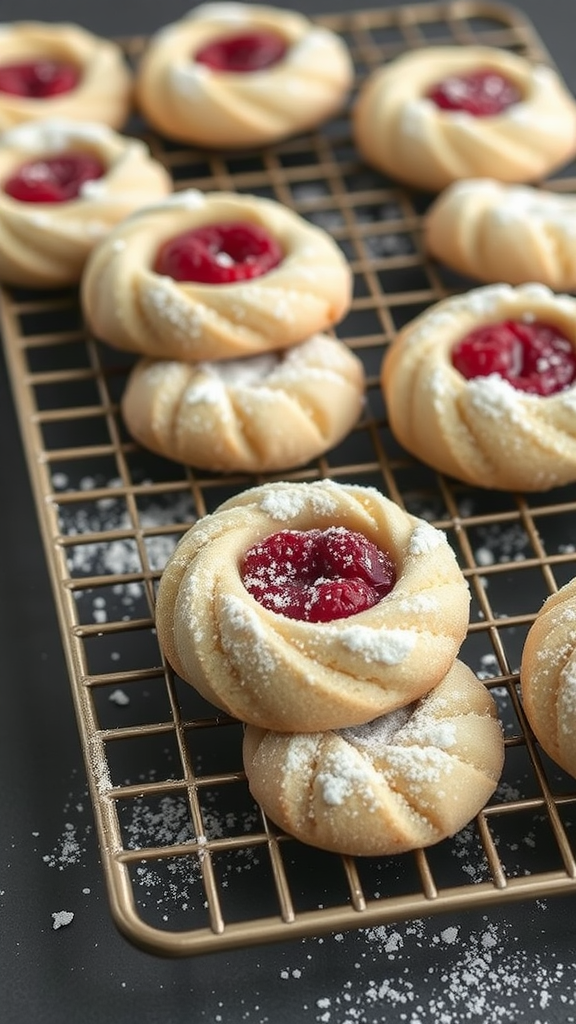
These buttery, melt-in-your-mouth thumbprint cookies are a classic treat perfect for any occasion. With a touch of almond flavor and a sweet raspberry jam filling, they’re as delicious as they are beautiful. A dusting of powdered sugar adds the perfect finishing touch to these irresistible cookies.
Ingredients
-
For the Cookies:
- 1 cup (2 sticks) unsalted butter, softened
- 2/3 cup granulated sugar
- 1 teaspoon almond extract
- 2 cups all-purpose flour
- 1/4 teaspoon salt
-
For the Filling:
- 1/3 cup raspberry jam or preserves
-
Optional Toppings:
- Powdered sugar for dusting
- Chopped almonds for garnish
Instructions
-
Preheat the Oven
Preheat your oven to 350°F (175°C). Line a baking sheet with parchment paper or a silicone baking mat. -
Cream the Butter and Sugar
In a large mixing bowl, use a hand mixer or stand mixer to cream the softened butter and granulated sugar until light and fluffy, about 2–3 minutes. -
Add the Almond Extract
Mix in the almond extract until fully combined. -
Incorporate the Dry Ingredients
Gradually add the flour and salt to the butter mixture, mixing just until the dough comes together. Avoid overmixing. -
Shape the Cookies
Roll the dough into 1-inch balls and place them about 2 inches apart on the prepared baking sheet. Use your thumb or the back of a small spoon to press an indentation into the center of each cookie. -
Fill with Jam
Spoon a small amount of raspberry jam (about 1/2 teaspoon) into each indentation. -
Bake the Cookies
Bake for 12–15 minutes, or until the edges are lightly golden. Remove from the oven and let the cookies cool on the baking sheet for 5 minutes before transferring to a wire rack to cool completely. -
Add the Finishing Touch
Once the cookies are completely cool, dust them lightly with powdered sugar or garnish with chopped almonds if desired.
Prep Time
15 minutes
Cook Time
12–15 minutes
Total Time
30 minutes
Serving Size
Makes about 24 cookies
Notes
- Substitute raspberry jam with your favorite fruit jam, such as strawberry, apricot, or blackberry.
- For a nuttier flavor, add 1/4 cup finely chopped almonds to the cookie dough.
- These cookies make a great holiday treat or gift when packaged in decorative tins.
Nutrition Information (Per Cookie)
- Calories: 120
- Protein: 1g
- Fat: 7g
- Carbohydrates: 14g
- Fiber: 0g
- Sugar: 8g
How to Store
Store the cookies in an airtight container at room temperature for up to 4 days. For longer storage, freeze the baked cookies in a single layer for up to 2 months. Thaw at room temperature before serving.
Apple Nachos with Caramel and Nuts
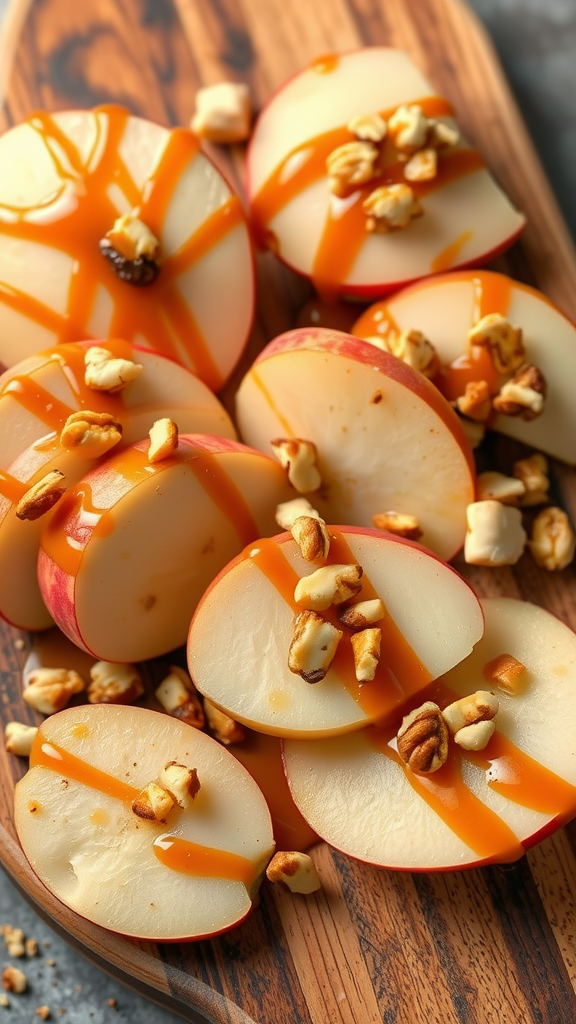
Apple nachos are a fun, crowd-pleasing dessert that’s perfect for any occasion. Crisp apple slices are drizzled with gooey caramel and topped with your favorite crunchy nuts. Quick to prepare and endlessly customizable, this is a treat that’s as easy as it is delicious!
Ingredients
-
For the Base:
- 3 large apples (such as Honeycrisp, Fuji, or Granny Smith), cored and thinly sliced
-
For the Toppings:
- 1/4 cup caramel sauce, warmed
- 1/4 cup chopped nuts (such as pecans, walnuts, or almonds)
- 2 tablespoons mini chocolate chips (optional)
- 2 tablespoons shredded coconut (optional)
- 1/4 teaspoon flaky sea salt (optional)
Instructions
-
Prepare the Apples
Wash, core, and thinly slice the apples. Arrange the slices in a single layer on a large plate or platter. -
Warm the Caramel Sauce
Warm the caramel sauce in the microwave or on the stovetop until it’s easily pourable. -
Assemble the Nachos
Drizzle the warm caramel sauce evenly over the apple slices. Sprinkle the chopped nuts, mini chocolate chips, shredded coconut, and any additional toppings over the apples. -
Garnish and Serve
Sprinkle a pinch of flaky sea salt on top for a sweet and salty twist (optional). Serve immediately and enjoy!
Prep Time
5 minutes
Cook Time
0 minutes
Total Time
5 minutes
Serving Size
Serves 4
Notes
- Use a mix of apple varieties for a balance of sweet and tart flavors.
- To prevent the apples from browning, toss the slices in a mixture of lemon juice and water (1 tablespoon lemon juice per 1 cup water) before assembling.
- Substitute caramel sauce with peanut butter or almond butter for a healthier twist.
Nutrition Information (Per Serving)
- Calories: 180
- Protein: 2g
- Fat: 8g
- Carbohydrates: 28g
- Fiber: 3g
- Sugar: 20g
How to Store
This dessert is best enjoyed fresh, as the apples may brown and lose their crispness over time. If needed, store leftover apple nachos in an airtight container in the refrigerator for up to 24 hours. Drizzle with additional caramel sauce before serving.
Peanut Butter and Chocolate Energy Bites
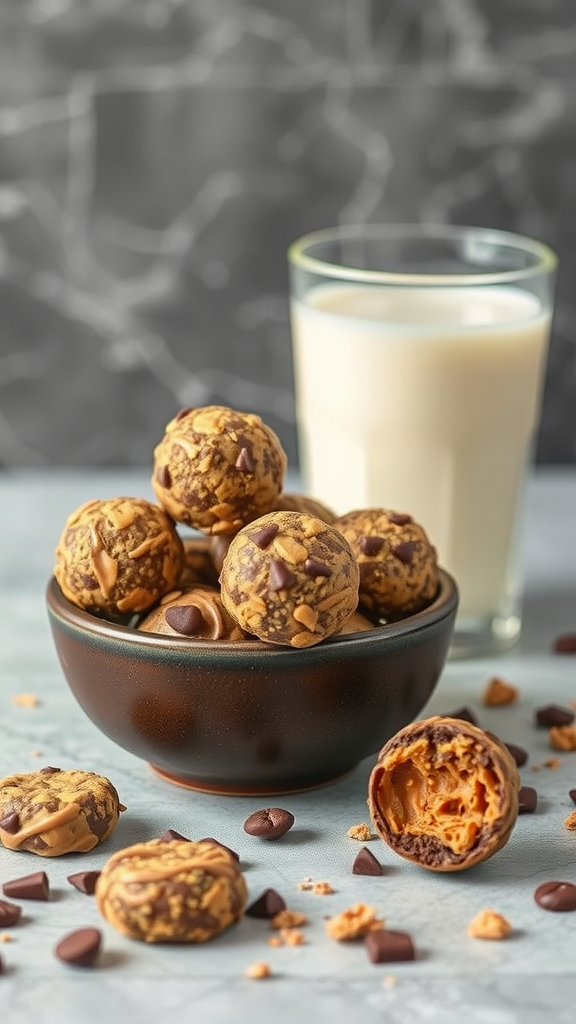
These no-bake peanut butter and chocolate energy bites are the ultimate snack! Packed with wholesome ingredients, they’re perfect for a quick energy boost, a midday snack, or a guilt-free dessert. Easy to make and customizable, they’re sure to become a favorite in your household.
Ingredients
- 1 cup rolled oats
- 1/2 cup natural peanut butter (or your favorite nut butter)
- 1/3 cup honey or maple syrup
- 1/4 cup mini chocolate chips
- 1/4 cup ground flaxseed (optional)
- 1/2 teaspoon vanilla extract
- Pinch of salt
Instructions
-
Mix the Ingredients
In a large mixing bowl, combine the rolled oats, peanut butter, honey (or maple syrup), chocolate chips, ground flaxseed (if using), vanilla extract, and a pinch of salt. Stir until all the ingredients are well combined. -
Chill the Mixture
Cover the bowl and refrigerate the mixture for 20–30 minutes. This makes it easier to roll into balls. -
Form the Energy Bites
Once chilled, use your hands or a small cookie scoop to roll the mixture into 1-inch balls. Place them on a parchment-lined baking sheet or plate. -
Store or Serve
Enjoy immediately or store the energy bites in an airtight container for later.
Prep Time
10 minutes
Chill Time
20–30 minutes
Total Time
30–40 minutes
Serving Size
Makes about 15 bites
Notes
- For a nut-free version, substitute peanut butter with sunflower seed butter.
- Add mix-ins like shredded coconut, dried fruit, or chopped nuts for variety.
- For an extra chocolatey treat, roll the bites in cocoa powder before chilling.
Nutrition Information (Per Serving)
- Calories: 120
- Protein: 3g
- Fat: 6g
- Carbohydrates: 14g
- Fiber: 2g
- Sugar: 8g
How to Store
Store energy bites in an airtight container in the refrigerator for up to 1 week. For longer storage, freeze them for up to 3 months. Thaw at room temperature or enjoy straight from the freezer.
Chocolate-Covered Pretzel Rods
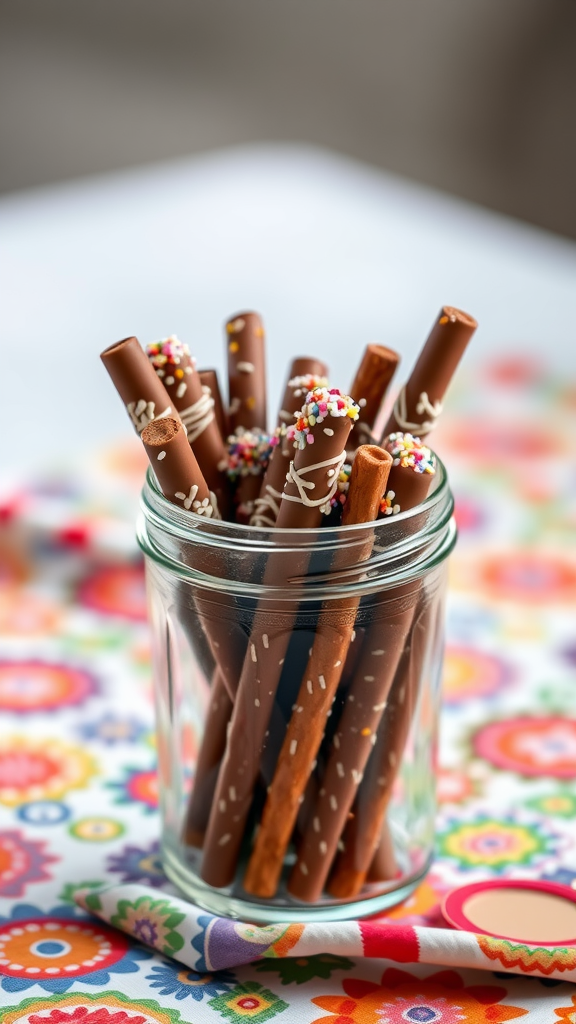
Chocolate-covered pretzel rods are a perfect sweet-and-salty treat that’s as fun to make as it is to eat. Dip crunchy pretzel rods in melted chocolate and decorate them with your favorite toppings for a simple, customizable dessert that’s perfect for parties, holidays, or just a quick snack.
Ingredients
- 12 pretzel rods
- 1 cup semisweet or milk chocolate chips (or melting wafers)
- 1/2 cup white chocolate chips (optional, for drizzling)
- Optional Toppings:
- Sprinkles
- Crushed nuts
- Mini chocolate chips
- Crushed candy canes
- Shredded coconut
Instructions
-
Prepare the Work Area
Line a baking sheet with parchment paper or wax paper. Set up your toppings in small bowls for easy access. -
Melt the Chocolate
In a microwave-safe bowl, melt the semisweet or milk chocolate chips in 30-second increments, stirring after each interval, until smooth. If using white chocolate for drizzling, melt it separately using the same method. -
Dip the Pretzel Rods
Hold each pretzel rod by one end and dip it into the melted chocolate, covering about 2/3 of the rod. Gently tap off any excess chocolate on the side of the bowl. -
Add Toppings
Immediately sprinkle your desired toppings onto the wet chocolate, rotating the pretzel to coat evenly. Place the pretzel rod on the prepared baking sheet. -
Optional Drizzle
If using white chocolate, use a spoon or piping bag to drizzle it over the chocolate-dipped pretzel rods for added decoration. -
Let Them Set
Allow the chocolate-covered pretzel rods to set at room temperature or place them in the refrigerator for 10–15 minutes until the chocolate is firm. -
Serve and Enjoy
Once set, serve the pretzel rods on a platter or package them in treat bags for gifting.
Prep Time
10 minutes
Chill Time
10–15 minutes
Total Time
20–25 minutes
Serving Size
Makes 12 pretzel rods
Notes
- For a glossy finish, add 1 teaspoon of coconut oil or shortening to the chocolate while melting.
- Store in an airtight container to keep the pretzels crisp.
- Customize the toppings for holidays or special occasions (e.g., red and green sprinkles for Christmas, orange and black for Halloween).
Nutrition Information (Per Pretzel Rod)
- Calories: 150
- Protein: 2g
- Fat: 6g
- Carbohydrates: 21g
- Fiber: 1g
- Sugar: 10g
Your Last-Minute Dessert Adventure Awaits!
Store the pretzel rods in an airtight container at room temperature for up to 1 week. Avoid refrigerating after the chocolate has set, as moisture may affect the texture.
If you’re looking for more inspiration to satisfy your sweet tooth, our collection of quick and easy dessert recipes has something for everyone. From rich and gooey chocolate treats to light and fruity delights, these recipes are perfect for busy days or last-minute gatherings. Each one is designed to bring joy to your kitchen with minimal effort and maximum flavor, so you’ll never be short of ideas when dessert cravings strike.
Ready to explore more? Visit our dessert recipes to discover simple yet stunning options that will impress your family and friends. Whether you’re planning a special occasion or just want a quick sweet fix, our selection has you covered with easy-to-follow instructions and irresistible results. Happy baking!