

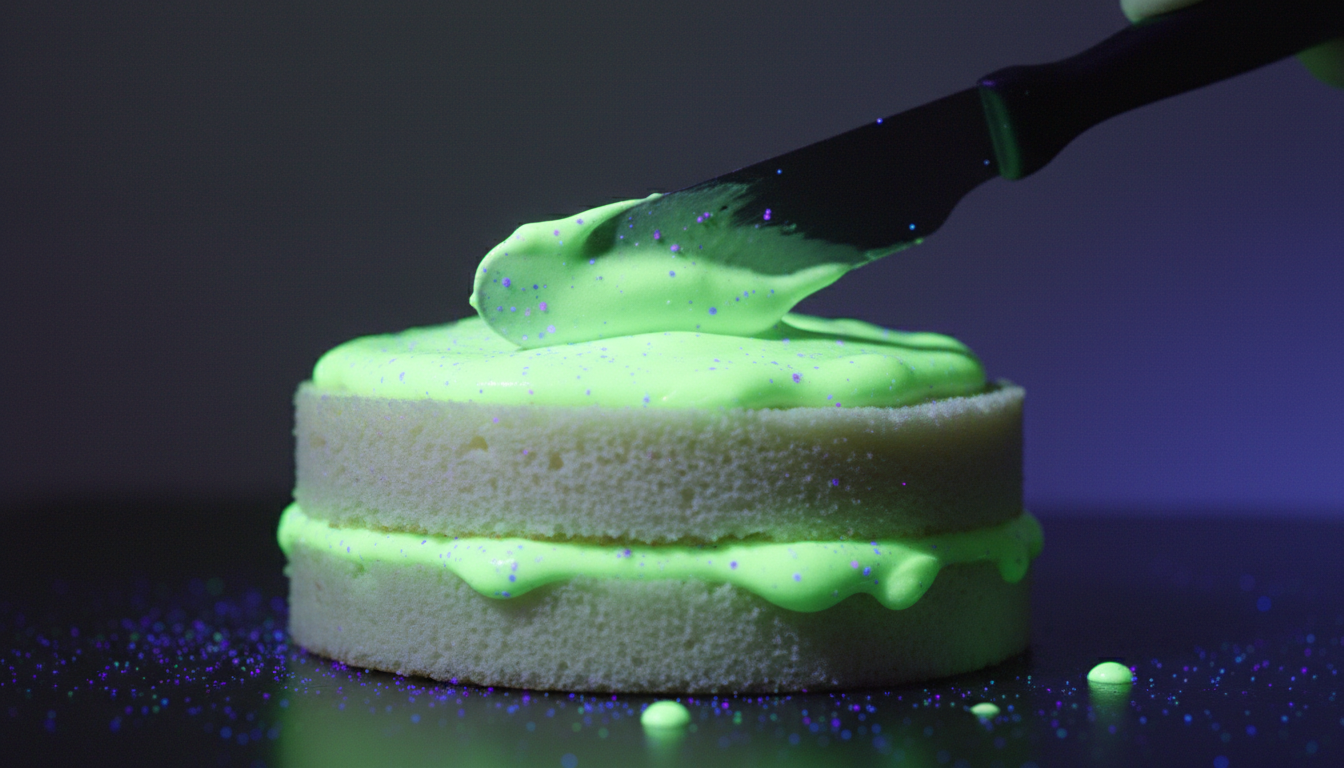
A glow in the dark cake uses tonic water (which glows bright blue under UV/black light) and neon food coloring to create a cake that literally lights up at parties. It’s a showstopper for birthdays, Halloween, New Year’s, and glow-theme events — and it’s much easier to make than it looks.


Table of Contents
- How Does a Glow in the Dark Cake Work?
- Ingredients
- How to Make It
- Neon Glow Frosting
- Tips for Maximum Glow Effect
- Variations & Decorating Ideas
- FAQ
How Does a Glow in the Dark Cake Work?
The secret is tonic water. Tonic water contains quinine, a compound that fluoresces bright blue-white when exposed to ultraviolet (UV/black) light. By replacing some of the liquid in your cake batter and frosting with tonic water, you can make a cake that glows under a black light.
You’ll also want neon food coloring (not regular food coloring — neon gel colors respond to UV light much better) to add vivid color layers. The result is a cake that looks completely normal in regular light and absolutely electric under UV.
What you need to make it glow: a UV/black light (cheap ones are widely available on Amazon for $10–20), tonic water, and neon food coloring gels.
Ingredients
For the Cake Layers
- 2½ cups all-purpose flour
- 2½ teaspoons baking powder
- ½ teaspoon salt
- 1 cup unsalted butter, room temperature
- 2 cups granulated sugar
- 4 large eggs
- 2 teaspoons vanilla extract
- 1 cup tonic water (replaces milk/water — this is what makes it glow)
- Neon gel food colors: yellow-green, orange, pink, blue, purple
For the Neon Buttercream Frosting
- 1½ cups unsalted butter, room temperature
- 5–6 cups powdered sugar, sifted
- 4–6 tablespoons tonic water (instead of milk)
- 1 teaspoon vanilla extract
- Neon gel food colors (same as above)
How to Make a Glow in the Dark Cake
Step 1: Make the Cake Batter
Preheat oven to 350°F (175°C). Grease and flour three 8-inch round cake pans (or line with parchment). Whisk together flour, baking powder, and salt in a bowl; set aside.
Beat butter and sugar on medium-high until light and fluffy, about 4 minutes. Add eggs one at a time, then vanilla. Alternate adding the flour mixture and tonic water in three additions, beginning and ending with flour. Mix until just combined.
Step 2: Divide and Color
Divide the batter evenly into 3 portions (or more if you want more layers). Color each with a different neon gel: yellow-green, hot pink, and electric blue work especially well. Use a toothpick to add gel and mix until the color is fully even — neon gels are intense, so start with a small amount.
Pour each colored batter into a prepared pan. Bake 25–30 minutes until a toothpick comes out clean. Cool completely before frosting.
Neon Glow Frosting
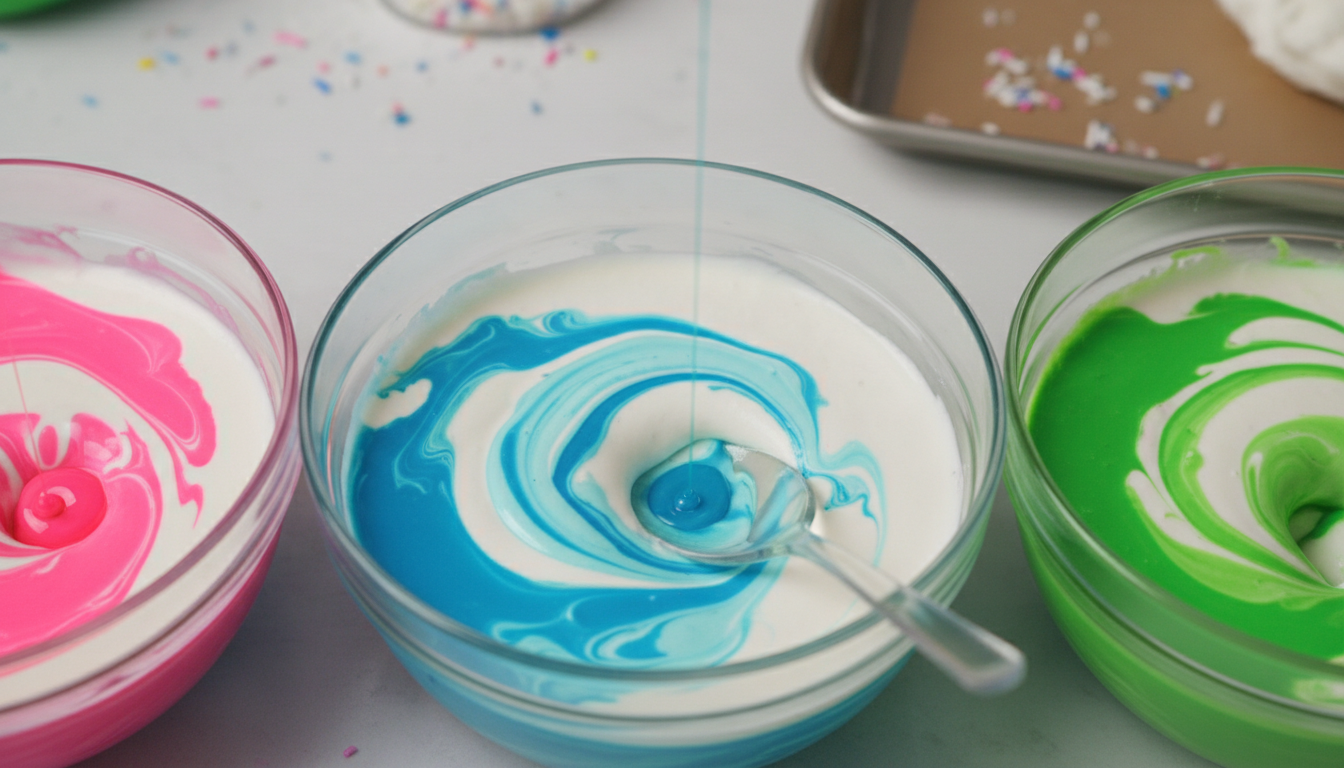
Beat butter until light and fluffy, about 3 minutes. Add powdered sugar 1 cup at a time, alternating with tonic water. Add vanilla. Beat on high for 2 minutes until smooth and fluffy. Divide into 4–5 bowls and color each with a different neon gel.
Ombre or swirled frosting technique: To get multiple colors on the outside, add dollops of different colored frosting around the cake and smooth with an offset spatula or bench scraper for a blended neon effect.
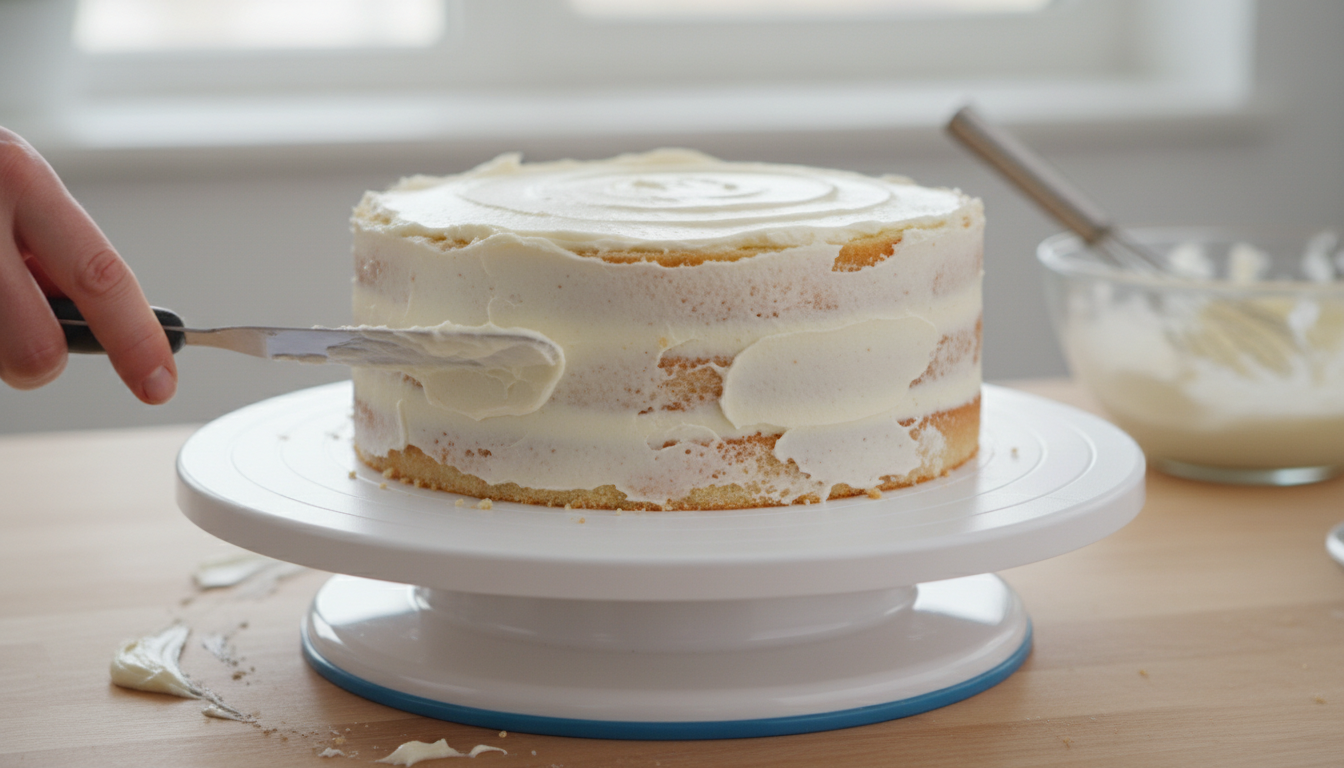
Assembly
Stack the cake layers with a thin layer of neon frosting between each. Apply a thin crumb coat, then refrigerate 30 minutes. Apply the final layer of neon frosting, smoothing or texturing as desired. Decorate with edible glitter, neon sprinkles, or glow-in-the-dark star decorations.
Tips for Maximum Glow Effect
- Use diet tonic water — it has a higher quinine content than regular tonic water and glows brighter. Schweppes and Canada Dry both work well.
- Neon gel colors only — regular liquid food coloring barely glows. Look for “neon” or “electric” labeled gels (Americolor Neon set is excellent).
- Yellow-green glows the most — if you want the most dramatic effect, use yellow-green (neon chartreuse) for the dominant color. It glows almost radioactively bright.
- The black light matters — a cheap single-bulb clip light won’t give you the same effect as a 25W black light bar. For a party, use a bar-style black light positioned above the cake table.
- Photograph under UV before cutting — you’ll want a photo of the exterior glow before it’s sliced.
Variations & Decorating Ideas
- Glow in the dark drip cake — make a neon-tinted white chocolate ganache drip using tonic water instead of cream
- Galaxy glow cake — dark navy base frosting with neon streaks of blue, purple, and yellow-green
- Halloween glow cake — orange and green layers with a black frosting exterior and neon drip
- Geode glow cake — sugar crystal geode decorations painted with neon luster dust to glow under UV
- Glow cupcakes — same recipe scaled to cupcakes, perfect for parties where slicing is impractical
FAQ
Is tonic water safe to eat in a cake?
Yes, completely. Tonic water is a food-grade beverage and is safe to bake with. The quinine content in tonic water is far below any level of concern — you’d need to drink liters per day to experience any effects. Baked into a cake at the quantities used here, it’s perfectly safe.
Does the cake taste different with tonic water?
Very slightly. Tonic water has a faint bitter note (from quinine) that’s mostly undetectable once baked and mixed with sugar. The vanilla and other flavors dominate. Most people can’t tell the difference in a side-by-side taste test.
Can I make this without a black light?
You can still make a striking neon cake without a UV light — the neon colors are bold and vibrant in regular lighting too. The glow effect only works under UV, but the cake looks festive and colorful regardless.
What black light should I buy?
For a birthday party or event, a black light bar (25W or larger) works best. For a tabletop photo shoot, a small clip-on UV bulb works fine. Look for “UV/black light” specifically — regular purple LED lights won’t cause fluorescence the same way.
Want more show-stopping cake ideas? Check out our Paw Patrol Cake Guide and What Is Mochi? for more dessert inspiration.
