
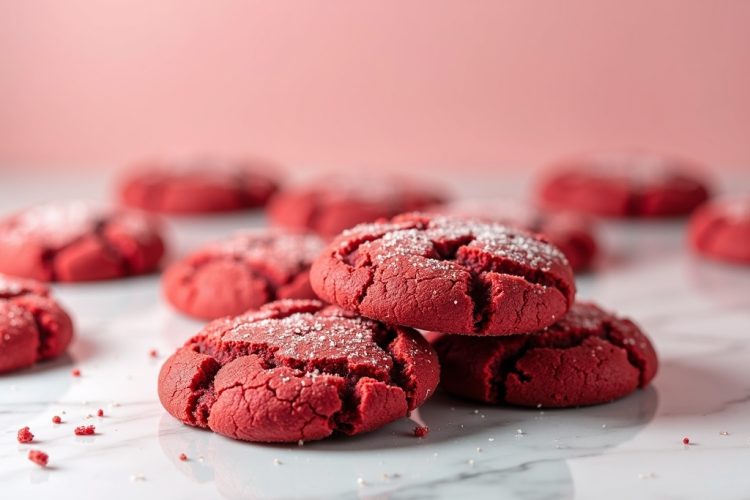
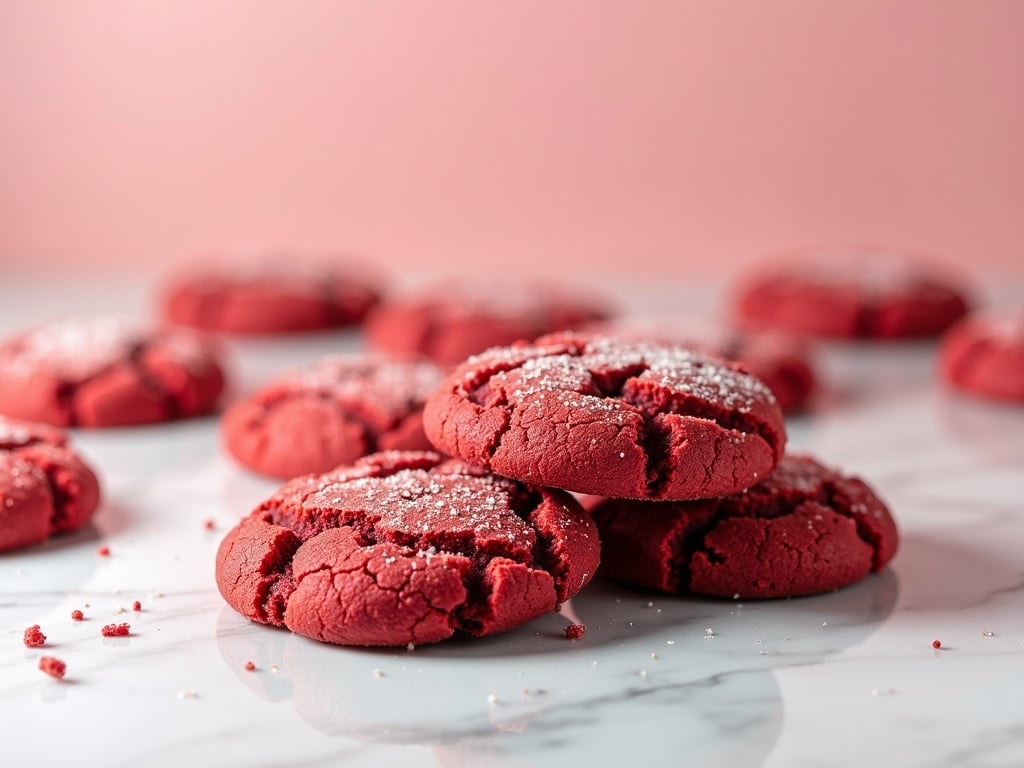
There’s something about the deep crimson hue of red velvet that stops people in their tracks. I remember the first time I pulled a batch of these cookies from the oven—the kitchen filled with the warm aroma of vanilla and cocoa, and that striking red color practically glowed against the white sugar-crusted tops. If you’re the kind of person who can’t resist a classic red velvet cake but wishes you could have that same flavor in a handheld, cookie form, well, I have very good news for you.
These Red Velvet Sugar Cookies deliver everything you love about the traditional Southern dessert: that subtle cocoa flavor, the tender crumb, and of course, that gorgeous color. But instead of waiting for cake layers to cool and frosting to set, you get all that goodness in a fraction of the time. I’m talking about 30 minutes from mixing bowl to your first bite.
The Story Behind Red Velvet
Red velvet isn’t just chocolate cake with red food coloring, though I know that’s a common misconception. The original red velvet cake gets its distinctive color from a chemical reaction between natural cocoa powder and acidic ingredients like buttermilk and vinegar. Back in the 1920s, when the Waldorf-Astoria Hotel in New York popularized the dessert, that subtle reddish-brown hue was all natural.
These days, we use food coloring to achieve that vibrant red that makes red velvet so instantly recognizable. And while some purists might scoff, I say embrace it! That striking color is part of what makes red velvet such a showstopper at holiday cookie exchanges, Valentine’s Day gatherings, or whenever you need a dessert that looks as good as it tastes.
Speaking of cookie exchanges, if you’re looking for more crowd-pleasing recipes, check out my collection of 15 easy cookie exchange recipes. These red velvet beauties are always the first to disappear from the dessert table.
Let’s Talk About the Ingredients
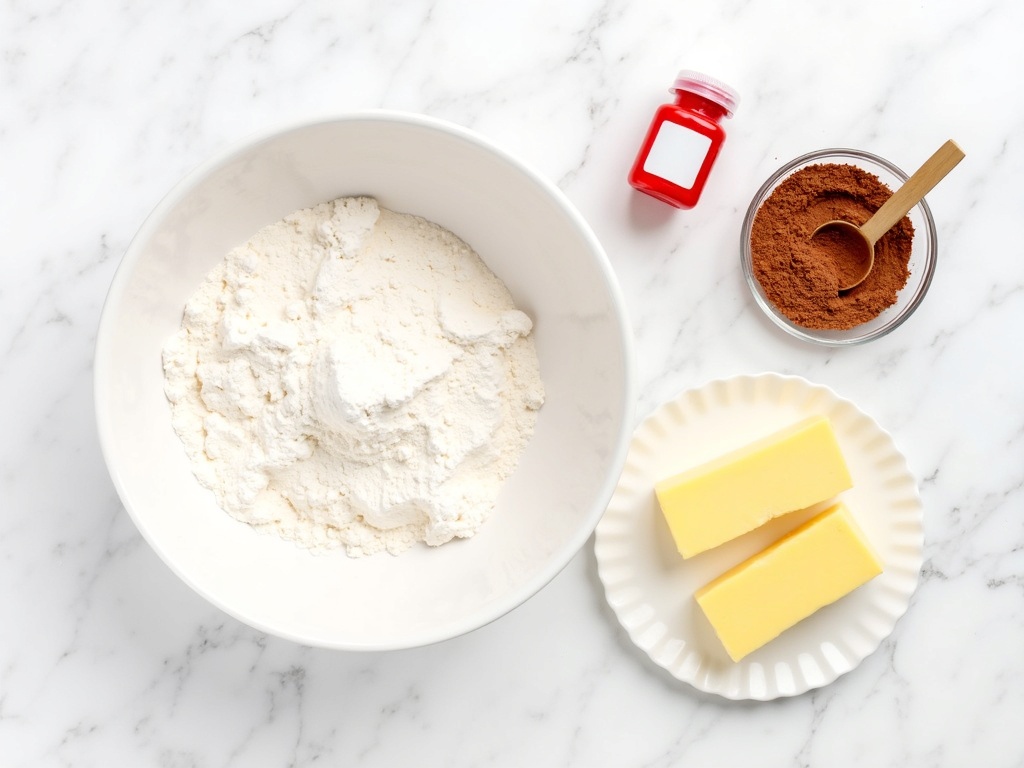
The ingredient list here is straightforward, but each component plays an important role in creating that signature red velvet experience. Here’s what you’ll need:
- All-purpose flour (2¼ cups/280g) — The foundation of our cookie structure. Don’t swap in cake flour here; we need the protein content for chewiness.
- Unsweetened cocoa powder (2 tablespoons) — Just enough to give that subtle chocolate note without overwhelming. Dutch-process works fine, but natural cocoa gives a more traditional flavor.
- Baking soda (1 teaspoon) — Our leavening agent, which also helps create that tender texture.
- Salt (½ teaspoon) — Enhances all the flavors and balances the sweetness.
- Unsalted butter, softened (¾ cup/170g) — I always use unsalted so I can control the salt level. Make sure it’s truly softened, not melted!
- Granulated sugar (1 cup/200g), plus more for rolling — Standard white sugar for the cookie base, plus extra for that crackly coating.
- Egg, room temperature (1 large) — Binds everything together and adds richness.
- Vanilla extract (1 teaspoon) — Pure vanilla, please! The artificial stuff doesn’t come close.
- White vinegar (1 teaspoon) — This is the secret ingredient that gives red velvet its characteristic tang and helps activate the baking soda.
- Red food coloring (1-2 tablespoons) — Gel coloring gives the most vibrant results, but liquid works too. Start with less; you can always add more.
For mixing the dough, I rely on my trusty Hamilton Beach 6-Speed Hand Mixer. It’s lightweight, affordable, and gets the job done without hauling out the stand mixer. If you’re serious about cookie baking, a Cookie Scoop Set is worth every penny for perfectly uniform cookies.
How to Make Red Velvet Sugar Cookies
Prep Time: 15 minutes | Cook Time: 10-12 minutes | Yield: 24 cookies | Calories: 120 per cookie
Ready to bake? Here’s how to bring these cookies together:
Step 1: Mix the Dry Ingredients
In a medium bowl, whisk together the flour, cocoa powder, baking soda, and salt. I know it seems like a small amount of cocoa, but trust me—red velvet is all about subtlety. Set this aside.
Step 2: Cream the Butter and Sugar
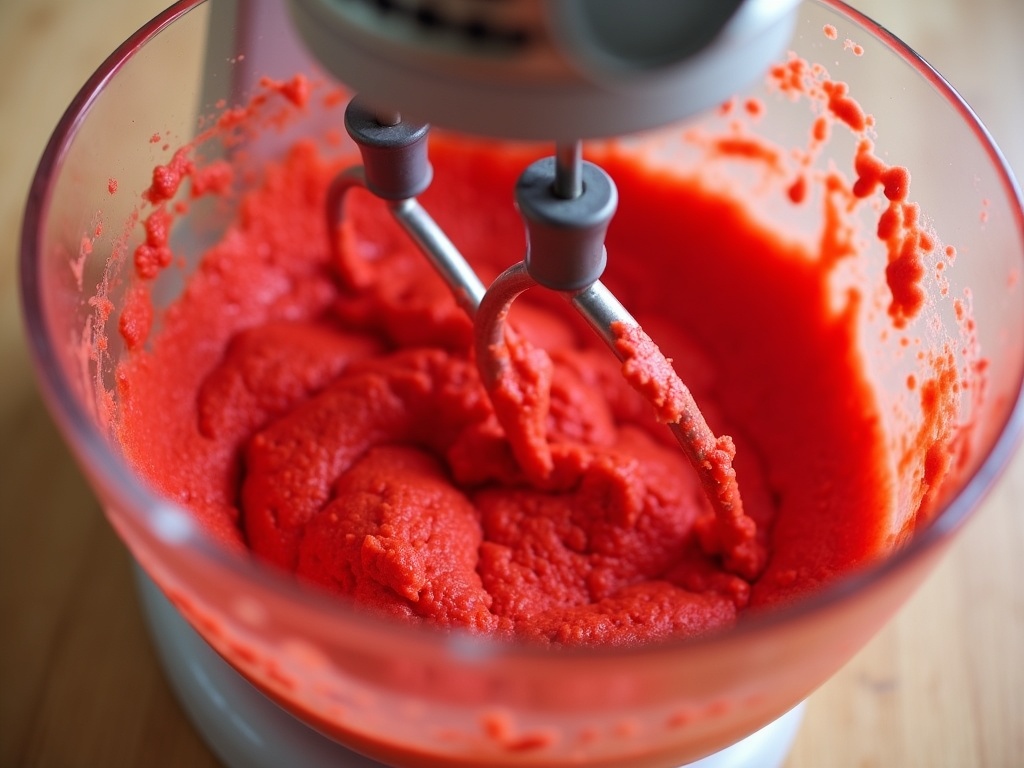
In a large bowl (or the bowl of your stand mixer), beat the softened butter and granulated sugar together until light and fluffy. This takes about 2-3 minutes with a hand mixer on medium speed. Don’t rush this step—creaming properly creates the foundation for a tender cookie.
Step 3: Add the Wet Ingredients
Add the egg, vanilla extract, white vinegar, and red food coloring to the butter mixture. Beat until everything is well combined and that gorgeous red color is evenly distributed. If you’re using gel coloring, start with 1 tablespoon and add more if you want a deeper red.
Step 4: Combine Wet and Dry
Gradually add the dry ingredient mixture to the wet ingredients, mixing on low speed just until a dough forms. Don’t overmix here—we want tender cookies, not tough ones. The dough will be thick and vividly red. Cover and chill for at least 30 minutes. (This step is non-negotiable!)
Step 5: Shape and Sugar-Coat
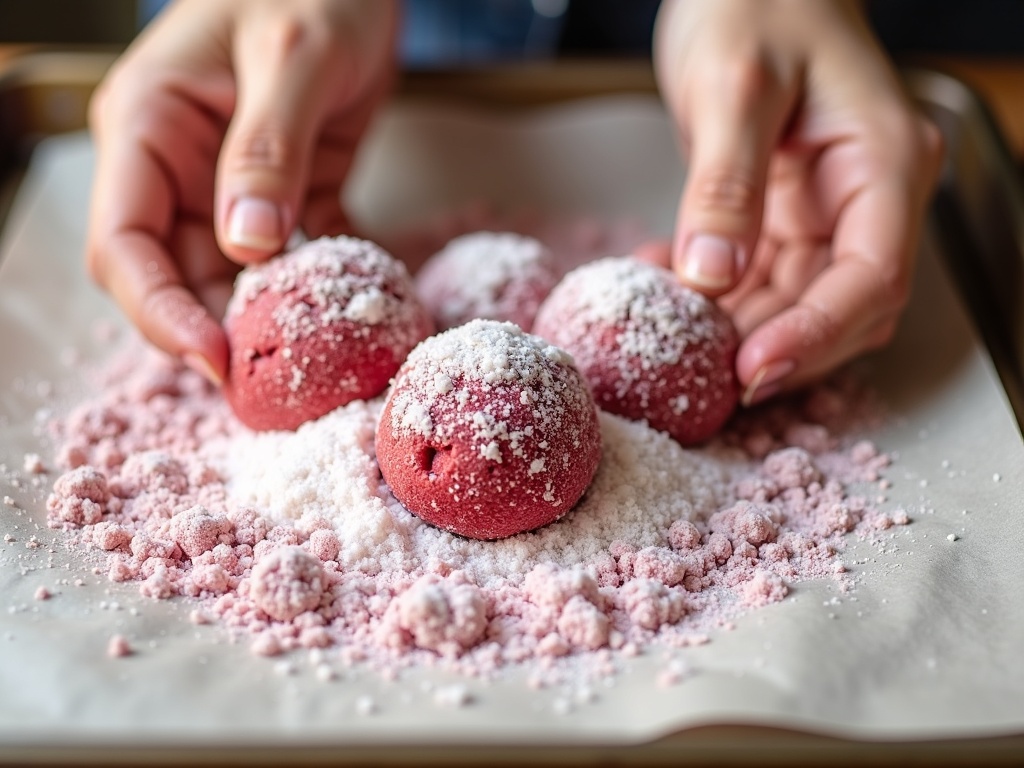
Preheat your oven to 350°F (175°C) and line baking sheets with parchment paper. Scoop out tablespoon-sized portions of dough and roll them into balls. Then roll each ball generously in granulated sugar—the more sugar, the prettier the crackly tops.
Step 6: Bake to Perfection
Place the sugared dough balls about 2 inches apart on your prepared baking sheets. Bake for 10-12 minutes, until the edges are set and the tops have those beautiful crackly patterns. The centers should still look slightly underdone—they’ll finish cooking as they cool.
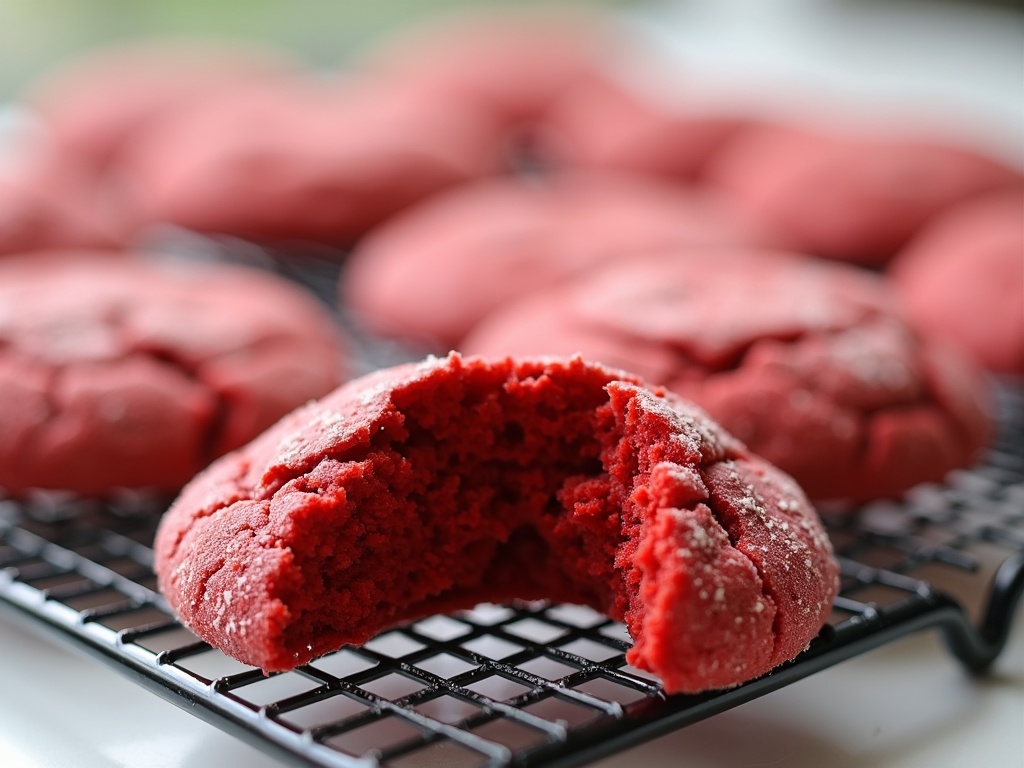
Let the cookies cool on the baking sheets for 5 minutes, then transfer to wire racks to cool completely. I know it’s tempting to dig in immediately, but patience yields the best texture.
The Secret to That Perfect Crackly Top
Here’s the thing about these cookies: that signature crackly sugar crust doesn’t happen by accident. The combination of generous sugar-coating and the way the dough spreads in the oven creates those beautiful fissures. For the best results, don’t skip the chilling step—cold dough spreads more slowly, giving the exterior time to set while the interior continues to expand.
If your first batch doesn’t crack quite enough, try chilling the dough longer or adding a touch more sugar to your rolling mixture. I learned this through trial and error, and now I wouldn’t make these any other way.
Storage and Make-Ahead Tips
These cookies keep beautifully at room temperature in an airtight container for up to 5 days. The sugar coating helps maintain their texture, keeping that exterior slightly crisp while the interior stays tender.
Want to prep ahead? The dough can be refrigerated for up to 3 days or frozen for up to 3 months. I like to scoop and roll the dough balls, then freeze them on a baking sheet before transferring to a freezer bag. When you’re ready to bake, just roll the frozen dough in sugar and add an extra 2-3 minutes to the baking time.
For more make-ahead dessert strategies, check out my guide to easy cookie cups—another crowd-pleaser that travels well and can be prepped in advance.
Flavor Variations and Pairings
Once you’ve mastered the basic recipe, there are so many ways to make these your own:
- White Chocolate Drizzle: Melt white chocolate and drizzle over cooled cookies for extra sweetness and a beautiful contrast.
- Cream Cheese Frosting Sandwich: Spread a thin layer of cream cheese frosting between two cookies for a sandwich version.
- Peppermint Twist: Add ½ teaspoon peppermint extract to the dough for a holiday variation.
- Chocolate Chunks: Fold in ½ cup white chocolate chips or chunks before chilling.
These cookies pair wonderfully with coffee, hot chocolate, or even a cold glass of milk. For an elegant dessert, serve them alongside my chocolate cream cheese truffles—the combination is absolutely decadent.
Troubleshooting Common Issues
My cookies spread too much: The dough likely wasn’t chilled long enough. Next time, chill for at least an hour or add a couple extra tablespoons of flour.
My cookies didn’t crack on top: Make sure you’re using enough sugar for rolling—the coating needs to be generous. Also, ensure your oven is fully preheated.
The red color looks dull: Different brands of food coloring vary in intensity. Gel coloring typically gives more vibrant results. You can also add an extra teaspoon of vinegar, which helps brighten the red hue.
Final Thoughts
Red Velvet Sugar Cookies are one of those recipes that feels special without requiring special occasion-level effort. They’re impressive enough for holiday cookie boxes but simple enough for a Tuesday afternoon when you need something homemade and comforting.
If you give these a try, I’d love to hear how they turn out! And if you’re looking for more cookie inspiration, don’t miss my giant cookie cake recipe—it’s another showstopper that feeds a crowd.
Happy baking!