
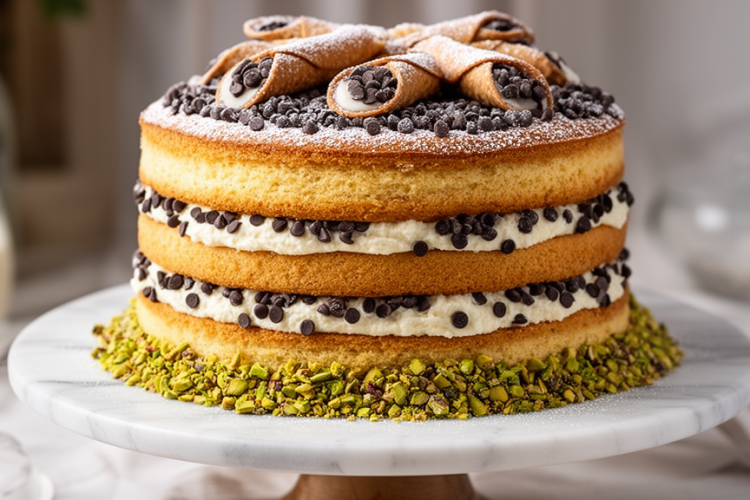
I still remember the first time I had a proper cannoli from a little Italian bakery in Boston’s North End. The crunch of that fried shell giving way to cool, creamy ricotta flecked with tiny chocolate chips and candied orange peel—it was a textural masterpiece that changed how I thought about dessert. Years later, I found myself craving those same flavors but wanting something I could slice and share at gatherings. That’s how this cannoli cake was born.
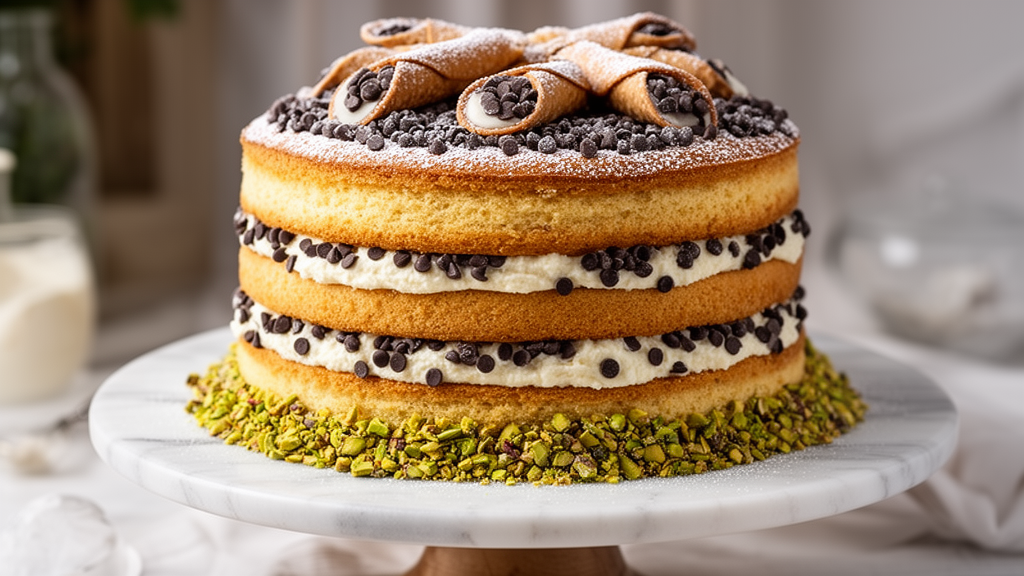
After more than a dozen tests (my friends weren’t complaining about the “failed” attempts), I finally nailed the balance. This isn’t just a vanilla cake with some ricotta frosting slapped on—every element is designed to capture that authentic cannoli experience. The cake itself is moist and tender with hints of cinnamon and orange zest. The filling is that signature ricotta mixture, lightened with mascarpone for stability. And the finishing touches? Mini chocolate chips, pistachios, and that essential dusting of powdered sugar that makes every slice look like it came straight from an Italian pastry case.
The Story Behind Cannoli Cake
Cannoli themselves have ancient roots, originating in Sicily during Arab rule in the 9th century. The fried pastry tubes filled with sweetened ricotta were originally a carnival treat, made to celebrate the season before Lent. According to the Library of Congress Italian-American history archives, Sicilian immigrants brought cannoli to America in the late 1800s, where they became a staple of Italian-American bakeries.
Cannoli cake is a more recent invention—a brilliant mashup that transforms the hand-held treat into a celebration centerpiece. The concept emerged from Italian-American home kitchens where cooks wanted to capture those beloved flavors in a format that could feed a crowd. Think of it as the cousin to our tiramisu cold brew cheesecake—another Italian-inspired dessert that takes traditional flavors and makes them party-friendly.
Let’s Talk About the Ingredients
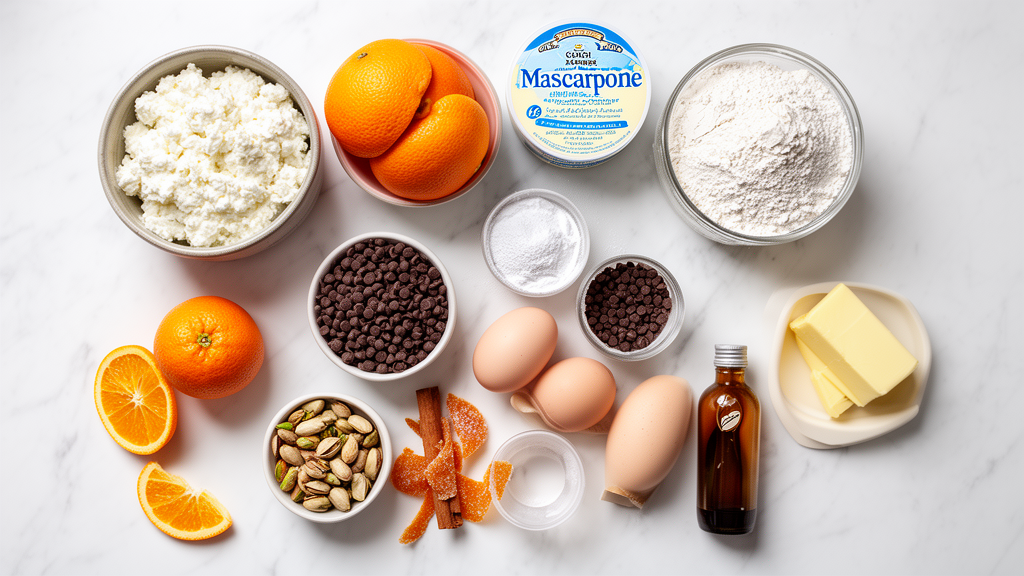
Quality matters here—more than in many other cakes. Cannoli cake lives or dies by its dairy components, so this isn’t the place to grab whatever’s on sale. Here’s what you need to know:
The Ricotta: You want whole milk ricotta, and you want it dry. Here’s an incredibly nitpicky detail, but it matters: place your ricotta in a fine-mesh sieve lined with cheesecloth, set it over a bowl, and let it drain in the refrigerator for at least 4 hours (or overnight). Excess moisture is the enemy of stable frosting. I learned the hard way that skipping this step results in a filling that weeps and slides off your cake layers.
The Mascarpone: This isn’t strictly traditional in cannoli filling, but I wouldn’t be the baker I claim to be if I didn’t tell you this info—mascarpone stabilizes the ricotta and adds a luxurious richness that keeps people coming back for seconds. If you’ve ever asked why bakery cannoli filling holds its shape so beautifully, this is often the secret. In a pinch, you can use cream cheese, but I promise splurging for mascarpone is worth it!
The Citrus: Fresh orange zest is non-negotiable. Those tiny flecks of oil in the zest carry aromatics that extract simply can’t replicate. (Though in a pinch, the same amount of orange extract works just as well for the cake itself—just not the frosting.)
For more ricotta-based dessert inspiration, check out our collection of cream cheese desserts that use similar techniques.
Equipment You’ll Need
- Three 9-inch round cake pans – I use these USA Pan aluminized steel pans for even heat distribution.
- Stand mixer or hand mixer – The KitchenAid Artisan Series is my workhorse for this recipe.
- Fine-mesh sieve and cheesecloth – Essential for draining ricotta.
- Offset spatula – For smooth frosting application.
- Cake turntable – Not required, but makes assembly so much easier.
- Piping bag with star tip – For the decorative border.
Cannoli Cake Recipe
Prep Time: 45 minutes
Cook Time: 30 minutes
Chill Time: 4 hours (for ricotta draining)
Serving Size: 12–16 slices
Calories: 485 per slice
For the Cake Layers:
- 3 cups (375g) all-purpose flour, spooned and leveled
- 2 teaspoons baking powder
- 1 teaspoon baking soda
- 1 teaspoon ground cinnamon
- ½ teaspoon salt
- 1 cup (226g) unsalted butter, room temperature
- 2 cups (400g) granulated sugar
- 4 large eggs, room temperature
- 1 cup (240g) whole milk ricotta, drained (see notes)
- ½ cup (120ml) whole milk
- ¼ cup (60ml) vegetable oil
- 2 teaspoons vanilla extract
- 1 tablespoon fresh orange zest (from about 1 large orange)
For the Cannoli Filling & Frosting:
- 2 cups (480g) whole milk ricotta, drained overnight
- 8 ounces (227g) mascarpone cheese, room temperature
- 1½ cups (180g) powdered sugar, sifted
- 1 teaspoon vanilla extract
- 1 teaspoon fresh orange zest
- ½ cup (85g) mini semi-sweet chocolate chips
- ¼ cup (35g) shelled pistachios, finely chopped
- 2 tablespoons candied orange peel, finely diced (optional)
For Assembly & Decoration:
- ½ cup heavy cream, whipped to stiff peaks (for crumb coat)
- Additional mini chocolate chips
- Additional chopped pistachios
- Powdered sugar for dusting
- Whole cannoli shells (store-bought or homemade), for garnish
How To Make Cannoli Cake
1. Prepare the Ricotta (Do This First!)
At least 4 hours before baking (preferably the night before), line a fine-mesh sieve with cheesecloth and set it over a bowl. Add all the ricotta you’ll need for both the cake and the filling—about 3 cups total. Let it drain in the refrigerator. You’ll be shocked at how much liquid releases. This makes your life SO much easier when it comes time to frost.
2. Mix the Dry Ingredients
In a medium bowl, whisk together the flour, baking powder, baking soda, cinnamon, and salt. Get your whisk in there and really break up any clumps—especially the cinnamon, which loves to clump. Set aside.
3. Cream Butter and Sugar
In your stand mixer’s bowl (or a large mixing bowl if using a hand mixer), combine the room temperature butter and granulated sugar. Using the paddle attachment on medium speed, beat for 4–5 minutes until the mixture is creamy, pale, and has increased in volume significantly. This aeration is crucial for a light cake crumb—don’t rush it. Scrape down the bowl with your spatula halfway through.
4. Add Eggs and Flavorings
With the mixer on low speed, add the eggs one at a time, letting each incorporate fully before adding the next. Then add the vanilla extract and orange zest. Mix until just combined. Overmixing at this stage can cause the cake to become tough.
5. Incorporate Ricotta and Dry Ingredients
With the mixer on low, add the drained ricotta and mix until combined. The batter will look slightly curdled—don’t panic, this is normal. Gradually add the dry ingredient mixture in three additions, alternating with the milk and oil mixture (milk + oil whisked together). Begin and end with the dry ingredients. Mix until the last flour streak disappears—usually about 30 seconds. Don’t overmix.
6. Bake the Cake Layers
Preheat your oven to 350°F (175°C). Grease and flour three 9-inch round cake pans, or line the bottoms with parchment paper. Divide the batter evenly among the pans—each should get about 2 cups of batter. Bake for 28–32 minutes, or until a skewer inserted into the center comes out with a few crumbs attached. The cakes should spring back when lightly touched. Because this cake contains a lot of rich fats, it browns incredibly quickly—keep an eye on it!
Let the cakes cool in their pans for 10 minutes, then turn out onto wire racks to cool completely. Wrap each layer in plastic wrap and refrigerate for at least 2 hours (or overnight). Cold cakes are much easier to level and frost.
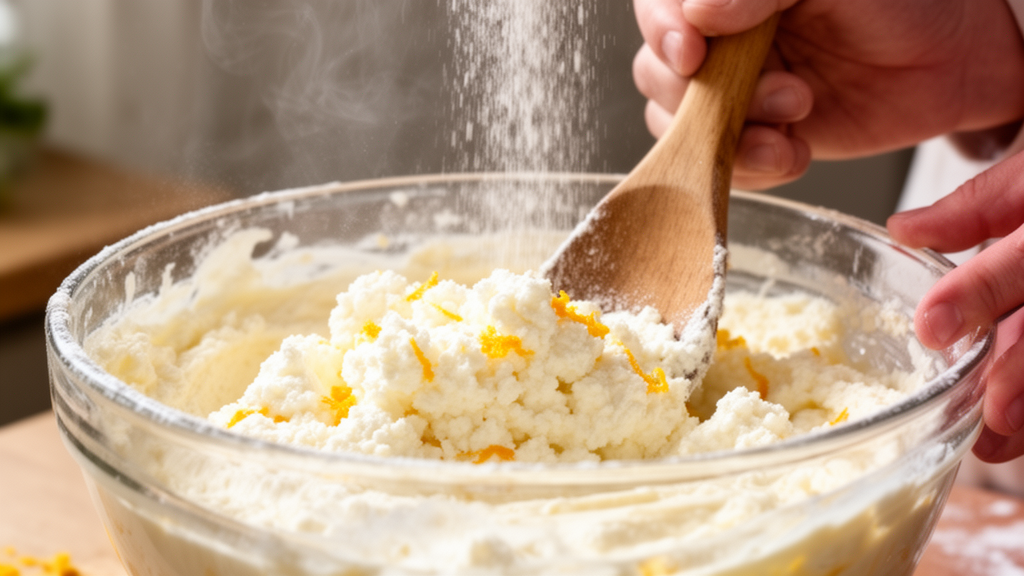
7. Make the Cannoli Filling
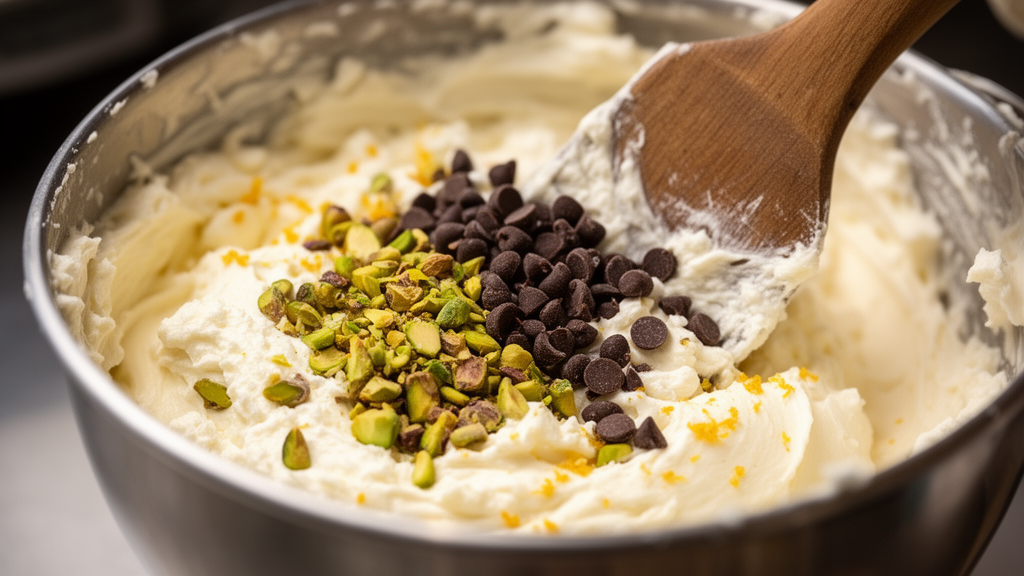
In a large bowl, combine the drained ricotta and mascarpone. Beat with a hand mixer (or stand mixer on low) until smooth and combined. Add the powdered sugar, vanilla, and orange zest. Beat until fluffy and well-combined, about 2 minutes. Fold in the mini chocolate chips, chopped pistachios, and candied orange peel (if using) with a spatula. Taste and adjust sweetness if needed—I find some ricottas need a touch more sugar than others.
Mastery Tip: If your filling seems too soft to frost with, refrigerate it for 30 minutes before using. The mascarpone will firm up beautifully.
8. Assemble the Cake
Place one cooled cake layer on your serving plate or cake turntable. Spread about 1 cup of the cannoli filling evenly over the top. (This is similar technique to our giant cookie cake—generous filling between layers is key.) Top with the second cake layer and repeat. Add the third layer, then refrigerate the cake for 15 minutes to set the filling.
Whip the heavy cream to stiff peaks and spread a thin layer over the entire cake—this is your crumb coat. Refrigerate for 20 minutes. Then use the remaining cannoli filling to frost the top and sides of the cake. I like to leave the sides somewhat “naked” (not fully covered) for a rustic look, but cover completely if you prefer.
9. Decorate
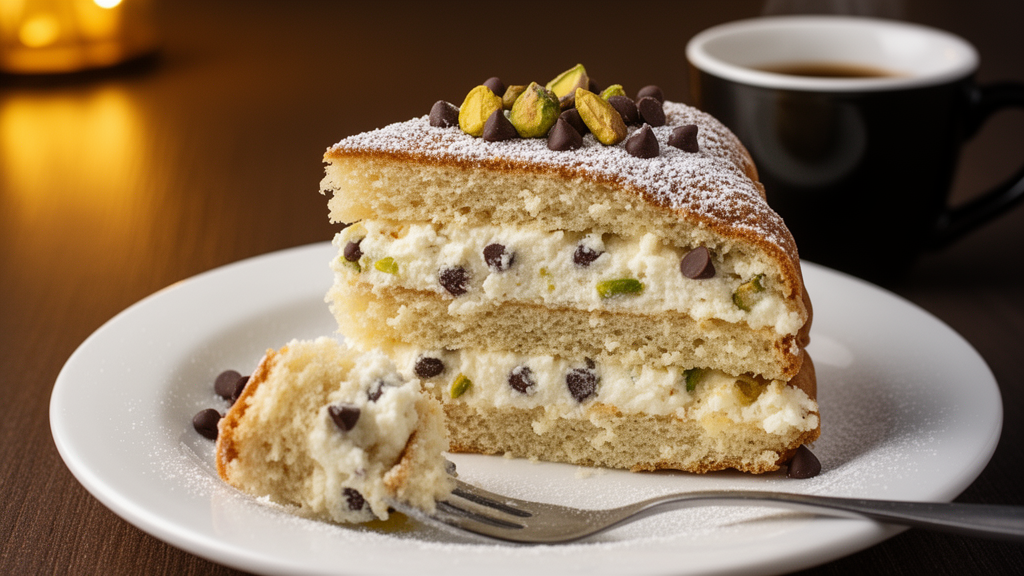
Press additional chopped pistachios around the base of the cake. Pipe decorative dollops of filling around the top edge using a star tip. Nestle mini chocolate chips into the piped border. Just before serving, dust generously with powdered sugar. Garnish with whole cannoli shells if desired—they make this cake look absolutely spectacular!
Storage & Make-Ahead Instructions
This cake keeps beautifully, making it perfect for entertaining:
- Refrigerator: Store covered in the refrigerator for up to 4 days. The flavors actually improve after the first day as they meld together.
- Freezing the layers: Wrap unfrosted cake layers tightly in plastic wrap, then foil. Freeze for up to 3 months. Thaw overnight in the refrigerator before frosting.
- Freezing the whole cake: Freeze the fully assembled cake (without the powdered sugar dusting) for up to 1 month. Thaw overnight in the refrigerator and dust with powdered sugar before serving.
One day, I’ll probably make an olive oil version of this cake—alas, I have yet to try it. If you’re in the same boat as me and love Italian desserts, our chocolate cream cheese truffles make an excellent companion treat for your dessert table.
Troubleshooting Common Issues
My filling is weeping/too soft. The ricotta wasn’t drained enough. Next time, drain overnight. For now, refrigerate the cake heavily and serve cold.
The cake is too dense. This usually happens from overmixing the batter or using cold ingredients. Make sure everything is room temperature and mix only until ingredients are combined.
The frosting tastes grainy. Your ricotta might be low quality or too wet. Good ricotta should be smooth and creamy, not gritty. Try a different brand next time.
Recommended Pairings
This cake deserves thoughtful accompaniments:
- Espresso or strong coffee – The bitterness balances the sweet, creamy filling perfectly.
- Sweet dessert wine – A Moscato or Vin Santo would be traditional Italian pairings.
- Fresh berries – Raspberries or strawberries add a bright, acidic counterpoint.
If you’re looking for a filled dessert with similar texture contrast, our ube coconut churros offer that same creamy interior with a contrasting exterior—perfect for folks who love cannoli’s textural play.
Final Thoughts
Cannoli cake is one of those desserts that looks impressive but is genuinely approachable for bakers of all skill levels. The key is patience—draining that ricotta, letting the cakes cool completely, chilling before frosting. Rush any of these steps and you’ll fight the cake every step of the way. Give it the time it needs, though, and you’ll have a showstopper that rivals anything from a fancy bakery.
I make this for birthdays, holiday gatherings, and any time I want to bring a little piece of Italian-American heritage to the table. Don’t be afraid to press hard so the decorations hold their shape, and remember—the rustic look is part of the charm. This isn’t fondant-covered perfection; it’s a real cake with real texture and honest-to-goodness flavor. Give it a try, and don’t forget to tag me if you make it—I love seeing your bakes!
Looking for more pastry-inspired cakes? Our pastry cake uses similar techniques with a different flavor profile!