

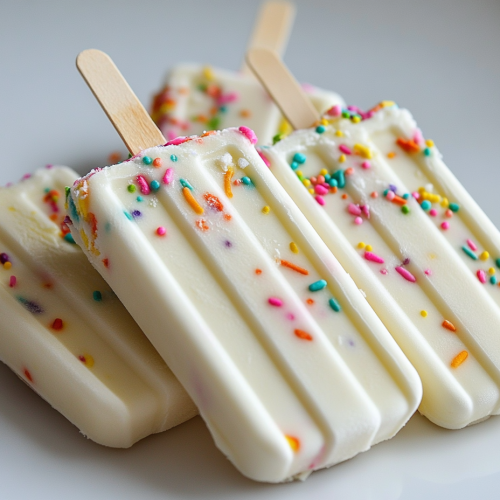
Birthday cake popsicles have taken celebration desserts to a whole new level. These adorable handheld treats combine the nostalgic taste of birthday cake with the fun presentation of a popsicle, creating an irresistible dessert that’s perfect for parties, special events, or whenever you’re craving something delightfully festive. Also known as cakesicles, these treats offer all the joy of a slice of cake but in a convenient, portable form that minimizes mess and maximizes fun.
What makes Birthday Cake Popsicles truly special is their versatility and eye-catching appearance. The colorful confetti interior encased in a smooth chocolate shell creates an Instagram-worthy treat that guests can’t wait to try. Unlike traditional cake slices that require plates and forks, these hand-held cake creations can be enjoyed anywhere, making them ideal for birthday celebrations, school functions, and casual gatherings alike. If you’re looking to add something special to your next event, these cakesicles are guaranteed to impress both kids and adults.

Birthday Cake Popsicles
Equipment
- Mixing bowl
- Whisk
- Popsicle Molds
- Freezer
Ingredients
- 1 1/2 cups heavy cream
- 1/2 cup milk whole or almond milk
- 1/2 cup granulated sugar
- 1 tsp vanilla extract
- 1/2 tsp almond extract optional, for cake batter flavor
- 1/4 cup yellow cake mix
- 1/4 cup rainbow sprinkles
Instructions
- In a mixing bowl, whisk together the heavy cream, milk, sugar, vanilla extract, and almond extract until well combined.
- Slowly whisk in the cake mix until fully incorporated and smooth.
- Gently fold in the rainbow sprinkles.
- Pour the mixture into popsicle molds, leaving a little space at the top.
- Insert popsicle sticks and freeze for at least 4 hours, or until solid.
- To remove, run the molds under warm water for a few seconds, then gently pull out the popsicles.
- Enjoy immediately or store in an airtight container in the freezer.
Notes
- Storage: Store in an airtight container in the freezer for up to 2 weeks.
- Customization: Dip in melted white chocolate for extra decadence.
- Dairy-Free Option: Use coconut cream and almond milk as substitutes.
The Delightful History of Birthday Cake Popsicles
Birthday Cake Popsicles emerged as a creative evolution of cake pops, which first gained popularity in the early 2000s. While cake pops offered bite-sized portions on lollipop sticks, cakesicles took the concept further by increasing the size substantially and adopting a popsicle shape. This innovation allowed for more cake filling and decorating possibilities, quickly capturing the attention of dessert enthusiasts worldwide.
The rise of social media platforms like Instagram and Pinterest catapulted these treats to viral status around 2018, with bakers and home cooks sharing their increasingly creative designs. What started as a simple concept has transformed into an art form, with bakers creating themed cakesicles for various holiday celebrations and special occasions. Their popularity continues to grow in 2025 as more people discover how these versatile treats can transform an ordinary celebration into something extraordinary.
I’ve found that the appeal of Birthday Cake Popsicles lies in their perfect balance of novelty and nostalgia. They combine the classic flavor of birthday cake that many of us grew up loving with a fresh, modern presentation that feels special and Instagram-worthy. For those who enjoy baking but want something different from traditional cakes and cupcakes, cakesicles offer a fun project that yields impressive results even for novice bakers.

Everything You Need to Make Birthday Cake Popsicles
Before diving into the creation process, gathering all the necessary ingredients and equipment is crucial for smooth cakesicle preparation. Here’s everything you’ll need to make these delightful treats:
For the ingredients, you’ll need:
- 1 box confetti cake mix (plus ingredients called for on the box – typically eggs, oil, and water)
- 1/2 cup buttercream frosting
- 32 oz melting chocolate or candy melts (bright white)
- Sprinkles for decoration
- Food coloring (optional, for colored chocolate coating)
- Decorative elements like unicorn horns or edible glitter (optional)
- Ribbon for presentation (optional)
- Popsicle sticks
The equipment you’ll need includes:
- Popsicle or cakesicle molds (silicone works best for easy release)
- Large ziplock bags
- Spatula
- Mixing bowls
- Microwave-safe bowl (for melting chocolate)
- Baking pan (for the cake)
- Measuring cups and spoons
- Optional: piping bags and tips for decorating
High-quality ingredients make a noticeable difference in your final product. For the best flavor profile, choose a premium cake mix or make your own from scratch if you prefer. The melting chocolate quality is particularly important as it forms the outer shell and contributes significantly to the taste and appearance of your cakesicles.
If you’re planning to make these for someone with dietary restrictions, you can easily adapt this recipe. Simply substitute a keto-friendly cake mix or use gluten-free alternatives depending on your needs. The versatility of this recipe makes it accessible for almost everyone to enjoy!
Creating Perfect Birthday Cake Popsicles: Step-by-Step Guide
Follow these detailed instructions to create perfect Birthday Cake Popsicles that will impress all your guests:
Step 1: Prepare the Cake Base
Begin by baking the confetti cake according to the package directions in a standard 9×13 inch pan. Allow the cake to cool completely to room temperature, which usually takes about 1-2 hours. A completely cooled cake is essential for the proper texture of your cakesicles.
Step 2: Create the Cake Mixture
Once cooled, crumble the entire cake into fine crumbs in a large bowl. Add the buttercream frosting to the crumbs and mix thoroughly until well combined. The mixture should be moist enough to hold together when pressed but not so wet that it becomes mushy. You can test the consistency by taking a small amount and rolling it into a ball – it should hold its shape.
Step 3: Chill the Mixture
Transfer the cake and frosting mixture to a large ziplock bag, press out any excess air, and seal it. Massage the mixture through the bag to ensure thorough combining. Refrigerate for at least 30 minutes to firm up, which makes it easier to work with.
Step 4: Prepare the Molds
While the cake mixture chills, melt about half of your white chocolate according to package directions, typically in 30-second intervals in the microwave, stirring between each interval. Once melted, spoon approximately 2 tablespoons of chocolate into each popsicle mold cavity. Use the back of your spoon to spread the chocolate up the sides of each cavity, creating a shell approximately 1/8 inch thick.
Step 5: Add the Sticks
Before the chocolate sets, insert a popsicle stick about halfway into each mold. Place the molds in the refrigerator for about 5 minutes to allow the chocolate to harden.
Step 6: Fill with Cake Mixture
Remove the molds and cake mixture from the refrigerator. Press the cake mixture firmly into each chocolate-lined mold, leaving about 1/8 inch of space at the top for the final chocolate layer. Make sure to pack it in densely to avoid air pockets.
Step 7: Seal with Chocolate
Melt the remaining chocolate and spoon it over the exposed cake mixture, ensuring it connects with the chocolate sides to create a complete seal. Tap the molds gently on the counter to level the chocolate and eliminate air bubbles.
Step 8: Chill to Set
Return the filled molds to the refrigerator for at least 20-30 minutes, or until the chocolate is completely set.
Step 9: Unmold and Decorate
Once set, carefully remove the cakesicles from the molds by gently pulling back the edges of the silicone mold and carefully lifting out each treat. If you’re having trouble, try chilling them for a bit longer. At this point, you can decorate with additional melted chocolate drizzles, sprinkles, or other decorative elements while the surface is still slightly tacky.
The beauty of Birthday Cake Popsicles lies in their adaptability. You can create them for any special occasion by simply changing the colors and decorative elements to match your theme. From baby showers to graduation parties, these versatile treats can be customized for any celebration.

Complete Recipe Card for Birthday Cake Popsicles
Prep Time: 30 minutes
Cook Time: 30 minutes (for cake)
Chill Time: 1 hour
Total Time: 2 hours
Servings: 8-10 cakesicles
Difficulty: Medium
Nutritional Information (per cakesicle):
Calories: 420
Fat: 22g
Saturated Fat: 14g
Cholesterol: 45mg
Sodium: 210mg
Carbohydrates: 52g
Fiber: 1g
Sugar: 42g
Protein: 4g
Ingredients:
- 1 box (15.25 oz) confetti cake mix
- Eggs, oil, and water (as called for on cake mix box)
- 1/2 cup buttercream frosting
- 32 oz white melting chocolate or candy melts
- Sprinkles and decorative elements
- 8-10 popsicle sticks
Equipment:
- Silicone popsicle molds
- Large ziplock bag
- Mixing bowls
- Spatula
- Microwave-safe bowl
- Baking pan
- Measuring cups and spoons
Instructions:
- Prepare and bake cake according to package directions. Cool completely.
- Crumble cake into fine crumbs in a large bowl. Add buttercream frosting and mix until well combined.
- Transfer mixture to a ziplock bag and refrigerate for 30 minutes.
- Melt half the chocolate in a microwave-safe bowl in 30-second intervals, stirring between each.
- Spoon about 2 tablespoons of melted chocolate into each mold cavity, spreading up the sides to create a shell.
- Insert popsicle sticks and refrigerate for 5 minutes to set.
- Fill molds with chilled cake mixture, leaving 1/8 inch space at the top.
- Melt remaining chocolate and spoon over the cake mixture to seal.
- Refrigerate for 20-30 minutes until completely set.
- Carefully remove from molds and decorate as desired.
Recipe Notes:
For best results, ensure the cake is completely cooled before crumbling and mixing with frosting. The consistency of your cake mixture is crucial – it should be moist enough to hold together but not soggy. If your mixture seems too dry, add a bit more frosting. If it’s too wet, you can add some extra cake crumbs or even a small amount of powdered sugar to absorb the excess moisture.
Fantastic Variations and Helpful Tips
Birthday Cake Popsicles can be customized in countless ways to suit different themes, occasions, or taste preferences. Here are some of my favorite variations to try:
- Chocolate Lover’s Dream: Replace the confetti cake with chocolate cake and use milk or dark chocolate coating instead of white.
- Red Velvet Elegance: Use red velvet cake with cream cheese frosting for a sophisticated twist.
- Seasonal Specials: Create themed cakesicles for holidays with appropriate colors and sprinkles, like festive Easter designs or Halloween monsters.
- Custom Color Combos: Tint the white chocolate with gel food coloring to match party themes or split the chocolate and create multi-colored designs.
- Flavor Infusions: Add flavor extracts like vanilla, almond, or mint to your melted chocolate for additional flavor dimensions.
To achieve professional-looking results, keep these helpful tips in mind:
- Temperature matters: Chocolate is sensitive to temperature. If it’s too hot, it can seize; if too cool, it won’t flow properly. Aim for a smooth, flowing consistency.
- Quality control: Higher quality chocolate melts more smoothly and tastes better. Consider investing in good quality candy melts or couverture chocolate.
- Prevent cracking: Allow your cakesicles to come to room temperature before serving to prevent the chocolate from cracking when bitten into.
- Troubleshooting sticks: If your sticks keep shifting when inserting them into the mold, let the chocolate set for a minute or two longer before adding the sticks.
- Decorate like a pro: Use contrasting colors for drizzles and decorations to make your designs pop. Allow one layer of decoration to set before adding the next for clean, defined designs.
One of my favorite adaptations is making “surprise reveal” cakesicles where the inside contains hidden colored layers or colorful candy surprises that are revealed when bitten into. This creates an extra element of fun, especially for gender reveal parties or birthday celebrations.
Expert Storage Solutions for Birthday Cake Popsicles
Proper storage is essential to maintain the freshness and appearance of your Birthday Cake Popsicles. Follow these guidelines to ensure your treats stay delicious from creation until serving:
Short-Term Storage (1-3 days):
For enjoying your cakesicles within a few days of making them, place them in a single layer in an airtight container at room temperature. Avoid refrigerating them during this time as condensation can form when they’re removed from the fridge, causing the chocolate coating to become sticky or develop a foggy appearance. When storing Birthday Cake Popsicles at room temperature, keep them away from direct sunlight and heat sources.
Medium-Term Storage (4-7 days):
If you need to store your cakesicles for up to a week, refrigeration is necessary. Place them in an airtight container with parchment paper between layers to prevent sticking. When you’re ready to serve, remove them from the refrigerator and let them sit at room temperature for about 20-30 minutes before serving. This prevents condensation and allows the cake center to soften slightly for the best texture.
Long-Term Storage (up to 2 months):
Birthday Cake Popsicles freeze beautifully, making them perfect for preparing well in advance of special events. To freeze properly, place the completely set and decorated cakesicles on a baking sheet in a single layer and freeze until solid (about 2 hours). Then transfer them to an airtight container or freezer bag with parchment paper between layers. When ready to serve, thaw them overnight in the refrigerator, then allow them to come to room temperature before serving.
Transportation Tips:
When transporting Birthday Cake Popsicles to an event, place them in a sturdy container with each cakesicle wrapped individually in cellophane or placed in mini treat bags tied with ribbon. This not only protects them but also creates a ready-to-serve presentation. For hot weather transport, use an insulated cooler with ice packs, but place the container of cakesicles in a way that they don’t directly touch the ice packs to prevent condensation.

Celebrating Life’s Sweet Moments
Birthday Cake Popsicles represent so much more than just another dessert option – they embody the joy and celebration that comes with special occasions. Their playful presentation combined with the nostalgic flavor of birthday cake creates an experience that resonates with both children and adults alike. Each bite delivers that perfect balance of textures – the snap of chocolate giving way to soft, flavorful cake inside.
What makes these treats truly special is their ability to transform an ordinary gathering into something memorable. Whether you’re hosting a birthday party, baby shower, or simply want to brighten someone’s day, homemade Birthday Cake Popsicles show thoughtfulness and care that store-bought options simply can’t match. Plus, the process of making them can become its own celebration – invite friends or family to join in the decorating process for a fun pre-party activity!
The versatility of these cakesicles means they’ll continue to be a trending dessert choice throughout 2025 and beyond. Their portable nature makes them perfect for today’s on-the-go lifestyle, while their endless customization options ensure they’ll never go out of style. If you’re looking to expand your dessert-making skills with a fun project that yields impressive results, Birthday Cake Popsicles are the perfect place to start.
Remember, the most important ingredient in any celebration dessert is the joy that comes from sharing it with others. So gather your ingredients, set aside some time for creativity, and prepare to delight your loved ones with these charming treats. The smiles they bring will be worth every minute spent creating them!