
Mochi ice cream is made by wrapping small scoops of ice cream in a thin, chewy mochi dough made from glutinous rice flour (mochiko), sugar, and water — then dusted with potato starch or cornstarch to prevent sticking. You can make it at home in under 2 hours with a microwave or stovetop, a silicone mold or ice cube tray, and your favorite ice cream flavor. No special equipment required.
What Is Mochi Ice Cream?
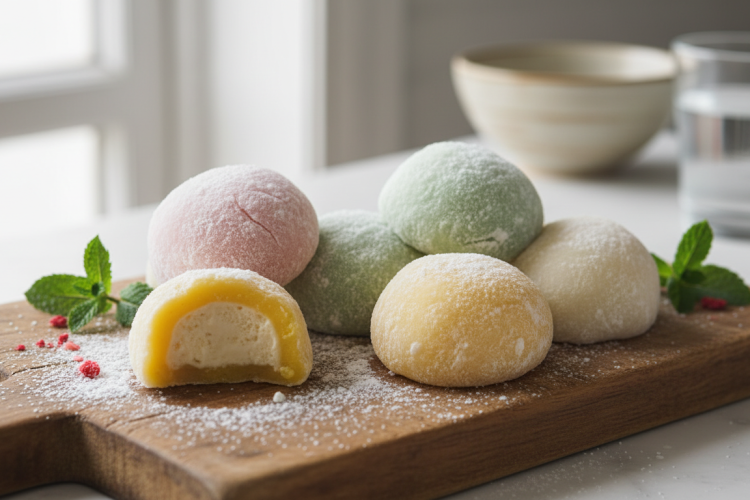
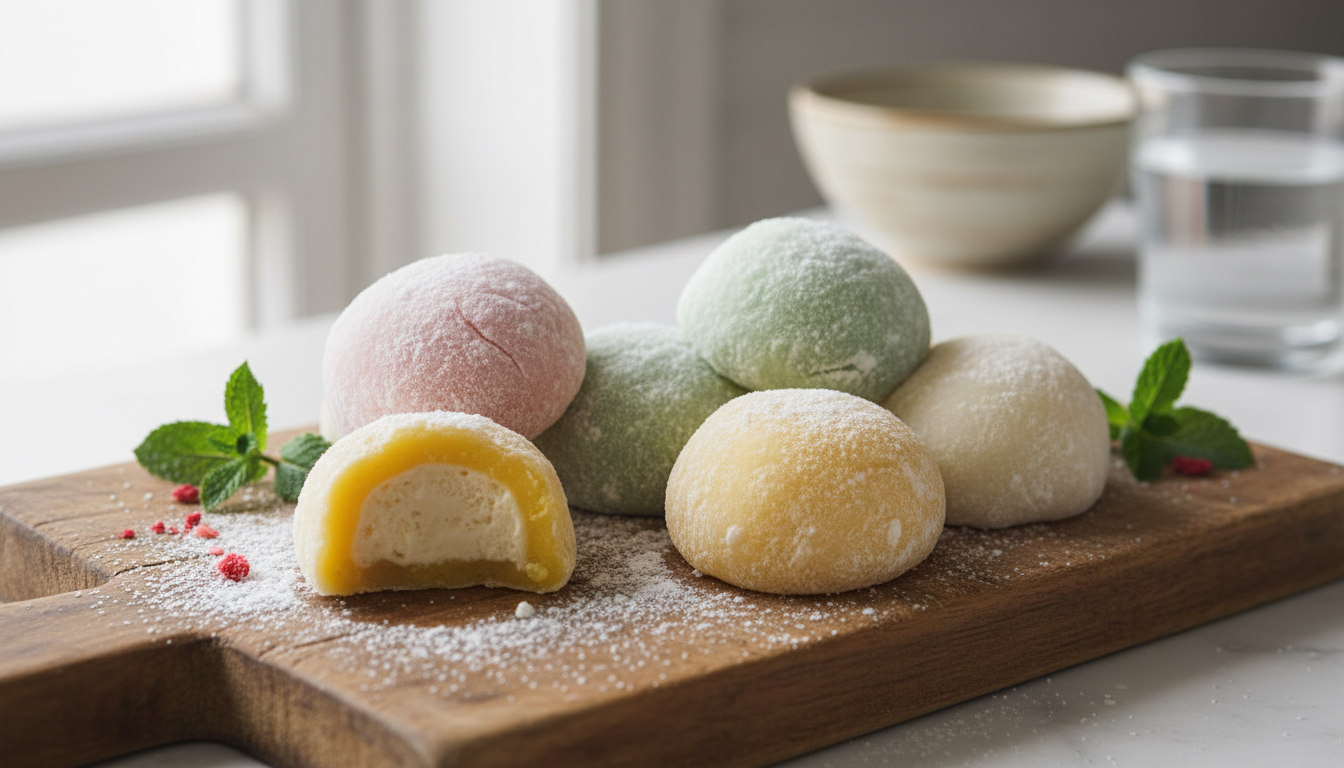
Mochi ice cream is a Japanese-American fusion dessert that combines two beloved textures: the sticky, chewy bounce of traditional mochi with the cold creaminess of ice cream. It was popularized in the United States in the 1990s by the Mikawaya bakery in Los Angeles and has since become a staple at grocery stores, Japanese restaurants, and dessert shops worldwide.
The outer shell is made from mochiko — sweet glutinous rice flour — which becomes wonderfully pliable and soft when cooked. This dough wraps around a small frozen ball of ice cream, creating a two-bite treat that’s unlike anything else. The contrast of cold and chewy is what makes mochi ice cream so addictive.
If you love Japanese-inspired desserts, you’ll also want to check out our guide to easy tiramisu or browse our roundup of Korean desserts for more Asian-inspired sweet inspiration.
Ingredients for Mochi Ice Cream
This recipe makes approximately 12 mochi ice cream balls. Here’s everything you’ll need:
For the Ice Cream Filling
- 1 pint (about 480ml) of your favorite ice cream (vanilla, strawberry, matcha, mango, or chocolate all work well)
- Plastic wrap or a silicone mold for pre-shaping
For the Mochi Dough
- 1 cup (130g) mochiko (glutinous rice flour / sweet rice flour)
- ½ cup (100g) granulated sugar
- ¾ cup (180ml) water
- Optional: 1–2 drops food coloring or 1 tsp matcha powder for colored dough
For Dusting
- ¼ cup potato starch or cornstarch (do not skip — this prevents sticking)
Key ingredient note: Make sure you’re using mochiko (sweet glutinous rice flour), not regular rice flour. They are not interchangeable. Mochiko gives the dough its signature sticky, chewy texture. You’ll find it at Asian grocery stores, Whole Foods, or online. According to the FDA, glutinous rice flour is naturally gluten-free despite its name — “glutinous” refers to the sticky texture, not gluten content.
Equipment You’ll Need
- Microwave-safe bowl (for microwave method) or small saucepan (stovetop method)
- Plastic wrap
- Rolling pin or your hands
- Round cookie cutter (about 4 inches / 10cm diameter) or a glass
- Sheet pan lined with parchment
- Freezer-safe container
- Silicone mold or ice cube tray (optional, for uniform ice cream balls)
Step 1 — Pre-Freeze the Ice Cream Balls
This is the most important step for success. You need your ice cream filling to be rock solid before you start wrapping, otherwise it will melt as you handle the warm mochi dough.
- Line a sheet pan with parchment paper and place it in the freezer for 10 minutes.
- Using a cookie scoop or tablespoon, scoop small balls of ice cream (about 1.5–2 tablespoons each) and place them on the chilled parchment.
- If you want perfectly round balls, place each scoop on a piece of plastic wrap, gather the edges, and twist into a tight ball. Place back on the sheet pan.
- Freeze for at least 1–2 hours, or until completely solid. The colder, the better. You can do this step the night before.
Pro tip: Work in small batches of 3–4 at a time so the ice cream doesn’t melt while you’re wrapping. Keep the rest in the freezer until you’re ready for each batch.
Step 2 — Make the Mochi Dough
You can cook mochi dough two ways: microwave (faster) or stovetop (more control). Both produce the same result.
Microwave Method (Recommended)
- Whisk together mochiko, sugar, and water in a microwave-safe bowl until completely smooth and no lumps remain.
- Add food coloring or matcha powder if using, and stir to combine.
- Cover loosely with plastic wrap (leave a small vent) and microwave on HIGH for 2 minutes.
- Remove, stir vigorously with a wet spatula — the mixture will be thick and stretchy in places.
- Cover and microwave for another 1 minute. Stir again.
- Repeat in 30-second intervals (stirring each time) until the dough is uniformly translucent, very thick, and pulling away from the sides of the bowl — usually 3–4 minutes total.
- Let cool for 2–3 minutes before handling (it will be very hot).
Stovetop Method
- Combine mochiko, sugar, and water in a small saucepan over medium heat.
- Stir constantly with a silicone spatula as it heats.
- Within 5–8 minutes, the mixture will thicken dramatically and become glossy and translucent.
- Continue stirring until the dough pulls away from the sides of the pan and forms a cohesive, stretchy mass.
- Remove from heat and let rest for 2 minutes.
Your mochi dough should be soft, pliable, and slightly sticky — like a very soft, warm playdough. If it feels too dry and tears easily, add a teaspoon of water and knead briefly. If too wet, cook for 30 more seconds.
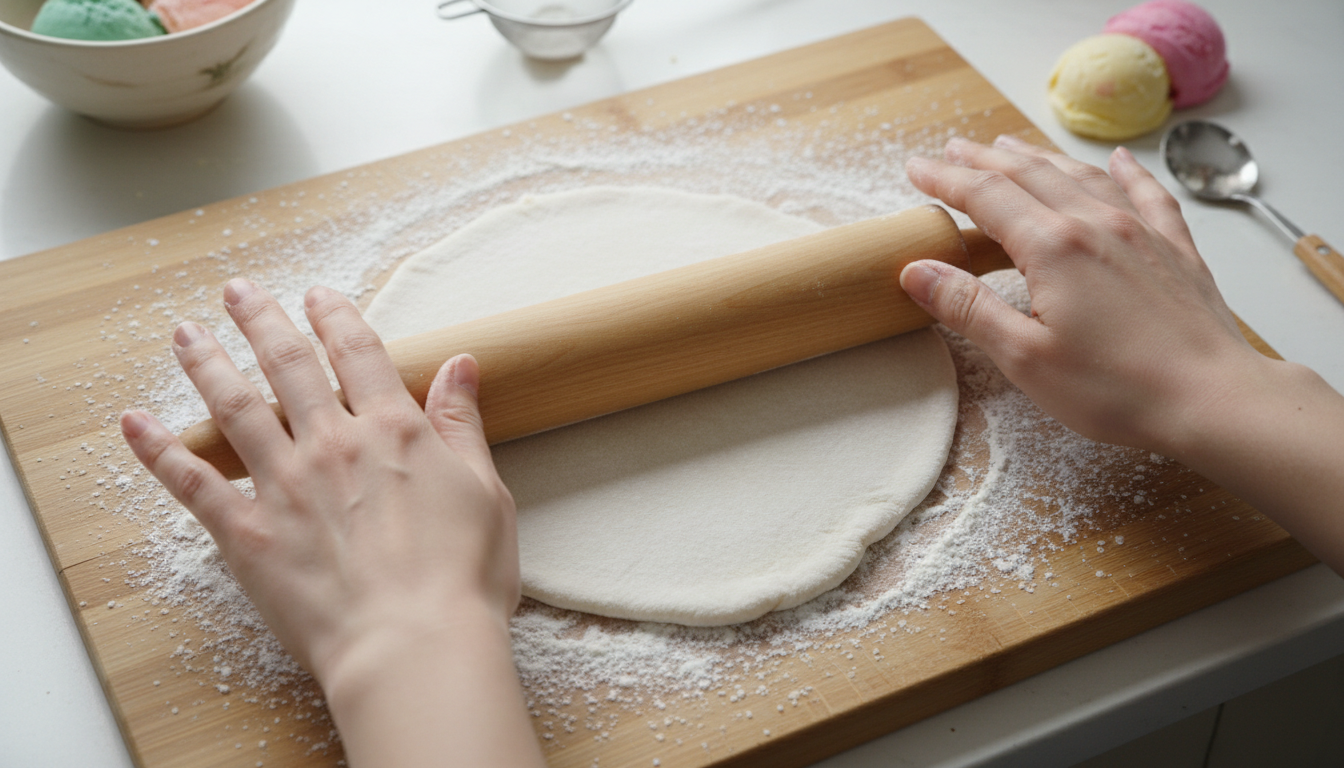
Step 3 — Roll and Cut the Mochi
This step needs to happen relatively quickly while the dough is still warm and pliable. Mochi becomes harder to work with as it cools.
- Generously dust a clean work surface, your rolling pin, and your hands with potato starch or cornstarch.
- Transfer the hot mochi dough onto the dusted surface. Dust the top of the dough as well.
- Using your rolling pin (or palms), flatten the dough into an even sheet about ¼ inch (6mm) thick. Work quickly but gently — the dough is very stretchy.
- Use a 4-inch (10cm) round cookie cutter or the rim of a glass to cut circles out of the dough.
- Re-roll scraps and cut more circles. You should get about 12 circles from one batch.
- Stack the circles between sheets of plastic wrap or dust each one with starch so they don’t stick together.
Thickness matters: Too thick and the mochi overwhelms the ice cream. Too thin and it tears when you wrap. Aim for an even ¼-inch sheet.
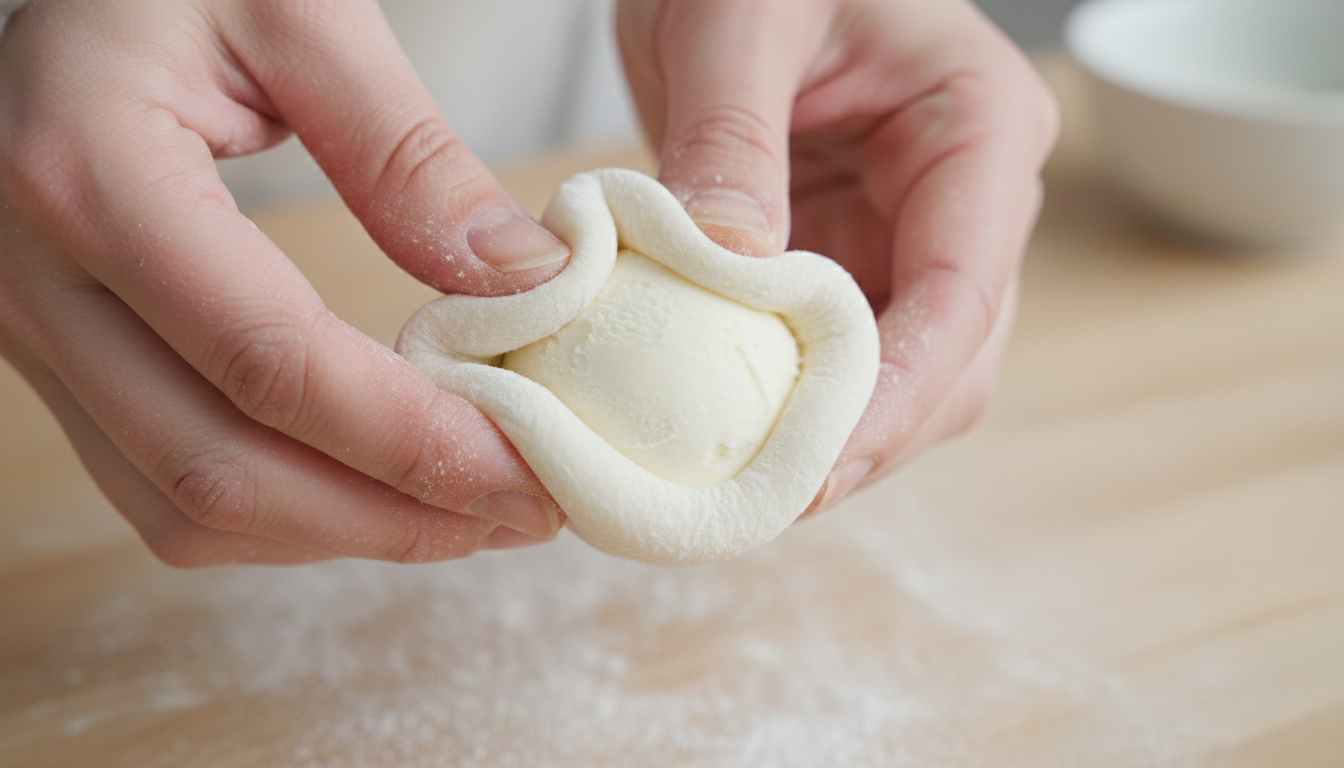
Step 4 — Wrap the Ice Cream
Now for the fun part. Work fast and keep the ice cream frozen solid.
- Remove 3–4 ice cream balls from the freezer. Keep the rest frozen.
- Place one mochi circle in your palm. Lay one ice cream ball in the center.
- Working quickly, gather the edges of the mochi circle up around the ice cream, pinching and pleating them together at the top to seal. Think of it like wrapping a dumpling.
- Pinch firmly to ensure the seam is completely sealed — any gaps will cause the ice cream to leak.
- Immediately place the finished mochi ice cream ball seam-side down on a parchment-lined tray.
- Return to the freezer immediately and repeat with the next batch.
If the mochi is tearing: Your dough may have cooled and stiffened. Microwave the remaining dough circles for 5–10 seconds to warm slightly.
For more creative frozen and chilled desserts, take a look at our easy flan recipe — another dessert that delivers impressive results with simple technique.
Step 5 — Freeze and Serve
- Once all mochi ice cream balls are assembled, freeze the entire tray for at least 1 hour to let them firm up completely.
- Transfer to an airtight container or zip-lock bag for long-term storage. Separate layers with parchment paper to prevent sticking.
- To serve: remove from freezer and let sit at room temperature for 3–5 minutes. Mochi is best when the outer shell is slightly soft and the ice cream inside is cold but scoopable.
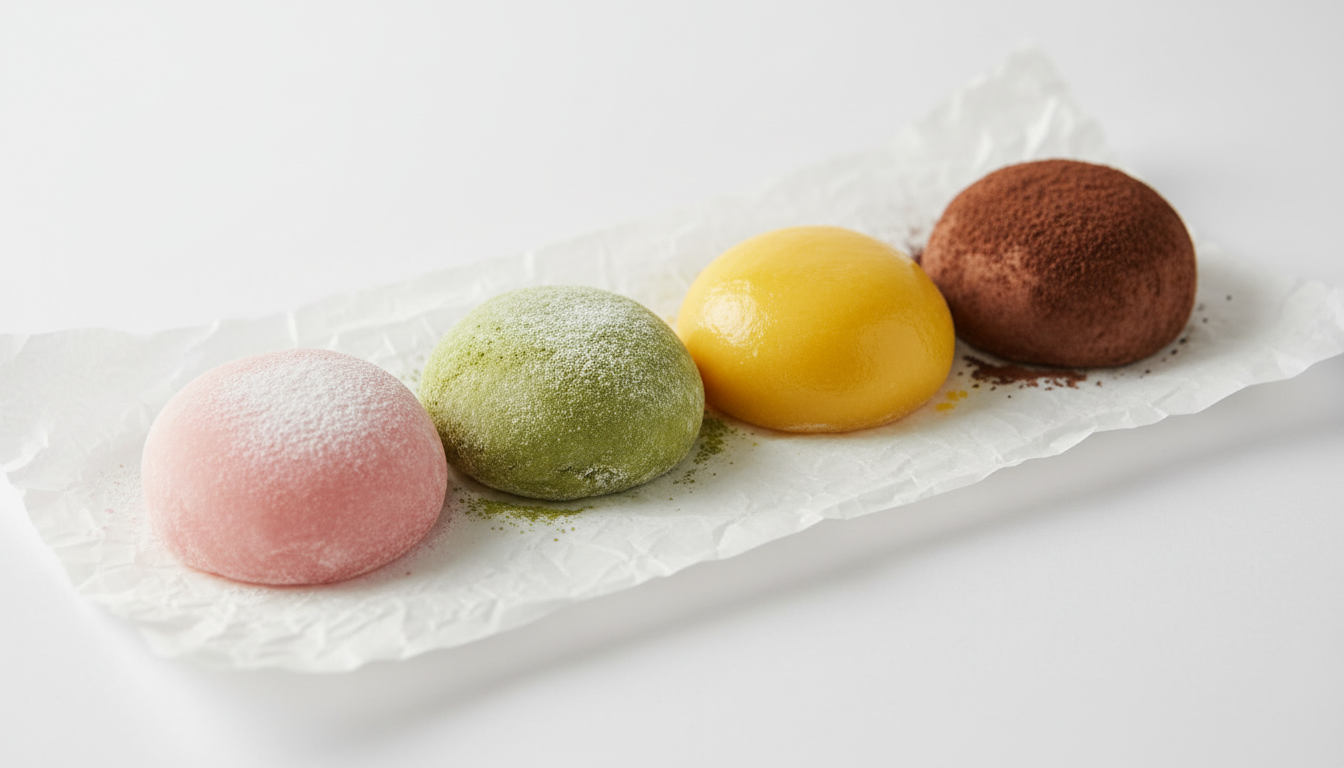
Best Ice Cream Flavors for Mochi
Virtually any ice cream flavor works, but some combinations are especially popular:
| Ice Cream Flavor | Mochi Dough Color | Best Pairing |
|---|---|---|
| Vanilla | White (plain) | Strawberry jam drizzle |
| Matcha | Green (matcha dough) | Red bean paste inside |
| Strawberry | Pink (food coloring) | White chocolate drizzle |
| Mango | Yellow (food coloring) | Coconut shavings |
| Chocolate | Brown (cocoa dough) | Sea salt flakes |
| Cookies & Cream | White or gray | Crushed Oreo garnish |
| Ube | Purple (ube powder) | Coconut cream filling |
For a unique flavor combination, try our matcha churros recipe — matcha pairs beautifully with vanilla or red bean ice cream in mochi form too.
Variations and Add-Ins
Red Bean Mochi Ice Cream
This is the most traditional version. Add a thin layer of sweetened anko (red bean paste) between the mochi shell and the ice cream. Spread about 1 teaspoon of anko onto the mochi circle before placing the ice cream ball. This adds a subtly earthy, sweet layer that’s authentically Japanese.
Dairy-Free Mochi Ice Cream
The mochi shell itself is naturally dairy-free — it’s just rice flour, sugar, and water. Simply swap the ice cream for a coconut milk, oat milk, or cashew milk-based frozen dessert. If you’re curious about other vegan-friendly sweets, our are Airheads vegan? guide breaks down common ingredients to watch for.
Stuffed Mochi Ice Cream
Add a surprise center inside the ice cream ball: a maraschino cherry, a chocolate truffle, or a small spoonful of peanut butter or Nutella. Freeze the stuffed ice cream balls extra firm before wrapping.
Troubleshooting Common Mochi Ice Cream Problems
My mochi dough is too sticky to handle
This is the most common issue — and the fix is simple: more starch. Dust your hands, your work surface, and the dough generously and repeatedly with potato starch or cornstarch. Don’t be afraid to use a lot — the excess will brush off when you’re done.
My mochi is tearing when I wrap
Three possible causes: (1) The dough cooled too much — reheat circles briefly in the microwave. (2) The dough is too thin — roll to ¼ inch, not thinner. (3) The ice cream ball is too big — use a smaller scoop, about 1.5 tablespoons maximum.
My mochi became hard and chewy after freezing
This is expected if you serve straight from the freezer. Always let mochi ice cream rest at room temperature for 3–5 minutes before eating. This softens the outer shell to its ideal chewy texture without melting the ice cream inside.
How to Store Mochi Ice Cream
Store mochi ice cream in an airtight container in the freezer, with parchment paper between layers to prevent sticking. Properly stored, it will keep for up to 1 month, though quality is best within the first 2 weeks. According to Healthline, glutinous rice flour is a good source of quick energy carbohydrates and is well-tolerated by most people, including those with gluten sensitivities.
Mochi Ice Cream vs. Regular Mochi
Traditional Japanese mochi (daifuku) is typically filled with sweet red bean paste or strawberry, and served at room temperature. Mochi ice cream is an American innovation using the same shell around frozen ice cream. For more on traditional Japanese sweets including mochi, check out our guide to wagashi — Japanese sweet recipes. And for the broader world of Asian desserts, our Korean desserts guide covers bingsu, tteok, and more.
Frequently Asked Questions
Can I use regular rice flour instead of mochiko?
No. Regular rice flour and glutinous rice flour (mochiko) behave very differently. Regular rice flour produces a dry, crumbly texture. Mochiko is essential for the stretchy, chewy mochi texture. Look for brands like Koda Farms Mochiko or Bob’s Red Mill Sweet White Rice Flour.
Is mochi ice cream gluten-free?
Yes — the mochi shell made from glutinous rice flour is naturally gluten-free. However, always check your ice cream for gluten-containing mix-ins. Choose a certified gluten-free ice cream if you have celiac disease or a serious sensitivity.
How long does homemade mochi ice cream last?
Homemade mochi ice cream keeps well in the freezer for up to 1 month in an airtight container. Quality is best in the first 1–2 weeks. After that, the mochi shell can become slightly icy or lose its ideal texture.
Can I make the mochi dough ahead of time?
Yes. Cooked mochi dough (without ice cream) can be wrapped tightly in plastic wrap and stored at room temperature for up to 2 days. You can also freeze the unrolled dough ball for up to 1 month — thaw overnight in the refrigerator before rolling.
What’s the best ice cream for beginners to start with?
Vanilla is the easiest to work with because it freezes firm and has a neutral flavor that lets you taste the mochi shell clearly. Strawberry is a close second. Avoid very soft ice creams (gelato) for your first batch — they melt too quickly during wrapping. Once you get the technique down, try our no-bake cheesecake filling variation using a frozen cheesecake filling instead of ice cream.