
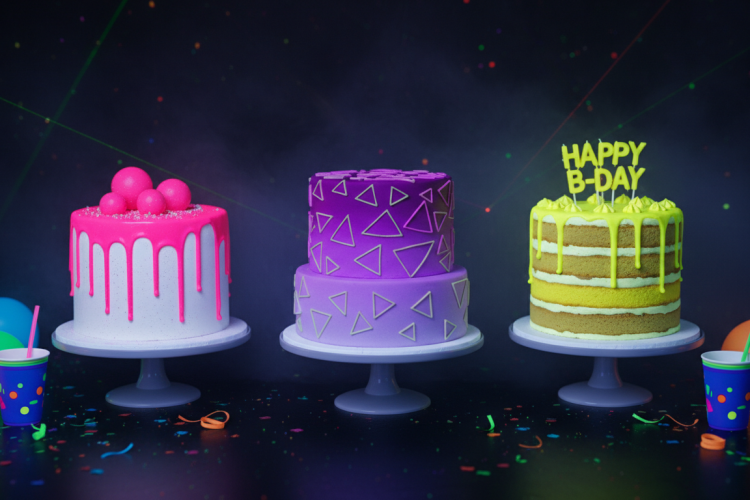
Neon cakes use electric, saturated colors — hot pink, lime green, electric blue — achieved through gel food coloring in buttercream, bright candy drips, and UV-reactive edible paint for cakes that glow under black light. Unlike subtle ombre cakes, neon cakes are designed to be bold and maximalist.
Neon Cakes vs. Glow-in-the-Dark Cakes
Neon cakes use vivid, high-saturation colors that look electric under normal lighting. Glow-in-the-dark cakes use tonic water or UV-reactive edible paint that only activates under black light. Many neon cake designs combine both — electric colors in daylight that also glow at parties. For the full glow-in-the-dark technique, see our Glow in the Dark Cake Recipe. This guide focuses on bold neon visuals in any lighting.
How to Get True Neon Colors in Frosting
- Gel food coloring (not liquid). Americolor “Electric” series, Chefmaster “Neon,” or Wilton “Neon” gels are formulated for high-saturation results.
- White buttercream base. Use shortening or titanium dioxide — butter’s yellow tint muddies neon colors.
- Whiteout technique. Mix neon gel into a small portion first, then fold into full batch to prevent streaking.
- Let color develop. Mix frosting 1–2 hours (or night before) — gel colors deepen as they sit.
10 Neon Cake Design Ideas
- Neon Drip Cake — White base with electric-colored chocolate drips (hot pink, lime, orange) from the top edge.
- Multi-Color Swirl Buttercream — Load 3–4 neon colors into one piping bag; pipe large rosettes for a tie-dye effect.
- Neon Fault Line Cake — Band of neon candy or curd exposed around the middle, flanked by smooth white buttercream.
- Electric Ombre Layers — Cut layers reveal a rainbow of neon-colored cake layers inside.
- Neon Geode Cake — Rock candy crystals dyed neon pressed into a carved “geode” section.
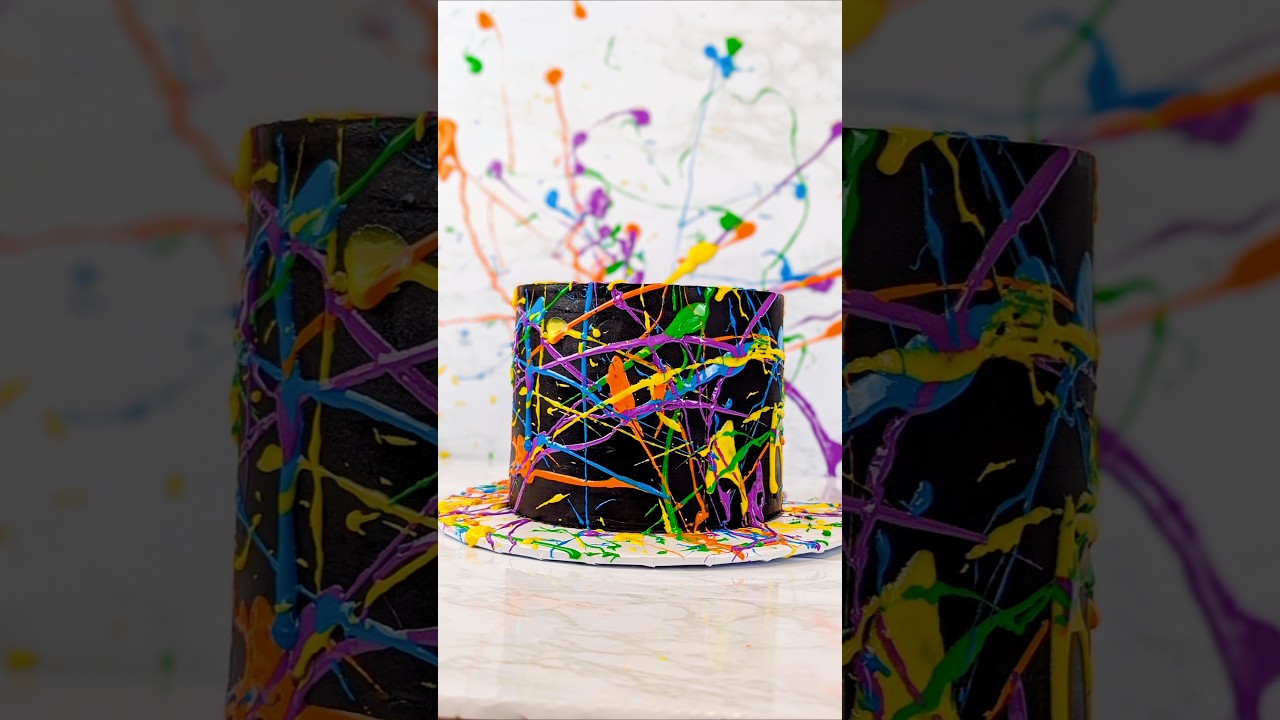
- UV Paint Splatter — Food-grade UV-reactive paint flicked across a dark frosted base.
- Neon Number Cake — Number-shaped layers frosted in contrasting neon colors for milestone birthdays.
- Cyberpunk Theme Cake — Black buttercream with neon pink and blue circuit-board line patterns.
- Neon Tropical Cake — Coral, lime green, and electric turquoise with edible sugar hibiscus flowers.
- Candy Explosion Drip — Neon candy melts dripped all over, topped with matching M&Ms, gummies, and sprinkles.
Neon Drip Cake Technique
Melt white candy melts and tint heavily with neon gel. Test on the back of a chilled spoon — should flow slowly, not run off instantly. Use a squeeze bottle to add drips around the top edge of a chilled cake. Fill the top surface, then smooth the center.
UV-Reactive Neon Cake Decorating
For cakes that actually glow under black light, use food-grade fluorescent/UV-reactive edible colors from specialty suppliers. Regular neon gel food coloring does NOT glow under UV. Tonic water (quinine fluoresces under UV) can be used in clear glazes — a trick covered in our Glow in the Dark Cake guide.
Pro Tips for Neon Cakes
- Chill between steps — neon colors bleed when frosting is warm.
- Use a white cake base — colored layers show through cuts in frosting.
- Don’t mix complementary neons — hot pink + lime green = brown. Apply side by side, not blended.
- Photograph in natural light — warm indoor light dulls neon vibrancy.
Supplies and Tools You’ll Need
Getting the colors and effects right depends as much on your tools as your technique. Most of these are affordable and reusable across many cake projects.
Gel Food Coloring
Americolor, Chefmaster, and Wilton all make neon/electric gel sets specifically formulated for high-saturation results. Avoid liquid food coloring for neon work — the water content throws off buttercream consistency and the colors are significantly less vibrant. A neon gel set (typically 4–6 colors) covers every neon palette you’d need. The colors do shift slightly between the bowl and the baked/set result — electric blue tends to deepen, hot pink can pull slightly orange in some brands. Test on a small batch of frosting before committing to a large quantity.
Piping Bags and Tips
For smooth sides: a bench scraper and offset spatula are your primary tools — no piping required. For textured designs (rosettes, ruffles, star borders): a 1M or 2D tip gives classic results. For the linear stripe effect common in neon designs: a flat #47 basketweave tip or the back of a spoon dragged through fresh buttercream creates texture. Have extra piping bags on hand — working with multiple neon colors means frequent bag changes.
UV/Black Light
For cakes that actually glow, you need a UV black light source. A UV flashlight (inexpensive, available on Amazon) works for close-up photography and small gatherings. For full party lighting, UV LED strips that frame the dessert table create a dramatic effect. The tonic water or UV-reactive edible paint glows bright white-blue under UV; neon colors in buttercream glow most intensely when made with titanium dioxide-whitened bases.
Best Neon Color Combinations
Not every combination of neon colors works visually. These pairings are tested and work well together without creating a muddy or chaotic appearance.
- Hot pink + electric blue: The classic neon pairing. High contrast, reads immediately as “neon” to the eye. Works on white, black, or pastel bases.
- Electric green + neon yellow: Bold and slightly retro. Works especially well for gaming-themed or 80s-inspired cakes.
- Neon orange + hot pink: Warm, tropical palette. Pairs naturally with citrus flavor profiles — lemon, passion fruit, mango.
- All-neon rainbow: All 5–6 neon colors arranged in vertical or horizontal bands. Stunning but requires clean color separation — freeze each color layer or chill between applications.
- Neon on black: The most dramatic presentation. Black buttercream (achieved with black gel coloring or activated charcoal) as the base coat, with neon accents applied on top via drips, splatters, or piped borders. This combination photographs extremely well.
How to Photograph Neon Cakes
Neon cakes can be tricky to photograph because camera auto-exposure tends to blow out the bright colors or underexpose the scene around them. A few adjustments make a significant difference.
For UV glow shots: Set the room to full darkness. Use the UV light as your only light source. Switch your phone or camera to manual or night mode with a slightly longer exposure (2–4 seconds). Place the camera on a flat surface or tripod — even slight movement during a long exposure blurs the shot. The glowing elements will be crisp against a dark background.
For standard neon shots: Shoot with consistent, diffused natural light (near a window on an overcast day) or with a ring light. Avoid mixed lighting (some warm, some cool) — it makes the neon colors shift unpredictably in the final image. Shoot from a 45-degree angle slightly above the cake for the most flattering presentation, or directly from the front if you want to emphasize a dramatic border or side decoration.
Neon Cake Flavor Pairings: Matching Taste to Color
Bold neon hues don’t have to be just a visual spectacle; they can also guide you toward flavor combinations that feel just as daring. A bright electric blue frosting, for example, pairs beautifully with a tangy raspberry mousse or a citrus‑infused lemon curd, creating a contrast that makes the palate pop as much as the eyes. If you’re leaning toward a neon pink glaze, think strawberry‑basil or watermelon‑lime sorbet—both bring a refreshing zing that balances the sweetness of the frosting. For deeper neon shades like magenta or orange, consider richer bases such as chocolate ganache with a hint of chili or a caramel‑toffee filling spiked with sea salt. These pairings keep the cake from feeling one‑dimensional and turn the neon palette into a full‑sensory experience. Want more ideas on how to blend flavors with color? Check out our guide on neon frosting tips for additional inspiration. The culinary team at Taste of Home also recommends tasting your frosting and filling together before assembling the cake to ensure the flavors harmonize as well as the colors dazzle.
Neon Cake Presentation: Lighting, Staging, and Themed Accents
Even the most perfectly tinted neon cake can lose its wow factor without the right presentation. Strategic lighting is the secret weapon: a soft wash of black‑light (UV) behind the cake will make fluorescent frosting glow like a disco ball, while a warm amber spotlight can highlight pastel‑based neon shades for a more understated glow. Consider adding themed accents that echo the neon vibe—think edible glitter, metallic dragees, or sugar‑crafted neon signage spelling out a birthday message. For a party‑ready look, place the cake on a mirrored platter; the reflection multiplies the brightness and creates a dynamic visual that draws guests in from every angle. If you’re planning a larger event, think about a tiered display with each level showcasing a different neon hue, tied together with a cascading ribbon of neon‑colored sugar pearls. For more staging ideas, explore our article on party cake ideas, which offers tips on everything from table décor to coordinated dessert tables. Remember, the goal is to let the neon colors shine while keeping the overall aesthetic cohesive and Instagram‑ready.
Neon Color Theory & Pairing Strategies
Understanding why certain hues pop under black‑light while others stay muted is the first step to mastering neon cake design. Neon pigments work best when they sit opposite each other on the color wheel—think electric pink beside vivid teal or bright orange next to lime green. This contrast creates a visual “shock” that draws the eye, especially when the cake is displayed on a dark backdrop. For a more sophisticated look, layer a pastel base (like a soft lavender buttercream) and then accent with neon splashes; the muted foundation lets the bright accents truly shine. When planning your palette, consider the event’s theme—festival‑style parties often favor a full‑spectrum rainbow, whereas a neon‑pink and gold scheme can feel glam and cohesive. Pairing neon frosting with complementary décor, such as metallic sprinkles or black‑light‑reactive edible glitter, adds depth without overwhelming the palate. For additional inspiration on color harmony, check out the guide to bold cake palettes on our site, and see how professional pastry chefs approach neon hues in this article from Serious Eats.
Advanced Neon Frosting Techniques
Beyond basic tinting, advanced frosting methods can elevate a neon cake from eye‑catching to unforgettable. One technique is “color‑burst piping,” where you load a single piping bag with multiple neon shades separated by thin layers of neutral buttercream; as you pipe, the colors swirl together, creating a marbled effect that glows under UV light. Another pro tip is to incorporate a small amount of edible luster dust into the frosting; the dust reflects black‑light, giving the surface a subtle shimmer that mimics a neon sign. For a dramatic finish, try a glossy glaze made from gelatin, corn syrup, and a splash of neon food coloring—this creates a high‑shine surface that refracts light and intensifies the neon vibrancy. When working with these techniques, keep your frosting at a cool but pliable temperature (around 65°F/18°C) to prevent the neon pigments from bleeding. Need a step‑by‑step tutorial? Our advanced frosting guide walks you through each method, and the Food Network offers video demonstrations that illustrate the exact consistency and tools required for flawless neon finishes.
Frequently Asked Questions
What food coloring makes neon colors?
Gel food coloring in “electric” or “neon” formulations — Americolor, Chefmaster, and Wilton all make neon-specific gel lines. Avoid liquid food coloring for neon effects.
Can you make a neon cake without fondant?
Yes — American buttercream takes gel coloring easily and can be smoothed to a near-fondant finish. Most designs above work with buttercream.
What flavors work best with neon cakes?
Any flavor — decoration is independent of the cake base. Popular pairings: lemon cake with neon pink frosting, vanilla with electric blue and purple swirls, chocolate with hot pink and lime drips.
How do I make my cake glow under black light?
Use food-grade UV-reactive edible colors (labeled “fluorescent”), or incorporate tonic water into clear gel glaze layers. Regular neon gel colors alone will not glow under black light.