
If you’re a coffee lover with a sweet tooth, this Tiramisu Cold Brew Coffee Cheesecake recipe is about to become your new favorite indulgence. Blending the deep, bold notes of cold brew with the creamy decadence of cheesecake, this dessert offers a modern twist on the classic tiramisu while staying true to its rich, velvety essence.
What makes this recipe truly special is its balance of flavors and textures. A smooth and airy cream cheese base meets the slightly bitter complexity of coffee, creating a sophisticated yet approachable treat. The buttery crust adds just the right amount of crunch, while a dusting of cocoa powder completes the experience with a nod to traditional tiramisu.
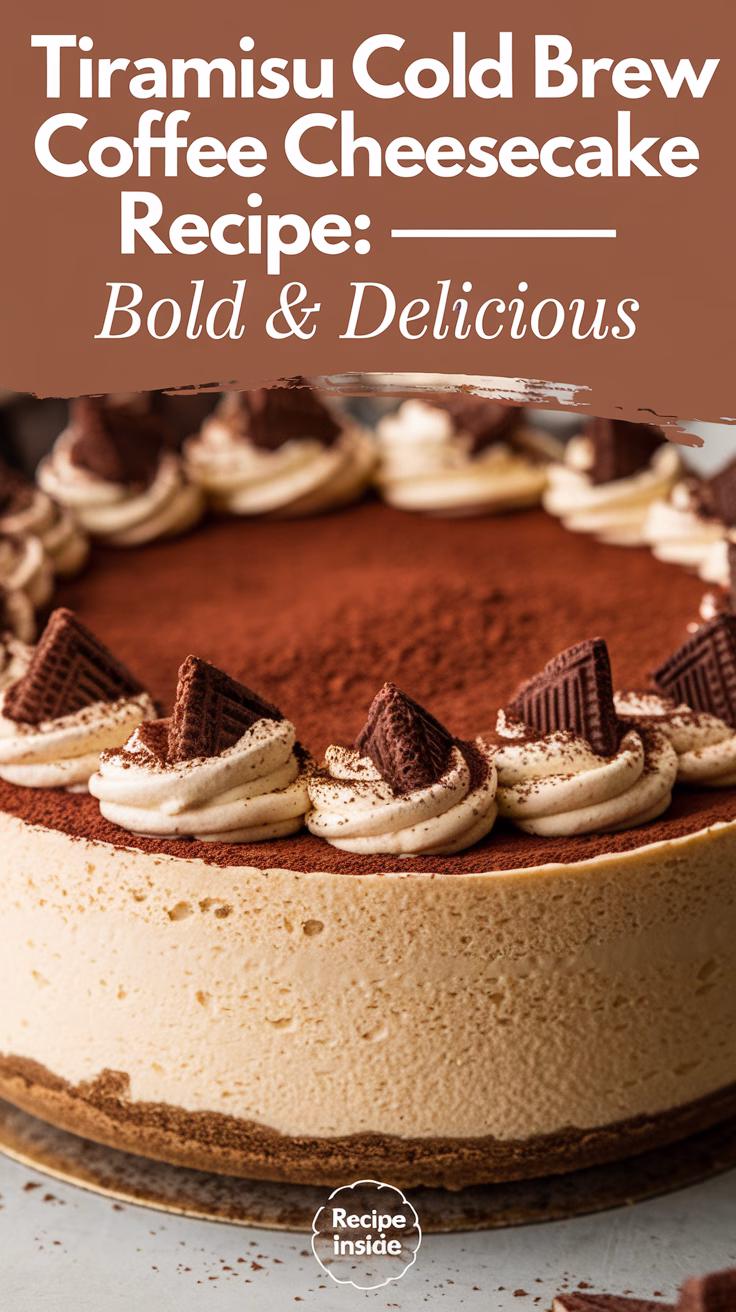
Perfect for special occasions or a luxurious weekend treat, this cheesecake is as impressive to look at as it is to eat. Follow along for a step-by-step guide to crafting this show-stopping dessert that will leave coffee enthusiasts and dessert lovers alike coming back for more!
Whether you’re hosting a gathering or simply indulging, this recipe promises to deliver a decadent experience. For more inspiration, check out this cardamom coffee cake that pairs perfectly with bold flavors.

Tiramisu Cold Brew Coffee Cheesecake
Equipment
- 9-inch springform pan greased
- Electric mixer for whipping the filling
- Spatula for spreading layers
- Refrigerator for chilling the cheesecake
Ingredients
- 1.5 cups graham cracker crumbs or crushed biscotti
- 6 tbsp unsalted butter melted
- 16 oz cream cheese softened
- 0.75 cup powdered sugar
- 1 cup cold brew coffee strongly brewed
- 1 tsp vanilla extract
- 1.5 cups heavy whipping cream cold
- 12 pieces ladyfingers cut in half
- 2 tbsp unsweetened cocoa powder for dusting
Instructions
- In a mixing bowl, combine graham cracker crumbs and melted butter. Press into the bottom of a greased 9-inch springform pan and refrigerate for 10 minutes.
- In a mixing bowl, beat cream cheese and powdered sugar until smooth. Mix in vanilla extract and 1/2 cup cold brew coffee.
- In a separate bowl, whip heavy whipping cream until stiff peaks form. Gently fold it into the cream cheese mixture.
- Dip the ladyfingers briefly into the remaining 1/2 cup of cold brew coffee and layer them over the crust.
- Spread the cheesecake mixture evenly over the ladyfinger layer.
- Cover and refrigerate for at least 4 hours or until firm.
- Before serving, dust the top of the cheesecake with cocoa powder.
- Slice and enjoy chilled.
Notes
- Optional Equipment: A fine-mesh sieve for evenly dusting cocoa powder.
- Customization: Add coffee liqueur to the soaking coffee for extra flavor.
- Storage: Store in the refrigerator for up to 3 days.
- Serving Tip: Let sit at room temperature for 5 minutes before slicing for a smoother cut.
Nutrition
Ingredients and Essential Tools
Crafting a dessert masterpiece starts with the right ingredients and tools. The foundation of this treat lies in its components, from the crust to the filling, and the precision of the equipment used. Let’s break it down.
Key Ingredients for the Shortbread Crust and Base
The crust is the backbone of any great dessert. For this recipe, crushed ladyfingers add a classic touch, while unsalted butter and light brown sugar create a rich, crumbly texture. Here’s what you’ll need:

| Ingredient | Quantity |
|---|---|
| Crushed ladyfingers | 1 ⅓ cups (150g) |
| Unsalted butter | 4 tablespoons (56g) |
| Light brown sugar | 2 tablespoons (30g) |
For the filling, mascarpone and room temperature cream cheese are essential. They ensure a smooth, creamy texture. Heavy cream adds richness, while powdered sugar balances the flavors.
Must-Have Kitchen Tools and Equipment
Precision is key in baking. A springform pan ensures easy removal, while a kitchen scale guarantees accurate measurements. A sturdy mixing bowl and a reliable whisk are also must-haves.
“The right tools don’t just make the process easier—they elevate the final result.”
For more inspiration, check out this Pistachio Tiramisu, a no-bake dessert that combines creamy mascarpone with nutty pistachios for a unique twist.
Step-by-Step Preparation Process
The secret to this dessert lies in its meticulous preparation. Each step, from the crust to the filling, requires attention to detail. Follow this guide to achieve a flawless result that’s as impressive as it is delicious.
Preparing the Crust and Base
Start by pre-baking the shortbread crust for a stable base. Combine crushed ladyfingers, unsalted butter, and light brown sugar in a mixing bowl. Press the mixture firmly into a springform pan. Bake at 350°F for 10 minutes to set the crust. This step ensures a sturdy foundation for the layers to come.
Mixing the Cheesecake Filling
In a large mixing bowl, beat cream cheese and sugar until smooth. Avoid overmixing to prevent excess air. Gradually add eggs, one at a time, to maintain a dense texture. Divide the batter into two portions: one with vanilla and the other with a bold coffee flavor. This dual approach creates a rich, layered filling.
Layering Coffee-Soaked Ladyfingers
Lightly dip ladyfingers in a coffee mixture, ensuring they’re moist but not soggy. Alternate layers of the soaked ladyfingers with the vanilla and coffee batters. Tap the pan gently to remove air bubbles. This technique ensures even layers and a professional finish.
“Precision in every step transforms a simple dessert into a masterpiece.”
| Step | Key Detail |
|---|---|
| Crust | Pre-bake for 10 minutes at 350°F |
| Filling | Mix cream cheese and sugar until smooth |
| Layering | Alternate coffee-soaked ladyfingers with batter |
Every minute counts in this process. From the crust to the final layer, following each step ensures a dense yet creamy result. The effort is worth it for a dessert that’s both bold and balanced.
Expert Baking Tips and Techniques
Mastering the art of baking requires more than just following a recipe—it’s about technique. Whether you’re a seasoned baker or a beginner, these expert tips will help you avoid common pitfalls and achieve flawless results every time.
How to Avoid Cracks in Your Dessert
Cracks can ruin the look of your creation, but they’re easy to prevent. One simple tip is to mix ingredients just until they’re incorporated. Overmixing can introduce too much air, leading to cracks during baking.
Another trick is to tap the pan gently on the counter. This helps remove air pockets. Make sure to do this before placing it in the oven. A water bath can also help maintain an even, steady temperature, preventing abrupt changes that cause cracks.
Proper Mixing and Room Temperature Tips
Room temperature ingredients are crucial for a smooth batter. Cold cream cheese or eggs can lead to lumps. Always note the oven’s temperature variations using a thermometer for precision.
For the soaking step, switch to strong coffee to emphasize flavor without overdoing it. After baking, cool the dessert gradually by leaving it in the oven with the door ajar. Finally, chill it in the fridge overnight for the best texture.
“The right techniques don’t just prevent mistakes—they elevate your baking to a whole new level.”
| Tip | Key Detail |
|---|---|
| Avoid Cracks | Mix just until ingredients are incorporated |
| Proper Mixing | Use room temperature ingredients |
| Cooling | Leave in the oven with the door ajar |
For more inspiration, try this hazelnut latte recipe to pair with your dessert. Its bold espresso flavors complement the richness of this treat perfectly.
Tiramisu Cold Brew Coffee Cheesecake Recipe: Detailed Guide
Unlock endless possibilities by experimenting with creative twists on a classic dessert. Whether you’re a seasoned baker or a beginner, these variations and customizations let you make this treat uniquely yours.
Creative Variations to Explore
For a simpler approach, try a no-bake version. It skips the oven but keeps the rich flavors intact. Swap the mascarpone cream for a whipped cream blend to lighten the texture. Adjust the coffee intensity to craft a personalized coffee cheesecake that suits your taste.
Add extra layers of coffee-soaked ladyfingers to fill the dessert with bold flavor. Top with a dusting of cocoa powder for a classic finish. For a deeper taste, experiment with coffee liqueur or additional cocoa elements.
Customization Tips from Social Media
Social media platforms like TikTok and Instagram are brimming with creative ideas. Users recommend adding a hint of cocoa to the mascarpone cream for depth. Others suggest topping the dessert with chocolate shavings or fresh berries for a vibrant touch.
“Customizing your dessert lets you stay true to the essence of tiramisu cheesecake while adding your personal flair.”
| Customization | Effect |
|---|---|
| No-bake version | Simplifies the process |
| Extra ladyfingers | Adds bold coffee flavor |
| Cocoa powder topping | Enhances visual appeal |
For more inspiration, check out these delicious ways to use tea in your. They’re perfect for experimenting with unique flavors.
Storage, Serving, and Presentation Ideas
Elevate your dessert game with smart storage and stunning presentation. Whether you’re preparing for a party or saving leftovers, these tips ensure your creation stays fresh and looks incredible.
Refrigeration, Freezing, and Shelf Life
To maintain the perfect texture, store your dessert in the fridge for up to 3 days. For longer storage, slice it into individual portions and freeze. Wrapped tightly, it can last up to 3 months. Let it thaw in the fridge for a few hours before serving.
When transferring from the springform pan, use a spatula to lift it gently onto a serving dish. This prevents cracks and keeps the layers intact. For more tips on maintaining freshness, check out this guide on how to store and serve desserts.
Presentation Tips for an Impressive Dessert
Presentation is key to making your dessert stand out. Dust the top with cocoa powder for a classic touch. Add a few decorative ladyfinger pieces for a bold, modern look. Keep the plating minimalist to let the flavors shine.
Pair each slice with a cup of coffee for a complete experience. The combination of creamy cheese and bold flavors makes it a gourmet food delight. Serve at room temperature for the best taste.
“A well-presented dessert isn’t just food—it’s an experience.”
| Storage Method | Duration |
|---|---|
| Refrigeration | Up to 3 days |
| Freezing | Up to 3 months |
Conclusion
This dessert is a bold blend of tradition and innovation. Its unique fusion of flavors makes it a must-try for anyone seeking a memorable treat. Following the precise recipe steps ensures a flawless result, from the mix of ingredients to the final presentation.
The careful balance of sugar, cream, and butter creates a rich, indulgent base. Expert tips, like proper cooling techniques, help avoid cracks and maintain a smooth texture. Every element, from the layers to the subtle dusting of cocoa, is designed for a bold, unforgettable experience.
Feel free to experiment while staying true to the guided process. Share your results and join the community of modern culinary explorers. This dessert isn’t just food—it’s a celebration of creativity and flavor.
FAQ
Can I use regular coffee instead of cold brew for this dessert?
Absolutely! While cold brew adds a unique smoothness, strong brewed coffee works just as well for soaking the ladyfingers.
How long should the cream cheese be at room temperature before mixing?
Let it sit out for about 30-45 minutes. This ensures a smooth, lump-free filling that blends perfectly with the mascarpone.
Can I substitute the ladyfingers with another ingredient?
Yes, sponge cake or even graham crackers can be used as a base layer, though the texture and flavor will vary slightly.
How do I prevent cracks from forming on the top?
Avoid overmixing the batter and bake in a water bath. Cooling it gradually in the oven with the door slightly open also helps.
Can I make this dessert ahead of time?
Definitely! It tastes even better after chilling overnight, allowing the flavors to meld together beautifully.
What’s the best way to store leftovers?
Keep it covered in the fridge for up to 3 days. For longer storage, freeze individual slices wrapped tightly in plastic wrap.
Can I add alcohol to this recipe?
Yes! A splash of coffee liqueur or Marsala wine in the coffee soak can elevate the flavor profile.
Is it necessary to use a springform pan?
A springform pan is ideal for easy removal, but a regular cake pan lined with parchment paper can also work.
So good! My new go-to dessert recipe.