

Party desserts have reached a whole new dimension with UV-reactive frosting, the culinary innovation that transforms ordinary treats into glowing wonders under blacklight. This isn’t just regular frosting—it’s an interactive visual experience that remains hidden until the perfect moment. When the blacklights switch on, once-ordinary cupcakes and cakes become the centerpiece of any celebration, creating those jaw-dropping moments that guests remember long after the party ends.
UV-reactive frosting has surged in popularity for themed events ranging from cosmic birthday celebrations to electric dance parties and spooky Halloween gatherings. The science behind the glow involves special pigments that absorb invisible ultraviolet light and emit it as visible light—creating that magical illuminated effect without any artificial ingredients that compromise taste. The best part? Creating this show-stopping frosting at home is surprisingly simple, requiring just a few specialty ingredients and basic baking tools.

UV-Reactive Frosting
Equipment
- Mixing bowl
- Electric mixer
- Piping bag
Ingredients
- 1 cup unsalted butter softened
- 3 cups powdered sugar
- 1/4 cup tonic water contains quinine for UV-reactive glow
- 1 tsp vanilla extract
- 1/4 tsp vitamin B2 powder optional, enhances UV glow
- 3 drops neon food coloring pink, blue, green, or yellow
Instructions
- In a mixing bowl, beat the softened butter until smooth and creamy.
- Gradually add the powdered sugar, mixing until fully incorporated.
- Slowly pour in the tonic water and vanilla extract, continuing to mix until the frosting is light and fluffy.
- Add the vitamin B2 powder, if using, and mix until combined.
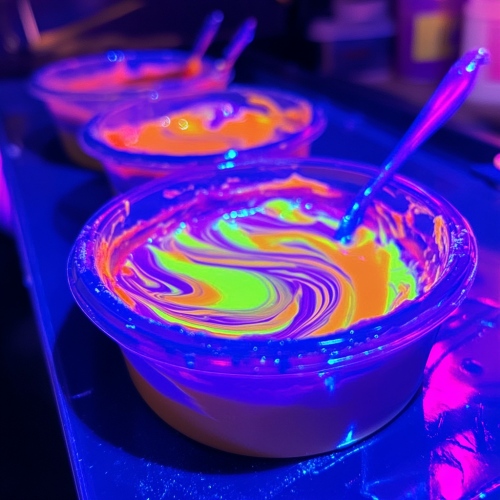
- Divide the frosting into separate bowls and tint each portion with different neon food colors.
- Use a piping bag to decorate cakes, cupcakes, or cookies. Serve under blacklight for a glowing effect!
Notes
- Storage: Store in an airtight container in the refrigerator for up to 5 days. Bring to room temperature before using.
- UV Effect: Tonic water and vitamin B2 both enhance the glow under blacklight. For the best effect, use a strong UV light.
- Customization: Mix different neon food colors for a galaxy or rainbow effect.
The Illuminating History of UV-Reactive Desserts
The journey of UV-reactive food products began in unexpected places—theatrical productions, nightclubs, and rave events of the 1990s. Initially, these glowing elements were primarily used for decorative drinks and simple garnishes that added visual flair to the nightlife scene. Food scientists and creative mixologists were the first to experiment with UV-reactive properties in consumable products, focusing primarily on liquid applications.
It wasn’t until the early 2010s that these glowing ingredients made their way into mainstream baking. The rise of immersive themed events, Instagram-worthy food creations, and interactive dining experiences created the perfect environment for UV-reactive frosting to flourish. By 2025, what was once a niche specialty technique has become an established trend in creative baking, with dedicated product lines and enthusiast communities sharing tips and techniques.
The crossover from nightlife novelty to home baking staple was largely driven by social media, where videos of glowing desserts generated millions of views. Baking influencers and professional pastry chefs began experimenting with UV-reactive ingredients, creating must-try glow in the dark desserts that captivated audiences worldwide. Today, UV-reactive frosting has secured its place as the go-to choice for anyone looking to create unforgettable party desserts with minimal effort.

What Makes UV-Reactive Frosting Special
UV-reactive frosting stands apart from other novelty desserts because it delivers on both visual impact and taste. Unlike many food gimmicks that sacrifice flavor for appearance, this glowing frosting maintains delicious buttery flavor while adding that wow factor. The reaction works through special food-grade pigments that respond specifically to blacklight wavelengths—creating vivid colors that seem to glow from within.
The psychological impact of UV-reactive desserts can’t be overstated. There’s something about the surprise reveal when the lights go down and the blacklights come on that creates genuine moments of delight. Children and adults alike experience that momentary wonder when everyday treats transform into luminous confections. This element of surprise makes UV-reactive frosting particularly perfect for milestone celebrations where creating memorable moments matters.
Beyond the visual appeal, UV-reactive frosting offers practical advantages for themed parties. It allows hosts to coordinate desserts with neon decorations, glow sticks, and other blacklight elements for a cohesive atmosphere. For those planning cosmic, electric, or Halloween parties, this frosting creates continuity in the theme from decorations to refreshments. If you’re looking to create a firefly jar cake that glows, UV-reactive frosting is the perfect starting point.
Essential Ingredients and Equipment
Creating UV-reactive frosting at home requires a specific set of ingredients that work together to achieve that perfect glow effect. Here’s everything you’ll need to have on hand before starting:
Essential Ingredients:
- UV-reactive food coloring (available at specialty baking stores or online)
- 7 cups confectioners’ sugar (powdered sugar)
- 1 cup vegetable shortening
- 1 teaspoon clear vanilla extract
- 5 tablespoons tonic water (contains quinine which enhances the glow)
- Pinch of salt
Equipment Needed:
- Stand mixer or hand mixer
- Mixing bowls
- Piping bags and tips
- Offset spatula
- Blacklight (for testing the glow effect)
- Airtight storage containers
When selecting UV-reactive food coloring, look for high-quality brands specifically formulated for baking applications. These colorings are designed to withstand heat without degrading and maintain their reactive properties even after being mixed into frosting. The clear vanilla extract is crucial—regular brown vanilla will dull the colors and reduce the glow effect. You can also submit your favorite dessert recipe using these special ingredients to be featured on our site!
Step-by-Step UV-Reactive Frosting Instructions
Follow this straightforward process to create perfect UV-reactive frosting every time:
- Prepare your base: In a large mixing bowl, combine the vegetable shortening and clear vanilla extract. Beat on medium speed until smooth and creamy, about 2 minutes.
- Add dry ingredients: Gradually add the confectioners’ sugar, one cup at a time, mixing on low speed after each addition until fully incorporated. Add a pinch of salt to balance sweetness.
- Introduce the UV element: Add the UV-reactive food coloring drop by drop until you reach your desired color intensity. Remember that colors often appear different under normal light than they do under blacklight, so test as you go.
- Adjust consistency: Gradually add tonic water, one tablespoon at a time, until the frosting reaches a smooth, pipeable consistency. The quinine in tonic water enhances the glow effect under blacklight.
- Test the glow: Turn off regular lights and test a small amount of frosting under blacklight to check the glow intensity. Adjust with more coloring if needed.
- Apply to desserts: Use piping bags to apply the frosting to completely cooled cakes or cupcakes. For best results, create patterns or designs that will showcase the glow effect.
- Chill to set: Place frosted desserts in the refrigerator for at least 30 minutes before serving to allow the frosting to set properly.
For an extra dramatic effect, you can create a tonic water glaze by mixing clear gelatin with tonic water and allowing it to cool slightly before drizzling over your frosted treats. This additional layer intensifies the glow effect and creates a multi-dimensional appearance. Just like with a glowing core cake recipe, the layers of glow create depth and visual interest.

Complete UV-Reactive Frosting Recipe
Prep Time: 15 minutes
Total Time: 15 minutes
Yield: Enough frosting for 24 cupcakes or one 9-inch layer cake
Difficulty Level: Easy
Nutritional Information (per serving, approximately 2 tablespoons):
Calories: 165
Total Fat: 7g
Saturated Fat: 2g
Cholesterol: 0mg
Sodium: 15mg
Total Carbohydrates: 28g
Dietary Fiber: 0g
Sugars: 27g
Protein: 0g
Ingredients:
- 7 cups confectioners’ sugar, sifted
- 1 cup vegetable shortening
- 1 teaspoon clear vanilla extract
- 5 tablespoons tonic water
- 1/4 teaspoon salt
- UV-reactive food coloring (amount varies by desired color intensity)
Equipment:
- Stand mixer with paddle attachment or hand mixer
- Large mixing bowl
- Rubber spatula
- Measuring cups and spoons
- Sifter for confectioners’ sugar
- Piping bags and tips
- Blacklight for testing
Instructions:
- In a large bowl, beat the vegetable shortening on medium speed until creamy, about 2 minutes.
- Add clear vanilla extract and salt, beating until combined.
- Gradually add sifted confectioners’ sugar, one cup at a time, mixing on low speed after each addition until completely incorporated.
- Once all sugar is incorporated, add UV-reactive food coloring drop by drop, mixing thoroughly between additions until desired color is achieved.
- Add tonic water one tablespoon at a time until frosting reaches ideal consistency—firm enough to hold shape but soft enough to pipe smoothly.
- Beat on medium-high speed for an additional 2 minutes until frosting is light and fluffy.
- Test a small amount under blacklight to confirm glow effect.
- Transfer to piping bags and decorate cooled desserts as desired.
Recipe Notes:
- For maximum glow effect, use clear vanilla extract rather than brown vanilla.
- Tonic water contains quinine which enhances the UV-reactive properties.
- If making ahead, store in airtight containers away from direct light.
- Frosting can be refrigerated for up to 1 week or frozen for up to 3 months.
- Let frozen frosting thaw completely in the refrigerator before re-whipping to restore texture.
Creative Variations and Pro Tips
Take your UV-reactive frosting to the next level with these creative variations that will dazzle your party guests. Mixing multiple UV-reactive colors creates stunning rainbow effects that glow with different intensities. Try creating an ombre effect by gradually blending colors from dark to light—the result under blacklight is particularly impressive.
Add complementary elements that enhance the glow effect. Edible glitter designed for baking can intensify light reflection, making your frosting sparkle and glow simultaneously. White chocolate shavings appear to float magically above glowing frosting when illuminated by blacklight. For Halloween parties, create spooky designs that come to life only under UV light, adding an element of surprise like those found in Sour Patch Kids glow-ups.
Professional bakers recommend these tips for perfect results every time:
- Always test your UV-reactive food coloring under blacklight before adding to your frosting base.
- Temperature matters—keep your frosting cool for the brightest glow effect.
- Layer different intensities of the same color to create depth in your designs.
- Use contrast to your advantage—combine areas of UV-reactive frosting with non-reactive elements.
- Create hidden messages or designs that only appear under blacklight for a surprise reveal.
When working with UV-reactive frosting, timing is important. The glow effect is most intense when the frosting is fresh, so plan your big reveal accordingly. If you’re preparing desserts for an evening event, frost your treats the same day for maximum impact. For parties with younger guests, consider a dramatic “lights-off” moment when serving dessert to showcase the full glowing effect.
Storing and Preserving UV-Reactive Frosting
Proper storage is crucial for maintaining both the texture and glow effect of UV-reactive frosting. For short-term storage of unfrosted desserts, place them in airtight containers in the refrigerator, where they’ll stay fresh for up to 5 days. Keep containers away from direct light sources, as UV-reactive pigments can gradually fade with prolonged exposure to light.
When storing UV-reactive frosting itself, transfer any unused portion to an airtight container and refrigerate for up to one week. Before using refrigerated frosting, allow it to come to room temperature naturally (about 30 minutes) and then re-whip for a few minutes to restore its fluffy texture. This prevents the frosting from becoming too stiff when piping.
For longer storage periods, UV-reactive frosting can be frozen for up to three months. Place the frosting in freezer-safe containers, leaving about an inch of space at the top for expansion. When ready to use, thaw completely in the refrigerator overnight rather than at room temperature to prevent texture changes. After thawing, whip the frosting again to incorporate any separated fats and restore the original consistency.
When storing fully decorated desserts with UV-reactive frosting, the glow effect may diminish slightly over time, so they’re best enjoyed within 2-3 days of preparation. For special occasions, consider creating neon layer cakes that glow just a day before your event for the most dramatic visual impact.


Frequently Asked Questions About UV-Reactive Frosting
Here are answers to common questions about working with UV-reactive frosting:
Is UV-reactive food coloring safe to consume?
Yes, UV-reactive food colorings approved for culinary use are made with food-grade ingredients that meet FDA safety standards. Always purchase from reputable suppliers and check for proper food-grade labeling.
How does UV-reactive frosting actually work?
The food coloring contains phosphors that absorb energy from ultraviolet light (blacklight) and re-emit it as visible light—creating the glowing effect while remaining completely invisible under normal lighting.
Where can I buy UV-reactive food coloring?
Specialty baking supply stores, online retailers like Amazon, and dedicated cake decorating websites sell food-grade UV-reactive colorings. Look for brands specifically marketed for culinary use rather than craft purposes.
Can I make UV-reactive frosting without tonic water?
Yes, though tonic water enhances the glow effect. If omitting it, substitute with milk or clear water to achieve proper consistency, but expect a slightly less intense glow.
Why isn’t my frosting glowing as brightly as expected?
Several factors can affect glow intensity: insufficient UV-reactive coloring, using brown vanilla instead of clear, expired coloring products, weak blacklight source, or room with too much ambient light. Try increasing the amount of coloring or using a stronger blacklight.
If you’re interested in helping grow our community of dessert enthusiasts, submit your favorite local dessert shop to our business directory so others can discover amazing places to find baking supplies and inspiration!
Light Up Your Next Celebration
UV-reactive frosting transforms ordinary desserts into conversation pieces that leave lasting impressions. The simple joy of watching faces light up (literally!) when the blacklights come on makes the minimal extra effort completely worthwhile. With just a few specialty ingredients and basic techniques, you can create professional-quality glowing desserts that set your parties apart.
Whether you’re planning a cosmic birthday bash, an electric dance party, or a glowing Halloween celebration, UV-reactive frosting offers that perfect blend of visual spectacle and delicious taste. The versatility of this technique allows for endless creative possibilities—from subtle accents to fully illuminated showstoppers. Don’t be surprised when guests ask for your secret or when your UV-reactive treats become the most requested party feature for future gatherings!
Ready to venture beyond frosting? Expand your glowing dessert repertoire by exploring additional techniques like illuminated fillings, glowing glazes, and reactive cake batters. The world of blacklight-reactive baking continues to evolve with new products and techniques emerging regularly. With the fundamental skills you’ve learned here, you’re perfectly positioned to create your own signature glowing desserts that will dazzle guests for years to come.