
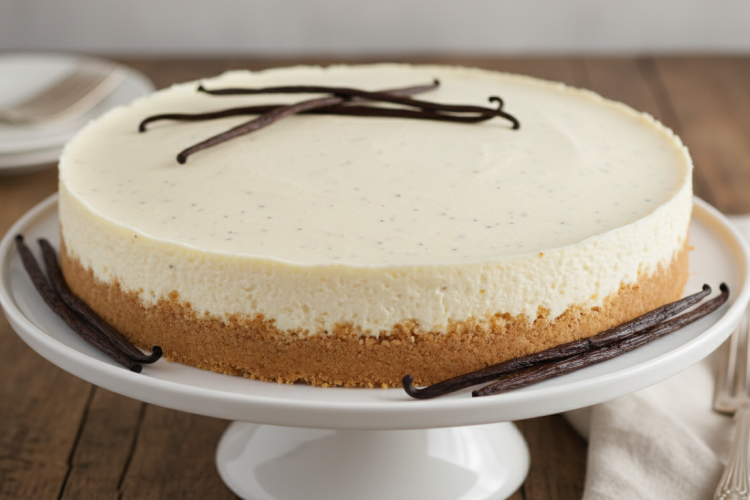
A classic vanilla cheesecake is a rich, dense, cream cheese-based dessert baked in a graham cracker crust, flavored with vanilla, and finished with a smooth, crack-free top. The key is using full-fat cream cheese at room temperature, baking in a water bath, and cooling gradually to prevent cracks.
Why This Is the Only Vanilla Cheesecake Recipe You Need
There are hundreds of cheesecake recipes online, but most either skip critical steps (the water bath), use shortcuts that compromise texture (sour cream substitutes), or bury the vanilla flavor under too many competing ingredients. This recipe focuses on one thing: the perfect classic vanilla cheesecake — silky, dense, barely sweet, with a genuine vanilla presence throughout.
This is a New York-style cheesecake in spirit, but without the sour cream topping that defines that specific variety. If you want that version, check out our New York cheesecake with sour cream topping. This recipe is the foundation — master it and every variation becomes easy.

Ingredients
Graham Cracker Crust
- 1 1/2 cups graham cracker crumbs (about 12 full crackers)
- 3 tablespoons granulated sugar
- 6 tablespoons unsalted butter, melted
- Pinch of salt
Vanilla Cheesecake Filling
- 32 oz (4 blocks) full-fat cream cheese, at room temperature — this is non-negotiable
- 1 1/4 cups granulated sugar
- 1/4 cup sour cream — adds slight tang and helps the texture
- 2 teaspoons pure vanilla extract — use real vanilla, not imitation
- 1 tablespoon vanilla bean paste — optional, but adds beautiful specks and deeper flavor
- 4 large eggs, at room temperature
- 2 tablespoons all-purpose flour — stabilizes the filling slightly
- Pinch of salt
According to the Serious Eats food science breakdown on cheesecake, room-temperature cream cheese is essential — cold cream cheese does not blend smoothly and creates lumps that no amount of mixing can fully resolve.

Equipment
- 9-inch springform pan — do not use a regular cake pan
- Stand mixer or hand mixer — for lump-free batter
- Large roasting pan — for the water bath
- Heavy-duty aluminum foil — to wrap the springform and keep water out
- Instant-read thermometer — optional but useful for doneness testing
- Rubber spatula — for scraping the bowl
How to Make Classic Vanilla Cheesecake: Step by Step
Step 1: Make the Graham Cracker Crust
Preheat your oven to 325 degrees F (165 degrees C). Combine graham cracker crumbs, sugar, melted butter, and salt in a bowl. Stir until the mixture resembles wet sand and holds together when pressed. Press firmly into the bottom of a 9-inch springform pan, working the crumbs up the sides about 1 inch. Use the flat bottom of a measuring cup or glass to pack it tightly.
Bake the crust alone for 10 minutes, then remove and let cool while you prepare the filling. This pre-baking step sets the crust so it does not get soggy when the filling goes in.
Step 2: Make the Filling
Beat the cream cheese on medium speed for 2-3 minutes until completely smooth — no lumps. Add the sugar and beat another 2 minutes. Add sour cream, vanilla extract, vanilla bean paste, flour, and salt. Mix just until combined.
Add the eggs one at a time, mixing on low speed after each addition just until incorporated. This is the most important step: do not overmix after adding eggs. Overmixing incorporates air, which expands in the oven and causes cracks as it deflates while cooling.

Step 3: Set Up the Water Bath
Wrap the outside of the springform pan tightly in two layers of heavy-duty aluminum foil, bringing it up past the halfway point of the pan. This prevents water from seeping in during the water bath bake. Place the wrapped pan into a large roasting pan.
Pour the cheesecake filling over the cooled crust and smooth the top with a spatula. Tap the pan gently on the counter a few times to release any air bubbles. Transfer the roasting pan to the oven rack, then pour about 1 inch of hot water into the roasting pan around the springform.

Step 4: Bake Low and Slow
Bake at 325 degrees F for 60-70 minutes. The cheesecake is done when the edges are set and slightly puffed, but the center 2-3 inches still jiggles when you gently shake the pan. It will look underdone — that is correct. It firms up as it cools.
If you have a thermometer, the internal temperature should be 150-155 degrees F when done. Above 160 degrees and you risk a grainy texture.
Step 5: Cool Gradually — This Is Critical
Turn off the oven and crack the door open about 1 inch. Leave the cheesecake inside for 1 hour. This gradual cooling prevents the rapid temperature drop that causes cracking. After 1 hour, remove from the oven and water bath. Run a thin knife or offset spatula around the edge of the pan to release it from the sides.
Let cool to room temperature on a wire rack — about 1-2 more hours. Then cover loosely and refrigerate for at least 6 hours, preferably overnight. A cheesecake cut before it is fully set will be soft and will not hold its shape when sliced.

How to Serve and Top a Classic Vanilla Cheesecake
A classic vanilla cheesecake is beautiful on its own, but toppings take it to another level. Here are the most popular options:
- Fresh berries — strawberries, blueberries, or raspberries arranged on top just before serving
- Berry compote — cook 1 cup berries with 2 tablespoons sugar and 1 teaspoon lemon juice until jammy; cool and spoon over
- Whipped cream — pipe rosettes around the edge for a classic presentation
- Caramel sauce — drizzle over slices just before serving for a rich finish
- Lemon curd — spread a thin layer on top for a bright, citrus contrast
To get clean slices, use a sharp knife dipped in hot water and wiped dry between each cut. This is the professional technique that prevents the filling from dragging and sticking to the blade.

Why Use a Water Bath?
The water bath — also called a bain-marie — is the single most important technique for a professional-looking cheesecake. Here is why it matters:
- Even heat distribution: Water conducts heat more evenly than air, protecting the delicate egg proteins from hot spots that cause curdling
- Moisture regulation: Steam from the water bath keeps the oven environment humid, preventing the top of the cheesecake from drying out and cracking
- Slower, gentler baking: Water cannot exceed 212 degrees F, which moderates the oven temperature around the pan and results in the silky, dense texture that defines a great cheesecake
If foil-wrapping feels fussy, a good alternative is to place a pan of hot water on the rack below the cheesecake. It is not quite as effective but is much better than no water bath at all.
Cheesecake Variations to Try Next
Once you have nailed the classic, here are some variations worth exploring:
- Strawberry Cheesecake — same base, topped with a fresh strawberry glaze
- Oreo Cheesecake — Oreo crust and crushed cookies folded into the filling
- Easy No-Bake Cheesecake — when you do not want to turn on the oven
- Butterbeer Cheesecake — butterscotch and butter rum flavors in a creative twist
Storage and Make-Ahead Tips
Refrigerator: Store covered for up to 5 days. The texture firms and flavor deepens after 24-48 hours.
Freezer: Freeze the whole cake or individual slices uncovered until solid, then wrap tightly in plastic wrap followed by foil. Keeps up to 2 months. Thaw overnight in the refrigerator.
Make-ahead: Can be made up to 3 days before serving. Add fresh toppings just before serving.

Nutrition Information (Per Slice)
Based on 12 servings from one 9-inch cheesecake, without toppings:
- Calories: approximately 420
- Total Fat: 30g (Saturated Fat: 17g)
- Carbohydrates: 32g (Sugar: 24g)
- Protein: 7g
- Cholesterol: 140mg
- Sodium: 310mg
Cheesecake is a rich dessert by nature — full-fat cream cheese and eggs are what create that signature dense, silky texture. If you’re looking for a lighter option, our no-bake cheesecake uses whipped cream to reduce some of the density while still delivering great flavor.
Troubleshooting: Why Did My Cheesecake Crack?
- Overmixing after eggs: Mix eggs on low, just until combined — excess air causes cracking.
- Overbaking: Pull it when the center still jiggles; it firms as it cools.
- Rapid cooling: Cool gradually in the turned-off oven, then at room temperature before refrigerating.
- No water bath: Dry oven heat causes the top to crack — always use the water bath.
- Springform sides sticking: Run a knife around the edge immediately after baking so it can contract freely.
How to Choose the Best Vanilla for Cheesecake
Vanilla is the star of this cheesecake — not a background note — so it is worth spending a moment on which type to use and why it matters.
Pure Vanilla Extract
The baseline. Made by macerating vanilla beans in alcohol, pure vanilla extract has a warm, rounded flavor that works well in any baked dessert. Use 2 teaspoons minimum in this recipe. Imitation vanilla (made with synthetic vanillin) is noticeably flatter and thinner in flavor — avoid it for a recipe where vanilla is the feature.
Vanilla Bean Paste
Vanilla bean paste is a concentrated paste made from vanilla bean extract and the actual seeds scraped from the pod. It delivers intense flavor and the iconic speckled look that signals real vanilla to anyone looking at a slice. Use 1 tablespoon in place of — or in addition to — vanilla extract. It is the single best upgrade you can make to this recipe.
Vanilla Beans (Whole Pod)
Split a whole vanilla bean lengthwise and scrape the seeds directly into the cream cheese mixture. One pod is roughly equivalent to 1 tablespoon of paste. The pods themselves can be submerged in a jar of sugar to make vanilla sugar, which you can then use as a partial replacement for plain granulated sugar in the crust or filling.
Graham Cracker Crust Variations
The standard graham cracker crust is a neutral base that complements vanilla beautifully, but here are some variations worth trying depending on the occasion:
- Digestive biscuit crust: Common in UK-style cheesecakes. Slightly less sweet and more buttery than graham crackers — excellent with vanilla.
- Vanilla wafer crust: Use crushed Nilla Wafers in place of graham crackers for a more pronounced vanilla flavor in the base itself.
- Speculoos (Biscoff) crust: Adds a warm spiced undertone — cinnamon, cardamom, ginger — that pairs surprisingly well with a smooth vanilla filling.
- Shortbread crust: Press crushed shortbread cookies mixed with butter for a richer, more crumbly base that complements the dense filling.
- Brownie base: Bake a thin brownie layer in the springform, let it cool, then pour the cheesecake filling on top for a two-layer dessert. Pairs beautifully with our fudgy brownie recipe.
Serving Suggestions and Pairing Ideas
Classic vanilla cheesecake is versatile enough to anchor a dessert table or work as an elegant dinner-party finish. Here is how to present it for different occasions:
- Dinner party: Serve at room temperature (pulled from fridge 20-30 minutes before serving), sliced clean with a hot knife, with a berry compote and a few mint leaves on each plate.
- Birthday: Pipe whipped cream rosettes around the edge, top the center with fresh strawberries, and add candles. Pairs well with ideas from our birthday cake ideas guide if you want to offer two dessert options.
- Everyday: A slice straight from the fridge with a spoonful of store-bought jam or a drizzle of honey is perfect. No garnish needed — the cheesecake speaks for itself.
- Cheesecake bar: Set out the plain cheesecake alongside small bowls of different toppings (caramel, berry sauce, crushed cookies, whipped cream) and let guests build their own plate. This works well for casual gatherings.
Frequently Asked Questions
Can I use low-fat cream cheese?
Technically yes, but the result will be noticeably less dense and rich, with a slightly grainy texture. Full-fat cream cheese is what creates the signature texture. For a lighter result, our no-bake cheesecake made with whipped cream is a better choice.
How do I know when my cheesecake is done?
The edges should look set and slightly puffed, while the center 2-3 inches still wobbles when you gently shake the pan. If the whole thing looks solid and does not move, it is likely overbaked. Target an internal temperature of 150-155 degrees F.
Can I skip the water bath?
You can, but you significantly increase the risk of cracking. At minimum, place a pan of hot water on the rack below the cheesecake. It helps considerably even if it is not the full water bath setup.
How long can I keep cheesecake in the fridge?
Up to 5 days covered in the refrigerator. Days 2 and 3 are often the best — the texture firms and the flavors meld. Hold off on fresh fruit toppings until just before serving.