
The authentic New York cheesecake with sour cream topping is a two-stage baked cheesecake: a dense cream cheese filling baked until just set, then finished with a sweetened sour cream layer that bakes for an additional 10 minutes to create the smooth, tangy gloss that defines the classic New York deli-style version.
What Makes This New York Cheesecake Different
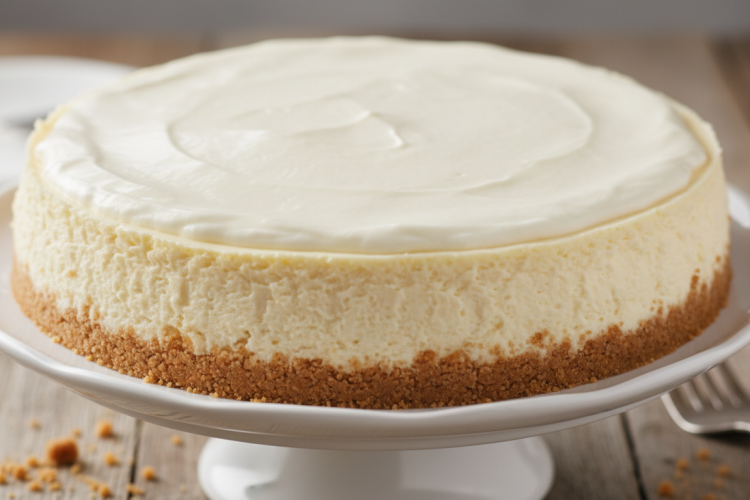
Walk into any legendary New York deli — Junior’s, Carnegie, the old Lindy’s — and the cheesecake that slides onto your plate shares a defining characteristic that most home recipes skip entirely: a thin, glossy, lightly sweetened sour cream topping baked right onto the cake. This isn’t just decoration. It seals the top, prevents cracking, adds a subtle tang that cuts through the richness of the filling, and gives the cheesecake that unmistakable sheen you see in every deli photograph.
Most recipes labeled “New York style” stop at the cream cheese filling. This recipe goes the full distance, including the sour cream finish that separates a truly authentic NY cheesecake from every other cream cheese-based dessert. If you’ve ever wondered why your homemade cheesecake tastes close but not quite right, this topping is likely the missing piece.

Ingredients You Need
Quality matters more in cheesecake than almost any other dessert. Every ingredient is front and center — there’s nowhere to hide. Use full-fat everything and bring your dairy to room temperature before you start.
For the Graham Cracker Crust
- 2 cups (200g) graham cracker crumbs (about 14–15 full sheets)
- 1/4 cup (50g) granulated sugar
- 1/2 cup (113g) unsalted butter, melted
- 1/4 tsp fine sea salt
For the Cream Cheese Filling
- 32 oz (907g / 4 blocks) full-fat cream cheese, room temperature
- 1 1/4 cups (250g) granulated sugar
- 1/4 cup (60g) full-fat sour cream, room temperature
- 2 tsp pure vanilla extract
- 1 tbsp fresh lemon juice
- 1/4 tsp fine sea salt
- 4 large eggs, room temperature
- 2 egg yolks, room temperature
For the Sour Cream Topping
- 2 cups (480g) full-fat sour cream
- 1/3 cup (67g) granulated sugar
- 1 tsp pure vanilla extract
- Pinch of fine sea salt
Equipment: 9-inch springform pan, stand mixer or hand mixer, large roasting pan (for water bath), aluminum foil (heavy duty), instant-read thermometer (optional but helpful).
Step-by-Step Instructions
Step 1: Make the Graham Cracker Crust
Preheat your oven to 325°F (163°C). Wrap the outside of a 9-inch springform pan with two layers of heavy-duty aluminum foil, making sure it comes up at least 3 inches on the sides. This waterproofs the pan for the water bath.
In a medium bowl, combine the graham cracker crumbs, sugar, melted butter, and salt. Stir until the mixture looks like wet sand — it should clump when you press it together. Press the mixture firmly and evenly into the bottom of the prepared springform pan, and about 1 inch up the sides. A flat-bottomed glass or measuring cup is the best tool for this. The firmer you press, the better the crust will hold when sliced.

Bake the crust at 325°F for 10–12 minutes, until lightly golden and fragrant. Remove and set aside to cool while you prepare the filling. Keep the oven at 325°F.
Step 2: Mix the Cream Cheese Filling
The cardinal rule of cheesecake filling: beat the cream cheese and sugar first, before anything else goes in. And do it at low to medium speed. High speed whips in too much air, which expands in the oven and cracks the surface as it deflates on cooling.
In the bowl of a stand mixer fitted with the paddle attachment (or using a hand mixer), beat the cream cheese on medium speed for 2 minutes until completely smooth with no lumps. Scrape down the sides of the bowl thoroughly. Add the sugar and beat another 2 minutes on medium. Add the sour cream, vanilla extract, lemon juice, and salt. Beat on low until just combined, scraping down the sides again.

Now add the eggs one at a time, followed by the egg yolks. Beat on low speed after each addition — just until the egg disappears into the batter, about 15–20 seconds per egg. Do not overmix once the eggs go in. Overmixing at the egg stage is the #1 cause of cracked cheesecake. The finished batter should be smooth, pale yellow, and slightly thick. Pour it over the cooled crust.
Step 3: Bake in a Water Bath
Place the foil-wrapped springform pan in a large roasting pan. Set the roasting pan in the oven, then carefully pour hot water from a kettle into the roasting pan until it reaches about 1 inch up the sides of the springform pan. This water bath — technically called a bain-marie — surrounds the cheesecake with gentle, moist heat that prevents the edges from cooking faster than the center, which is what causes cracking and rubberiness.

Bake at 325°F for 60–70 minutes. The cheesecake is done when the edges are set and slightly puffed, but the center 2–3 inches still jiggles like soft gelatin when you gently shake the pan. It should not look liquid, but it also should not be fully firm — it will set completely as it cools. If you have an instant-read thermometer, the center should read between 150°F and 155°F (65–68°C).
Remove the cheesecake from the water bath and set it on a wire rack. Do not remove the foil or the springform ring yet. Let it cool for exactly 10 minutes. Increase the oven temperature to 350°F for the sour cream topping step.
Step 4: Apply the Sour Cream Topping
While the cheesecake cools for those 10 minutes, whisk together the sour cream, sugar, vanilla extract, and salt in a small bowl until smooth and the sugar is fully dissolved. The mixture should be silky with no graininess.
Working quickly, pour the sour cream topping directly onto the warm cheesecake. Use an offset spatula to gently spread it to within about 1/4 inch of the edges. Work with a light hand — you’re spreading over a still-warm, partially set filling. If you press too hard, you’ll disrupt the surface.

Return the cheesecake to the 350°F oven (no water bath needed for this step) and bake for 10 minutes. The sour cream topping will look slightly matte and just barely set. It will firm up and turn glossy as it chills. Do not overbake this step — 10 minutes maximum.
Step 5: Cool and Chill
Remove from the oven and run a thin knife around the inside edge of the springform ring to loosen the crust. This prevents cracking as the cheesecake contracts during cooling. Let the cheesecake cool completely at room temperature — this takes about 2 hours. Do not rush this step.
Once at room temperature, cover loosely with plastic wrap and refrigerate for a minimum of 6 hours, but overnight (8–12 hours) is strongly preferred. Cheesecake continues to set and develop flavor as it chills. Slicing a cheesecake that hasn’t fully chilled results in a softer, messier cut and a less dense texture.
To slice cleanly, use a sharp chef’s knife dipped in hot water and wiped dry between each cut. This gives you those picture-perfect, clean deli-style slices.
Why the Sour Cream Topping Is Non-Negotiable for Authentic NY Cheesecake
It’s worth spending a moment on what this topping actually does, because it’s not just cosmetic. The sour cream layer serves four functions that are fundamental to the New York deli experience:
- Crack prevention: Applying a warm liquid layer over the warm, just-baked surface physically covers any minor fissures that may have formed during baking. That second 10-minute bake seals them.
- Flavor contrast: The cheesecake filling is intensely rich and sweet. The lightly sweetened sour cream adds acidity that cuts through the fat and refreshes the palate, making each bite feel lighter than it actually is.
- Texture differentiation: The topping sets to a slightly softer texture than the cream cheese filling beneath it. That textural contrast — creamy filling under a silkier top layer — is part of what makes a single bite so satisfying.
- Visual signature: The glossy, pale white top is the visual signature of a New York cheesecake. It’s what makes it recognizable from across a deli case.
According to Serious Eats, the water bath and sour cream finish together are what define the New York method — both are essential, not optional.
Topping Variations and Serving Ideas
The plain sour cream finish is the classic, but once you’ve mastered the base, there are several directions you can take it for different occasions:
Fresh Strawberry Topping
Hull and slice 1 pound of fresh strawberries. Toss with 2 tablespoons of sugar and 1 teaspoon of lemon juice. Let macerate for 30 minutes, then spoon over individual slices just before serving. The strawberry version pairs beautifully with the tangy sour cream base — this is the deli version you’ll see most at spring and summer tables.

Blueberry Compote
Simmer 2 cups of blueberries with 1/4 cup sugar and 1 tablespoon lemon juice for about 10 minutes until the berries burst and the liquid thickens slightly. Cool completely before spooning over the cheesecake. A cornstarch slurry (1 tsp cornstarch + 1 tbsp cold water) stirred in at the end gives it more of a glossy, set topping that slices cleanly.
Plain Classic (Original Deli Style)
Serve the cheesecake exactly as described — just the sour cream top, no garnish. A light dusting of powdered sugar around the edges of the plate and a sprig of fresh mint is the deli-standard presentation. Simple is correct here. The cheesecake is the star.
If you love cheesecake in all its forms, our Easy No-Bake Cheesecake is the no-oven version that’s just as crowd-pleasing. For a showstopper variation, try our Oreo Cheesecake Recipe or the insanely popular Butterbeer Cheesecake.
Troubleshooting Common Issues
My cheesecake cracked — is it ruined?
No. That’s exactly what the sour cream topping is for. Apply it as directed and it will fill and cover the crack. After the 10-minute bake and full overnight chill, you won’t be able to see it. Cracks form from overbaking, overmixing, or cooling too quickly — they’re cosmetic, not a structural problem.
My cheesecake is rubbery around the edges
This almost always means the water bath ran dry, or the oven temperature was too high. The dry, direct heat around the edges of the pan firms up the proteins too aggressively. Always check the water level halfway through baking and top it up with hot water if needed. Also verify your oven temperature with an oven thermometer — many home ovens run 15–25°F hot.
The sour cream topping looks curdled or watery after baking
This happens if the topping is applied to a cheesecake that’s too hot (above 165°F) or baked at too high a temperature. Make sure to let the cheesecake cool for 10 minutes before applying the topping, and bake the topping stage at 350°F for exactly 10 minutes — not longer. Any excess moisture will redistribute as it chills overnight.
My crust is soggy
Two causes: the foil wrap developed a leak and water got into the pan, or the crust wasn’t pre-baked long enough. Use two layers of heavy-duty foil and look for any gaps before putting the pan in the water. Pre-bake the crust for the full 10–12 minutes — it should look distinctly golden and smell nutty before the filling goes on.
For more baking troubleshooting, see our deep-dive on Why Is My Cake Crumbly? — many of the same principles apply to dense baked goods like cheesecake.
Storage and Make-Ahead Tips
New York cheesecake is one of the best make-ahead desserts in the baking canon. It actually improves with time — the texture becomes denser and the flavors more cohesive after 24–48 hours of refrigeration.
- Refrigerator: Cover tightly with plastic wrap or store in an airtight container. Keeps well for up to 5 days. The sour cream topping may develop a slight skin on the surface — this is normal and doesn’t affect the taste.
- Freezer: Freeze the entire cheesecake (without toppings) by wrapping first in plastic wrap, then in aluminum foil. It freezes well for up to 3 months. Thaw overnight in the refrigerator. The sour cream topping can be made fresh and applied after thawing, or applied before freezing if preferred — both work well.
- Slicing from frozen: For perfectly clean slices, you can actually slice the cheesecake while still partially frozen (after 30 minutes at room temperature). The slightly firm texture makes for the cleanest cuts.
This cheesecake can be made up to 3 days in advance and refrigerated. For parties, make it 2 days ahead — it will be at peak flavor and texture, and one less thing to worry about the day of the event. If you’re planning a dessert spread, our Tres Leches Cake is another great make-ahead option that improves overnight in the refrigerator.
Serving the Perfect Slice

Presentation matters. To cut cheesecake like a deli professional: fill a tall glass with very hot water. Dip your chef’s knife in, shake off excess water, and make one cut. Before the next cut, dip and wipe the knife again. The hot, clean blade glides through the cold filling without dragging. A 9-inch cheesecake cuts cleanly into 12 slices using this method.
Serve each slice on a chilled plate. Let it sit at room temperature for 10–15 minutes before eating — cold cheesecake dulls the flavor. The ideal serving temperature is cool but not cold, around 45–50°F. At that temperature, the filling is dense and creamy, and the sour cream topping has a perfect silky give.
Pair with coffee, espresso, or a light dessert wine. The acidity of the sour cream topping makes this cheesecake particularly good alongside something bitter, like a double espresso. At a deli, it’s almost always served with coffee — that’s the right call.
For more baking ideas to go alongside this cheesecake, see our Easy Tiramisu Recipe — another classic that shines at dinner parties — or our collection of Chocolate Lava Cake Recipe for something warm and contrasting on the same dessert table.
Frequently Asked Questions
Can I make this without a water bath?
You can, but the results are noticeably different. Without a water bath, the edges will cook faster than the center, often resulting in a rubbery border, a slightly eggy texture, and a higher likelihood of cracking. The water bath is essential to the smooth, dense, uniform texture that defines New York cheesecake. It’s worth the extra step. A simpler alternative: place a pan of hot water on the rack below the cheesecake — this adds moisture to the oven without a full bain-marie and gives about 80% of the benefit.
What’s the difference between New York cheesecake and regular cheesecake?
New York cheesecake uses only cream cheese as the dairy base — no whipped cream, no ricotta, no mascarpone. It’s baked in a water bath and has a dense, firm, almost creamy texture rather than a fluffy or mousse-like one. The sour cream topping is the final detail that distinguishes the classic New York deli version. “Regular” or Italian-American cheesecake often incorporates ricotta for a lighter texture. The Wikipedia entry on New York-style cheesecake notes that the Lindy’s restaurant version is widely credited as the original archetype.
Can I use low-fat cream cheese?
Technically yes, but the texture changes significantly. Full-fat cream cheese has a higher fat content that gives the filling its characteristic density and richness. Low-fat versions contain more water, which can make the filling softer and slightly gummier. For a cheesecake that’s specifically about authenticity — as this one is — use full-fat cream cheese. Philadelphia brand full-fat is the industry standard for this recipe.
How do I know when the cheesecake is done baking?
The jiggle test is the most reliable visual method: shake the pan gently. The outer 1–2 inches should be completely set. The center 2–3 inches should jiggle like soft Jell-O — not sloshy or liquid, but visibly moving as a single unit. If you have an instant-read thermometer, the center should reach 150–155°F. Above 160°F and the eggs begin to set too firmly, producing a rubbery, grainy texture.
Why does my cheesecake need to chill overnight?
The filling continues to set after baking as the proteins cool and the fats solidify. A cheesecake sliced after only 2 hours of chilling will be softer, creamier, and harder to cut cleanly. After 8–12 hours, the structure firms fully and the flavors — especially the vanilla and lemon — mellow and integrate. Overnight is not optional for the best result; it’s when the cheesecake goes from good to excellent.