
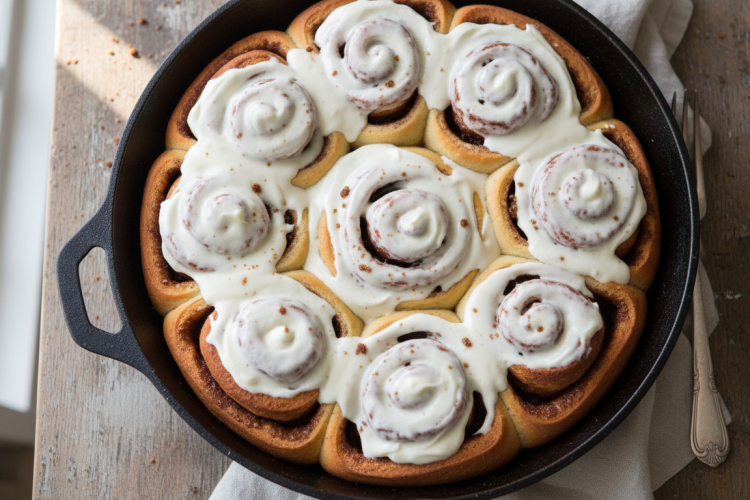
Homemade cinnamon rolls from scratch are soft, fluffy, and filled with a buttery brown sugar cinnamon swirl — topped with tangy cream cheese frosting and best eaten warm, straight from the pan. They take about 3 hours start to finish (mostly hands-off rise time), and the result is dramatically better than anything from a can.

Why Make Cinnamon Rolls From Scratch?
There is a particular kind of morning magic that happens when a pan of homemade cinnamon rolls comes out of the oven. The smell of warm cinnamon, browned butter, and sweet dough is unlike anything that comes from a refrigerated tube. And once you have made a batch from scratch, you will understand why home bakers come back to this recipe again and again.
Store-bought rolls are convenient, but they cannot match the texture of a properly developed dough. Scratch rolls have layers — actual defined, pull-apart layers built by properly proofed yeast dough and a generous filling. The cream cheese frosting you make at home is richer and tangier than the sticky-sweet glaze that comes in that tiny plastic container. The difference is not subtle.
This recipe is written for home bakers at every level. Whether you have made yeasted dough a hundred times or this is your first loaf, the instructions walk you through every step with explanations for why things happen — not just what to do. Understanding the process is what separates a good batch from a great one.
If you love this kind of comfort baking, you might also enjoy our churro cake recipe or a batch of easy homemade churros for another weekend baking project that delivers big reward for moderate effort.
Ingredients
This recipe makes 12 large cinnamon rolls. All ingredients should be at room temperature unless noted.

For the Dough
- 3½ cups (420g) all-purpose flour, plus more for dusting
- 2¼ teaspoons (1 packet) active dry yeast
- ¼ cup (50g) granulated sugar
- 1 teaspoon fine sea salt
- ¾ cup (180ml) whole milk, warmed to 110°F (43°C)
- ⅓ cup (75g) unsalted butter, softened and cut into pieces
- 2 large eggs, room temperature
- 1 teaspoon pure vanilla extract
For the Filling
- ½ cup (115g) unsalted butter, very soft (not melted)
- ¾ cup (150g) packed light brown sugar
- 2½ tablespoons ground cinnamon
- ¼ teaspoon fine sea salt
For the Cream Cheese Frosting
- 6 oz (170g) full-fat cream cheese, softened
- 1½ cups (180g) powdered sugar, sifted
- 3–4 tablespoons whole milk or heavy cream
- 1 teaspoon pure vanilla extract
- Pinch of fine sea salt
Equipment You Will Need
You do not need specialty equipment for this recipe, but a few tools make the process smoother. A stand mixer with a dough hook is helpful but entirely optional — this dough can be kneaded entirely by hand. You will also need a large mixing bowl, a rolling pin, a sharp knife or unflavored dental floss for slicing the rolls, and a 9×13-inch baking pan (or two 9-inch round pans for a more Instagram-ready look).
A kitchen thermometer is genuinely useful here. Yeast activates best in liquid at 105–115°F (40–46°C). Too cold and it won’t activate; too hot and it dies. A $10 instant-read thermometer removes all the guesswork. The Serious Eats guide to instant-read thermometers is a solid resource if you’re shopping for one.
Step-by-Step Instructions
Step 1: Activate the Yeast
In a small bowl or measuring cup, combine the warm milk (110°F), 1 teaspoon of the granulated sugar, and the active dry yeast. Stir gently and let sit for 5–10 minutes. You are looking for a foamy, bubbly surface — that foam is evidence the yeast is alive and working. If nothing happens after 10 minutes, your yeast may be old or your milk was too hot or cold. Start over with fresh yeast before proceeding.
Step 2: Make the Dough
In the bowl of a stand mixer fitted with the dough hook (or a large mixing bowl if kneading by hand), combine the flour, remaining sugar, and salt. Mix briefly to combine. Add the activated yeast mixture, eggs, and vanilla. Mix on medium-low speed for 2 minutes until a shaggy dough forms, then add the softened butter a few pieces at a time.
Increase speed to medium and knead for 8–10 minutes until the dough is smooth, slightly tacky, and pulls cleanly from the sides of the bowl. If kneading by hand, work the dough on a lightly floured surface for 10–12 minutes. The dough should pass the windowpane test: stretch a small piece thin enough to see light through without tearing.

Step 3: First Rise (Bulk Fermentation)
Shape the dough into a ball, place it in a lightly greased bowl, and cover with plastic wrap or a damp towel. Let it rise in a warm spot until doubled in size, about 60–90 minutes. The exact time depends on the temperature of your kitchen — a warm oven (turned off, with just the oven light on) at around 80°F works beautifully.
You can also do a slow, cold first rise in the refrigerator overnight. This develops more flavor and makes the dough much easier to handle. If going this route, cover tightly and refrigerate for 8–12 hours, then let the dough come to room temperature for 30 minutes before rolling.
Step 4: Make the Filling and Roll the Dough
While the dough rises, mix the filling: stir together the softened butter, brown sugar, cinnamon, and salt until a thick paste forms. Set aside at room temperature — it needs to be spreadable, not melted.
Once the dough has doubled, punch it down gently and turn it out onto a lightly floured surface. Roll it into a rectangle approximately 16×12 inches and about ¼ inch thick. Try to keep the thickness even — uneven rolling leads to uneven baking. Spread the filling evenly across the surface of the dough, leaving a ½-inch border along the far long edge (this helps the rolls seal when you roll them up).

Step 5: Slice and Arrange
Starting at the long edge closest to you, roll the dough tightly into a log. Roll with gentle, even pressure — too loose and the rolls will unravel; too tight and there is no room for the layers to puff up. Pinch the seam closed along the bottom.
To slice without flattening, slide a piece of unflavored dental floss or kitchen twine under the log, bring both ends up and cross them over the top, then pull in opposite directions. This cuts cleanly through the dough. Alternatively, use a very sharp serrated knife and saw gently rather than pressing down. Cut into 12 equal pieces, each about 1½ inches thick.
Place the rolls cut-side up in a greased 9×13-inch pan, spacing them slightly apart. They should have a little room to expand — they will touch during the second rise and baking, which is what creates those beautiful pull-apart edges.

Step 6: Second Rise
Cover the pan loosely with plastic wrap and let the rolls rise again until they are puffy, touching, and have risen about 50% — approximately 45–60 minutes at room temperature. Do not rush this step. Under-proofed rolls bake up dense and doughy in the center. The second rise is what gives them that signature cloud-like texture.
While the rolls are in their second rise, preheat your oven to 350°F (175°C) and make the cream cheese frosting.
Step 7: Make the Cream Cheese Frosting
Beat the softened cream cheese with a hand mixer or stand mixer until completely smooth, about 2 minutes. Add the sifted powdered sugar, vanilla, salt, and 3 tablespoons of milk. Beat on medium-high until fluffy and spreadable, 2–3 more minutes. Add the remaining tablespoon of milk if needed to reach a pourable-but-thick consistency. The frosting should hold a shape but flow slightly when spread. Taste and adjust sweetness with more powdered sugar if desired.
Step 8: Bake
Bake the rolls at 350°F for 22–27 minutes, until the tops are lightly golden and the internal temperature of the center roll reads 190°F (88°C) on an instant-read thermometer. The tops will look pale compared to other baked goods — that is correct. Cinnamon rolls should not be deeply browned; they will be dry and tough if overbaked. When in doubt, pull them out slightly early.
Let the rolls cool in the pan for exactly 5 minutes — no more. You want them warm enough that the frosting melts slightly into every layer, but not so hot that it completely liquefies and pools at the bottom. Spread the cream cheese frosting generously over the warm rolls and serve immediately.

Tips for the Best Cinnamon Rolls Every Time
A few technique details make a measurable difference in the final result.
Use Softened — Not Melted — Butter in the Filling
Melted butter runs out of the roll during baking and pools in the pan, leaving rolls that are dry inside and swimming in a greasy puddle. Softened butter stays in place during rolling and creates the cohesive, jammy filling layer you want. If your kitchen is warm and the butter gets too soft, pop it in the refrigerator for 10 minutes before mixing the filling.
Do Not Add Too Much Flour
The most common mistake in scratch cinnamon rolls is adding too much flour out of fear of a sticky dough. A slightly sticky dough is correct — it produces tender rolls. Flour your surface lightly and resist the urge to dump in extra flour during kneading. A dough that cleans the bowl but still slightly sticks to your hand is perfect.
Score the Roll Before Slicing
Before you slice, use a ruler or just eyeball it and make small marks along the log where each roll will be cut. Twelve equal rolls is the goal. Uneven rolls bake unevenly — the small ones overbake while the large ones are still doughy in the center.
Frost While Warm, Not Hot
The 5-minute rest after baking is not optional. On steaming-hot rolls, cream cheese frosting melts completely and disappears. After 5 minutes the surface temperature drops just enough to let the frosting pool in the swirls and set slightly while still sinking into the layers. This is the sweet spot.
Make-Ahead and Storage Options
Cinnamon rolls are at their peak right out of the oven, but they can absolutely be prepped ahead and stored.
Overnight Option (Most Popular)
After slicing and arranging the rolls in the pan, cover tightly with plastic wrap and refrigerate overnight (up to 16 hours). The next morning, let the rolls sit at room temperature for 60 minutes while the oven preheats. They will puff back up to the correct size. Bake as directed. This is the method that lets you wake up and have fresh rolls with minimal morning effort.
Freezing Unbaked Rolls
After slicing and placing rolls in the pan, wrap tightly and freeze for up to 1 month. The night before baking, transfer to the refrigerator to thaw. Let them come to room temperature and complete the second rise (about 2 hours) before baking as directed.
Storing Baked Rolls
Unfrosted baked rolls keep tightly covered at room temperature for 2 days or in the refrigerator for up to 5 days. To reheat, microwave individual rolls for 20–30 seconds or warm the whole pan at 325°F for 10 minutes. Frost after reheating for best results. Fully assembled (frosted) rolls can be refrigerated for up to 3 days — the cream cheese frosting holds up well cold.
Variations Worth Trying
Once you have the base recipe down, there are a lot of directions to take it. The dough itself is versatile, and the filling and frosting are easy to customize.
Brown Butter Cinnamon Rolls
Brown the butter for the filling instead of using it softened. Let it cool until slightly solid before mixing with the brown sugar and cinnamon. The nutty, caramel notes from browned butter take these to another level. This is the upgrade that converts people permanently.
Cardamom Orange Rolls
Replace the cinnamon with 1½ tablespoons ground cardamom and add 1 tablespoon of orange zest to the filling. Swap the vanilla in the frosting for 2 tablespoons of fresh orange juice. This Scandinavian-inspired variation is fragrant and sophisticated — a lovely brunch centerpiece for when you want something slightly unexpected.
Churro Cinnamon Rolls
Roll the baked rolls in a mixture of granulated sugar and cinnamon immediately after they come out of the oven (before frosting), and serve with a side of chocolate dipping sauce. This crossover between two beloved desserts is deeply satisfying. For the full hybrid experience, see our churro cake recipe or try making churros for a crowd at your next party.
Apple Cinnamon Rolls
Add ¾ cup of finely diced apple (peeled, tossed with 1 teaspoon lemon juice to prevent browning) to the filling layer before rolling. The apple cooks down during baking into tender, jammy pockets throughout the swirl. Use apple cider instead of plain milk in the frosting for full apple flavor. This variation is especially good in the fall.
Troubleshooting Common Problems
Even experienced bakers run into issues. Here are the most common problems and how to fix them.
The Dough Did Not Rise
Almost always a yeast issue. Check the expiration date on your yeast and proof it separately before mixing. Yeast also dies above 120°F — if your milk was too hot, that is likely the culprit. Use a thermometer next time.
The Filling Leaked Out
Usually caused by melted butter in the filling or rolling the dough too loosely. Make sure the butter is soft but not liquid before mixing the filling, and roll the dough log firmly. A little leakage is normal and creates delicious caramelized edges — excessive leakage means the butter was too warm.
The Center is Doughy
Under-baking is the culprit. Center rolls always bake more slowly than edge rolls. Use an instant-read thermometer and do not pull the pan until the center roll reaches 190°F. If the tops are browning too fast, tent loosely with aluminum foil for the last 5–8 minutes of baking.
The Rolls Are Dense or Tough
Two causes: too much flour added during kneading, or insufficient rise time. Resist adding flour unless the dough is absolutely unworkable, and make sure both rises are complete. A dense crumb is also what happens when you cut the second rise short — the rolls will not have developed the airy structure needed for a light, fluffy texture. For more on this, see our guide on why baked goods turn out dense.

Serving Ideas
Classic cinnamon rolls are a standalone event, but they pair beautifully with other components for a full brunch spread. Serve alongside fresh fruit, a bowl of Greek yogurt with honey, or scrambled eggs for balance. Coffee is the natural companion — the slight bitterness cuts through the richness of the frosting in a deeply satisfying way.
For dessert pairings, warm cinnamon rolls served with a scoop of vanilla ice cream become something close to a bread pudding experience. If you enjoy layered dessert combinations, you might also love our easy cookie recipe or explore our collection of birthday cake ideas for your next celebration baking project.
The Science Behind Soft Cinnamon Rolls
Understanding what makes a cinnamon roll tender and fluffy helps you troubleshoot and improvise with confidence. The softness comes from three things working together: fat, sugar, and proper gluten development.
Fat (the butter in the dough) coats the gluten strands and limits how tight they bond together. This is called shortening the gluten and it is why enriched doughs like this one are softer and more tender than lean doughs like baguettes. Sugar does double duty: it feeds the yeast during fermentation and contributes to the Maillard reaction during baking, which is what creates the golden tops and caramelized filling.
Proper kneading develops just enough gluten to give the rolls structure without making them tough. The windowpane test is the best way to assess this: a fully developed dough can be stretched thin enough to be translucent without tearing. According to food science sources, including research from King Arthur Baking, proper gluten development is the single most important factor in achieving a consistent, professional-quality enriched dough at home.
Yeast is responsible for both leavening and flavor. During fermentation, yeast converts sugars into carbon dioxide (which inflates the dough) and ethanol plus organic acids (which create flavor complexity). A longer, cooler rise produces more flavor because the process moves slowly enough for secondary fermentation byproducts to accumulate. This is the scientific basis for why overnight cold-rise rolls taste better than same-day rolls.
Frequently Asked Questions
Can I make cinnamon rolls without a stand mixer?
Yes, entirely. Mix the dough by hand in a large bowl until it comes together, then turn it out onto a floured surface and knead by hand for 10–12 minutes. It is a workout but completely achievable. The dough is ready when it is smooth and elastic and passes the windowpane test.
What is the best yeast for cinnamon rolls?
Active dry yeast works well here and is what this recipe uses. Instant yeast (also sold as rapid-rise or bread machine yeast) can be substituted in equal amounts and does not need to be proofed separately — just add it directly to the dry ingredients. Instant yeast will shorten your rise times by about 25%.
Can I freeze cinnamon rolls after baking?
Yes. Cool completely, wrap individually in plastic wrap, and then place in a zip-lock bag. Freeze for up to 2 months. Thaw overnight in the refrigerator or at room temperature for 2 hours, then warm in a 325°F oven for 10 minutes. Frost after warming.
Why are my cinnamon rolls not fluffy?
The most likely causes are: (1) yeast that was not properly activated, (2) insufficient rise time on the first or second rise, or (3) too much flour worked into the dough during kneading. All three lead to a dense, compact crumb. Use a thermometer for your milk temperature, give the dough a full rise in a warm spot, and use just enough flour to keep the dough manageable.
Can I use bread flour instead of all-purpose?
You can, but the texture will be chewier. Bread flour has a higher protein content (12–14% vs. 10–12% for all-purpose), which means more gluten development and a slightly denser, chewier roll. For the classic soft, pillowy texture most people want from cinnamon rolls, all-purpose flour is the better choice.
If cinnamon rolls are your gateway into pastry baking, there are many other rewarding recipes to explore from here. Our red velvet cake from scratch follows a similar make-it-yourself ethos, and our fudgy brownie recipe is a great next project if you want something a little quicker and just as satisfying.
This recipe is the kind that gets requested. Make it once, and people will start asking for it at holidays, brunches, and birthdays. It scales up easily — just double the recipe and use two pans — and adapts to almost any flavor direction you want to take it. The fundamentals of good yeasted dough are the same whether you are making cinnamon rolls, dinner rolls, or sweet buns. Once you have them, a whole world of baking opens up.