
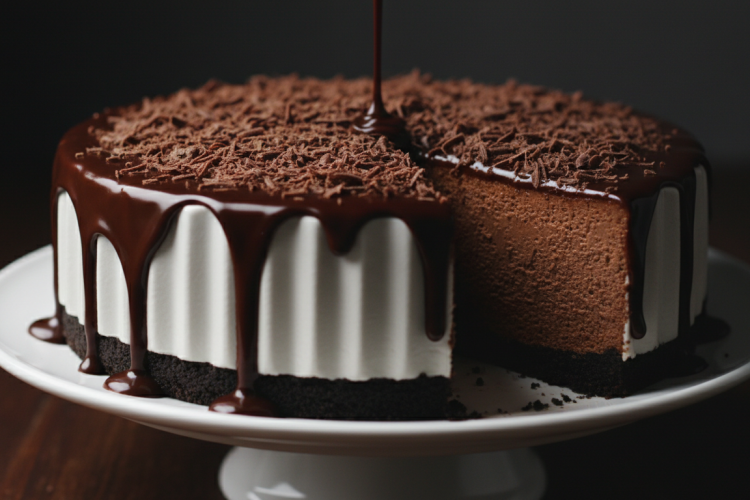
This no-bake chocolate cheesecake is a rich, silky dessert made with cream cheese, melted dark chocolate, and whipped heavy cream — no oven required, and it sets firm in the refrigerator in 4 to 6 hours. It’s one of the easiest chocolate desserts you can make: a buttery graham cracker crust, a luxuriously creamy chocolate filling, and an optional glossy ganache top that looks bakery-level with minimal effort.

Why This Recipe Works
No-bake cheesecakes can go wrong in a few ways: too soft, too dense, or a filling that doesn’t set properly. This recipe avoids all three. Here’s what makes it reliable every time:
- Full-fat cream cheese — Use blocks, not spreadable cream cheese. The lower moisture content gives you a firm, sliceable cheesecake rather than a soft pudding.
- Melted real chocolate — Good-quality dark chocolate (at least 60% cacao) adds deep flavor that cocoa powder alone can’t replicate. It also contributes cocoa butter, which helps the cheesecake set.
- Stiff whipped cream — Whipping the heavy cream to stiff peaks before folding creates a mousse-like texture — lighter and more refined than dense cream cheese cheesecakes.
- Enough chilling time — 4 hours minimum, overnight preferred. Patience here pays off with clean, even slices.
Ingredients

For the Graham Cracker Crust
- 2 cups (200g) graham cracker crumbs (about 14 full crackers)
- ¼ cup (50g) granulated sugar
- ½ cup (113g) unsalted butter, melted
- Pinch of salt
For the Chocolate Cheesecake Filling
- 8 oz (227g) dark chocolate (60–70% cacao), finely chopped
- 16 oz (454g) full-fat cream cheese, room temperature (two 8-oz blocks)
- ¾ cup (90g) powdered sugar, sifted
- 1 teaspoon pure vanilla extract
- ¼ teaspoon salt
- 1½ cups (360ml) heavy whipping cream, cold
- 2 tablespoons unsweetened cocoa powder
For the Chocolate Ganache Topping (Optional but Recommended)
- 4 oz (113g) dark chocolate, finely chopped
- ½ cup (120ml) heavy cream
For Garnish
- Chocolate shavings or curls
- Fresh raspberries or strawberries (optional)
- Flaky sea salt (optional — a small pinch elevates the chocolate flavor)
Equipment You’ll Need
- 9-inch (23cm) springform pan
- Stand mixer or hand mixer with whisk attachment
- Heatproof bowl and small saucepan (for double boiler)
- Rubber spatula
- Offset spatula (helpful for smoothing the top)
Step-by-Step Instructions
Step 1: Make the Graham Cracker Crust
Crush the graham crackers into fine crumbs using a food processor or by placing them in a zip-lock bag and rolling with a rolling pin. Combine the crumbs, sugar, salt, and melted butter in a bowl. Mix until all crumbs are evenly moistened — the texture should look like wet sand that clumps when squeezed.

Press the crust mixture firmly and evenly into the bottom of your 9-inch springform pan. Use the flat bottom of a measuring cup to pack it down tight — a compact crust holds together cleanly when sliced. Refrigerate for at least 30 minutes while you prepare the filling.
Step 2: Melt the Chocolate
Set up a double boiler: place the chopped dark chocolate in a heatproof bowl set over a saucepan of barely simmering water. Stir gently until completely melted and smooth. Don’t let the bowl touch the water, and keep the heat low — gentle, indirect heat prevents the chocolate from seizing. Remove from heat and let cool to room temperature (about 10 minutes). It should be fluid and pourable but not warm when it goes into the filling.

Alternatively, melt the chocolate in the microwave: heat in 20-second intervals at 50% power, stirring after each burst, until smooth. This usually takes 3–4 intervals total. Microwave melting is faster but requires more attention to avoid scorching.
Step 3: Beat the Cream Cheese
In a large bowl, beat the room-temperature cream cheese with a hand mixer or stand mixer on medium speed until completely smooth, about 2 minutes. Scrape down the sides. Add the sifted powdered sugar, vanilla extract, salt, and cocoa powder. Beat again until fully incorporated, about 1 minute. There should be no cream cheese lumps — scrape down the bowl as needed and beat until the mixture is silky smooth before proceeding.
Pour the cooled melted chocolate into the cream cheese mixture and beat on low speed until fully combined. The filling will turn a deep, uniform chocolate brown. Don’t overmix at this stage — just combine until smooth.

Step 4: Whip the Heavy Cream
In a separate clean, cold bowl, whip the cold heavy cream to stiff peaks using a hand mixer or stand mixer with the whisk attachment. Start on medium speed and increase to high as the cream thickens. Stop when the cream holds firm peaks that don’t fold over — this usually takes 3–4 minutes. Don’t overwhip; stop at stiff peaks before it becomes grainy or starts to look curdled.
Using a large rubber spatula, gently fold the whipped cream into the chocolate cream cheese mixture in two additions. Use slow, deliberate folds — you’re trying to keep as much air in the whipped cream as possible. The final filling should be light, airy, and evenly chocolate-colored throughout.
Step 5: Fill and Chill

Remove the chilled crust from the refrigerator. Spoon the chocolate filling onto the crust and spread it into an even layer using an offset spatula or the back of a spoon. Gently tap the pan on the counter a few times to release any large air bubbles and settle the filling.
Cover loosely with plastic wrap and refrigerate for at least 4 hours, or overnight for best results. The cheesecake needs to chill long enough for the filling to set firm enough to slice cleanly. Rushing this step is the most common reason no-bake cheesecakes fall apart when served.
Step 6: Make the Ganache Topping
Heat the heavy cream in a small saucepan until just barely simmering — small bubbles around the edges, not a full boil. Pour over the chopped dark chocolate in a heatproof bowl. Let sit undisturbed for 2 minutes, then stir slowly from the center outward until the ganache is smooth, shiny, and fully combined. Let cool for 5–10 minutes until pourable but not too thin.
Remove the cheesecake from the refrigerator. Pour the ganache over the top and use an offset spatula to spread it to the edges, letting it drip slightly over the sides for a dramatic finish. Return to the refrigerator for 30 minutes to set the ganache before garnishing and serving.
Serving and Slicing Tips

For the cleanest slices, run a sharp knife under hot water, wipe it dry, then cut. Repeat the hot-knife wipe between each slice. This prevents the filling from dragging and keeps the layers looking distinct and clean.
Top each slice just before serving with chocolate shavings, fresh raspberries, or a pinch of flaky sea salt. The salt is subtle but lifts the chocolate flavor noticeably — it’s a small touch that makes a big difference.
Variations and Flavor Twists
This base recipe is a flexible template. Here are some easy variations to try:
- Oreo crust — Replace the graham cracker crust with crushed Oreo cookies (skip the added sugar). The chocolate cookie crust pairs beautifully with the chocolate filling.
- Peanut butter swirl — Warm 3 tablespoons of peanut butter until pourable, drizzle over the top of the filling before chilling, then swirl with a toothpick.
- Mint chocolate — Add ½ teaspoon peppermint extract to the filling. Garnish with crushed peppermint candies for a holiday version.
- Espresso chocolate — Add 1 teaspoon of instant espresso powder to the cream cheese mixture. Coffee intensifies dark chocolate flavor beautifully.
- White chocolate variation — Substitute white chocolate for the dark chocolate for a completely different flavor profile. Reduce the powdered sugar by 2 tablespoons since white chocolate is sweeter.
- Individual cups — Layer the crust and filling in serving glasses or mason jars for individual no-bake chocolate cheesecakes. These set faster (2–3 hours) and are perfect for parties.
Storage Instructions
Store the finished cheesecake covered in the refrigerator for up to 5 days. For longer storage, individual slices can be frozen: wrap tightly in plastic wrap, then foil, and freeze for up to 2 months. Thaw in the refrigerator overnight before serving. The texture after freezing is slightly denser but still very good.
Do not leave the cheesecake at room temperature for more than 2 hours — cream cheese fillings should stay chilled. If you’re serving at a party, keep it refrigerated until just before cutting.
Troubleshooting: Why Didn’t My No-Bake Cheesecake Set?
The most common issue with no-bake cheesecakes is a filling that stays too soft and doesn’t hold its shape when sliced. Here’s why it happens and how to fix it:
- Spreadable cream cheese — Regular tub-style cream cheese has more moisture and stabilizers than brick-style blocks. It doesn’t set properly in no-bake applications. Always use full-fat brick cream cheese.
- Warm chocolate added to cold cream cheese — If the melted chocolate is still warm when added to the cream cheese, it can cause the mixture to become grainy and affect setting. Cool the chocolate completely first.
- Underwhipped cream — Soft-peak whipped cream doesn’t contribute enough structure. Whip to firm stiff peaks before folding in.
- Not enough chill time — 4 hours is the minimum; overnight is better. If your fridge runs warm, give it more time.
- The pan was too warm — Make sure the crust is chilled firm before adding the filling. A warm crust can soften the bottom layer.
If you’re curious about other cheesecake techniques, our classic vanilla cheesecake recipe uses a baked water-bath method for a completely different (denser, more custardy) texture. And for another no-bake option, our easy no-bake cheesecake is the vanilla version of this recipe. The lemon cheesecake is also a baked version with a bright citrus filling worth trying.
What Type of Chocolate Should I Use?
The chocolate you choose makes a significant difference in flavor. For this recipe, dark chocolate between 60% and 70% cacao hits the sweet spot — rich chocolate flavor without excessive bitterness, and enough cocoa butter to help the cheesecake set firm.
Avoid chocolate chips for the filling — they contain stabilizers (like lecithin) that prevent smooth melting and can affect the filling’s texture. Use a good-quality baking bar or couverture chocolate instead. Brands like Valrhona, Guittard, Ghirardelli, or Lindt work well. According to Serious Eats’ chocolate baking guide, higher-quality chocolate with a clean cacao flavor will produce a noticeably better final dessert than generic chips or baking chocolate.
For the ganache topping, you can go slightly darker (up to 72%) for a more intense contrast against the sweeter filling — or use the same chocolate for a cohesive flavor throughout.
Pairing Ideas
No-bake chocolate cheesecake pairs well with a variety of accompaniments. Here are some serving suggestions:
- Fresh berries — Raspberries, strawberries, or blackberries cut through the richness with their natural acidity.
- Whipped cream — A lightly sweetened dollop alongside each slice keeps things classic.
- Coffee or espresso — The bitterness of a good espresso complements the dark chocolate filling beautifully.
- Caramel sauce — Drizzle warm caramel over each slice for a chocolate-caramel combination. Our churro cheesecake bars also use caramel as a core flavor component if you want to explore that direction.
- Vanilla ice cream — Warm brownie + cold ice cream logic applies here too. A small scoop alongside a chilled slice is a genuinely great combination.
If you love chocolate desserts, also check out our fudgy brownie recipe and our chocolate lava cake recipe — both are excellent options when you want maximum chocolate impact with minimal time.
Watch: No-Bake Cheesecake Guide
Frequently Asked Questions
Can I make this no-bake chocolate cheesecake ahead of time?
Yes — this cheesecake is actually better made a day ahead. Overnight chilling lets the filling set completely firm, resulting in cleaner slices and a more developed chocolate flavor. Make it the day before your event and keep it covered in the refrigerator. Add the ganache and garnishes the morning of serving.
Do I need a springform pan?
A springform pan makes removal and slicing much easier, but it’s not strictly required. You can use a regular 9-inch cake pan lined with plastic wrap overhanging the edges — once chilled, lift the cheesecake out using the plastic wrap overhang. A springform pan gives a cleaner presentation and is worth using if you have one.
Can I use milk chocolate instead of dark?
You can, but the result will be much sweeter and may not set as firm. Milk chocolate has a higher sugar content and less cocoa butter than dark chocolate, which affects both flavor and structure. If you use milk chocolate, reduce the powdered sugar to ¼ cup and consider adding 2 tablespoons of cornstarch dissolved in a little cream to help the filling firm up. Dark chocolate at 60–70% cacao is strongly recommended for the best result.
How long does no-bake chocolate cheesecake last in the fridge?
Stored covered in the refrigerator, this cheesecake keeps well for up to 5 days. The crust may soften slightly after day 3 due to moisture absorption from the filling, but the flavor is still excellent. For longer storage, freeze individual slices wrapped in plastic wrap and foil for up to 2 months.
Why is my chocolate cheesecake grainy or lumpy?
Grainy texture almost always comes from one of two causes: cream cheese that wasn’t fully softened to room temperature before beating, or warm melted chocolate added to cold cream cheese (causing the chocolate to seize). Make sure your cream cheese sits out for at least 30 minutes before you start, and cool the melted chocolate completely before incorporating it. If you see lumps during beating, keep going — they usually smooth out with more mixing time.