
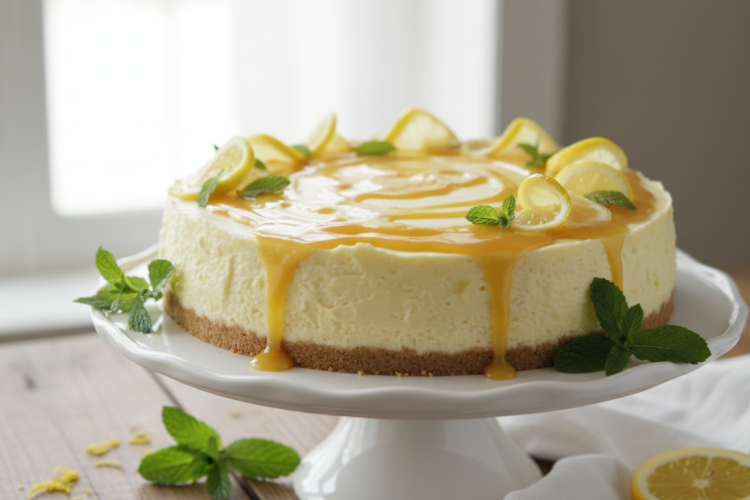
This lemon cheesecake recipe delivers a silky, tangy cream cheese filling on a buttery graham cracker crust, topped with bright homemade lemon curd — baked low and slow in a water bath for a perfectly smooth, crack-free top every time. It takes about 90 minutes of active prep and bake time, plus overnight chilling for the best texture and flavor.

Why This Lemon Cheesecake Recipe Works
There are a hundred lemon cheesecake recipes online, but most fall short in at least one area — too sweet, too dense, cracked top, or a filling that tastes more like vanilla with a squeeze of lemon. This recipe fixes all of that with a few deliberate choices:
- Fresh lemon zest and juice in the filling — bottled juice cannot replicate the floral, aromatic brightness that comes from freshly zested lemons. Zest contains the essential oils that give real lemon flavor.
- Water bath baking — surrounding the springform pan with steam creates even, gentle heat that prevents the outer edges from overcooking before the center sets. The result is a uniformly creamy texture with no cracks.
- Room temperature ingredients — cold cream cheese creates lumps that never fully smooth out. Bringing everything to room temperature before mixing is the single biggest technical tip for a silky batter.
- Homemade lemon curd topping — a thin layer of bright, glossy lemon curd applied after the cheesecake chills adds concentrated lemon flavor and a beautiful presentation with almost no extra effort.
- Overnight chill — the texture of cheesecake improves dramatically with a full overnight rest in the refrigerator. Slicing too early gives a soft, under-set result. Patience is the ingredient most recipes omit.
Ingredients
This recipe makes one 9-inch lemon cheesecake, serving 10 to 12 slices. All ingredients should be at room temperature before you begin.
For the Graham Cracker Crust
- 1½ cups (180g) graham cracker crumbs (about 12 full sheets)
- 3 tablespoons (38g) granulated sugar
- ¼ teaspoon fine salt
- 6 tablespoons (85g) unsalted butter, melted
For the Lemon Cheesecake Filling
- 24 oz (680g) full-fat cream cheese, room temperature (three 8-oz blocks)
- 1 cup (200g) granulated sugar
- 3 large eggs, room temperature
- 1 egg yolk, room temperature
- ⅓ cup (80ml) sour cream, room temperature
- 2 tablespoons (30ml) fresh lemon juice (about 1 large lemon)
- 1 tablespoon finely grated lemon zest (from 2 lemons)
- 1 teaspoon pure vanilla extract
- 2 tablespoons (16g) all-purpose flour (optional — adds slight structure, omit for gluten-free)
For the Lemon Curd Topping
- 3 large egg yolks
- ½ cup (100g) granulated sugar
- ¼ cup (60ml) fresh lemon juice (about 2 lemons)
- 1 teaspoon finely grated lemon zest
- 4 tablespoons (57g) unsalted butter, cut into cubes
- Pinch of salt
Equipment You Will Need
The right equipment makes the difference between a cheesecake that bakes evenly and one that cracks or leaks. Here is what you need:
- 9-inch springform pan — the removable sides are essential for releasing the cheesecake cleanly. Do not substitute a regular cake pan.
- Stand mixer or hand mixer — thorough creaming of the cream cheese requires a mixer. Doing this by hand leaves lumps.
- Large roasting pan — for the water bath. It needs to be large enough to hold the springform pan with room for water around all sides.
- Heavy-duty aluminum foil — to wrap the outside of the springform pan and prevent water from seeping in. Use at least two layers.
- Microplane or fine zester — for grating lemon zest without bitter white pith.
- Small saucepan — for cooking the lemon curd.
- Fine mesh strainer — to strain the curd for a perfectly smooth texture.
How to Make the Graham Cracker Crust
The crust is the foundation of the cheesecake, and it needs to be compact enough to hold together when sliced. A loose, sandy crust will crumble on the plate.

- Preheat the oven to 325°F (163°C). Position a rack in the center of the oven.
- Make the crumbs. Pulse graham crackers in a food processor until you have fine, even crumbs. Alternatively, place crackers in a zip-lock bag and crush with a rolling pin.
- Combine the crust ingredients. Mix graham cracker crumbs, sugar, and salt in a bowl. Pour in melted butter and stir until the mixture resembles wet sand and holds together when you squeeze a handful.
- Press into the pan. Pour the mixture into the springform pan and press it firmly and evenly across the bottom and about 1 inch up the sides. Use the flat bottom of a measuring cup or glass to pack it tightly — a loose crust will crumble when sliced.
- Pre-bake the crust. Bake for 10 minutes until just set and lightly golden. Remove and let it cool slightly while you make the filling. Do not turn off the oven.
How to Make the Lemon Cheesecake Filling
The filling is where this cheesecake earns its reputation. The key is to mix slowly and gently once the eggs are added — overbeating at this stage incorporates excess air which causes puffing and cracking during baking.

- Beat the cream cheese. In a stand mixer fitted with the paddle attachment (or using a hand mixer), beat the room-temperature cream cheese on medium speed for 2 to 3 minutes until completely smooth with no lumps. Scrape down the bowl frequently.
- Add the sugar. Add the sugar and beat on medium for another 2 minutes until fully incorporated and fluffy.
- Add the lemon flavoring. Mix in the lemon zest, lemon juice, vanilla extract, and sour cream on low speed until just combined. The sour cream adds slight tang and a silkier texture to the finished cheesecake.
- Add the eggs one at a time. This is the most critical step: switch to the lowest speed setting, add the eggs and egg yolk one at a time, mixing only until each disappears. Do not overmix. Overbeaten eggs = air bubbles = cracked cheesecake.
- Add flour if using. Sprinkle in the flour and fold gently with a spatula. The flour adds a small amount of structure that helps prevent sinking and cracking, especially in humid climates.
- Pour the batter. Pour the filling over the pre-baked crust and smooth the top with an offset spatula.

Baking in a Water Bath
A water bath (also called a bain-marie) is the professional technique that ensures a smooth, crack-free cheesecake. The steam keeps the oven humid and prevents the top from drying out before the center sets.
- Wrap the springform pan. Tear two large sheets of heavy-duty aluminum foil and wrap them around the outside and bottom of the springform pan, pressing the foil up the sides. This creates a watertight seal. You need at least two overlapping layers to prevent leaks.
- Place in a roasting pan. Set the wrapped springform pan inside a large roasting pan or baking dish.
- Add boiling water. Carefully pour hot water from a kettle into the roasting pan until it reaches about 1 inch up the sides of the springform pan. Do not splash water onto the cheesecake.
- Bake at 325°F for 55 to 65 minutes. The cheesecake is done when the edges are set and lightly puffed, but the center 2 to 3 inches still wobbles gently like Jell-O when you nudge the pan. It will firm up as it cools — do not overbake waiting for the center to stop moving entirely.
- Turn off the oven and crack the door. Leave the cheesecake in the oven with the door cracked open for 1 hour. This gradual temperature drop prevents the surface from cracking due to thermal shock.
- Remove and cool to room temperature. Take the cheesecake out of the water bath, remove the foil, and let it cool on a rack for another 1 hour before refrigerating.
- Refrigerate overnight. Cover loosely with plastic wrap and refrigerate for at least 6 hours, preferably overnight. The texture and flavor improve significantly with a full night’s rest.
If you enjoy baked cheesecakes, our classic vanilla cheesecake recipe uses the same water bath technique and is a great comparison to the lemon version.
How to Make the Lemon Curd Topping
The lemon curd is what sets this cheesecake apart visually and in flavor. It is bright, glossy, and intensely lemony — a perfect counterpoint to the rich cream cheese filling below it. Make the curd while the cheesecake bakes so it has time to cool.

- Whisk yolks, sugar, and lemon juice. In a small saucepan, whisk together the egg yolks, sugar, fresh lemon juice, lemon zest, and pinch of salt until smooth.
- Cook over medium-low heat. Place the saucepan over medium-low heat and cook, stirring constantly with a rubber spatula or wooden spoon, for 8 to 10 minutes until the curd thickens enough to coat the back of a spoon. Do not let it boil — boiling scrambles the yolks.
- Add the butter. Remove from heat and add the cold butter cubes one at a time, stirring each piece until fully melted and incorporated before adding the next. The butter makes the curd rich and glossy.
- Strain the curd. Pour the finished curd through a fine mesh strainer into a bowl or jar to remove any cooked bits of egg and the lemon zest. This step is what makes the curd silky smooth rather than grainy.
- Cool with plastic wrap pressed directly on the surface. Press a sheet of plastic wrap directly onto the surface of the curd (not over the bowl — directly touching the curd). This prevents a skin from forming as it cools.
- Refrigerate until ready to use. The curd will thicken further as it chills. It keeps for up to 2 weeks in the refrigerator.
Assembling and Serving the Lemon Cheesecake
Once the cheesecake has chilled overnight and the lemon curd is ready, assembly takes just a few minutes.

- Release the springform pan. Run a thin spatula or knife around the edge of the cheesecake before unlatching the springform ring. This prevents tearing the edges.
- Spread the lemon curd. Spoon about ½ cup of the chilled lemon curd onto the top of the cheesecake and spread it in an even layer, leaving a small border around the edge if desired. Return to the refrigerator for 30 minutes to let the curd set on top.
- Optional garnishes. For a bakery-style finish: pipe whipped cream rosettes around the border, add thin candied lemon slices, or scatter fresh blueberries or raspberries over the curd.
- Slice cleanly. For clean slices, dip a sharp knife in hot water and wipe dry between each cut. This melts through the filling cleanly rather than dragging.

Lemon Cheesecake Variations
Once you have mastered the base recipe, there are several easy variations worth exploring:
- No-bake lemon cheesecake — swap the baked filling for a whipped cream cheese and lemon filling set with gelatin. No water bath needed. Lighter texture, faster prep. See our easy no-bake cheesecake recipe as a base to adapt.
- Lemon blueberry cheesecake — fold fresh blueberries into the batter or scatter them over the lemon curd topping. The blueberry-lemon combination is a classic pairing.
- Lemon raspberry cheesecake — replace the lemon curd with a fresh raspberry coulis for a tart, fruit-forward topping.
- Lemon cheesecake bars — press the crust into a 9×13 pan, spread the filling in a thin layer, and bake for 30 minutes for easy portable squares. Great for potlucks and parties.
- Meyer lemon cheesecake — Meyer lemons are sweeter and more floral than regular Eureka lemons. In season (November through March), they produce an exceptionally fragrant cheesecake with less tartness and more complexity.
Storage and Make-Ahead Tips
Lemon cheesecake is an ideal make-ahead dessert — it actually tastes better the day after baking once the flavors have had time to meld and the texture has fully set.
- Refrigerator: Store covered in the refrigerator for up to 5 days. Keep sliced leftovers covered with plastic wrap pressed against the cut surface to prevent drying.
- Freezer: Cheesecake freezes beautifully for up to 2 months. Freeze without the lemon curd topping — add the curd after thawing. Wrap individual slices in plastic wrap, then aluminum foil. Thaw overnight in the refrigerator.
- Make ahead: The cheesecake (without curd) can be baked 2 to 3 days ahead and refrigerated. The lemon curd keeps for up to 2 weeks refrigerated. Assemble the day before serving or the morning of your event.
For another elegant cheesecake worth mastering, our strawberry cheesecake recipe uses the same baked base with a fresh strawberry topping — perfect for alternating between the two depending on the season.
Troubleshooting Common Lemon Cheesecake Problems
Even experienced bakers run into occasional issues with cheesecake. Here are the most common problems and how to fix or prevent them:
- Cracked top: Almost always caused by one of three things — overmixing the batter (too much air), overbaking (center too firm before cooling), or cooling too quickly (temperature shock). The water bath and oven-door cooling step in this recipe address all three causes.
- Watery filling: Wet cheesecake is usually caused by water seeping through the foil wrap into the springform pan. Use extra-wide, heavy-duty foil and wrap with at least two layers. Some bakers place the springform pan inside an oven bag as extra insurance.
- Lumpy batter: Cream cheese that is too cold will not mix smoothly. Always bring cream cheese to room temperature for at least 1 hour before mixing. If you see lumps, beat the cream cheese alone for an extra 2 minutes before adding other ingredients.
- Sunken center: Caused by underbaking or opening the oven door too early. The cheesecake should wobble like firm Jell-O in the center when done — not liquid, not solid. Trust the wobble.
- Gummy crust: Pre-baking the crust for 10 minutes before adding the filling prevents it from becoming soggy. If your crust is still soft after baking, it likely absorbed moisture from the water bath — double-check your foil wrap next time.
For more cheesecake baking guidance, our New York cheesecake with sour cream topping post covers the classic deli-style baked technique in detail, and many of the same troubleshooting principles apply.
If you have ever wondered why your desserts come out with issues, the Serious Eats guide to the science of cheesecake covers the food science behind every step — a great read for anyone who wants to understand the why behind the technique.
Pairing Suggestions
Lemon cheesecake is a versatile dessert that pairs well with a range of flavors and beverages:
- Fresh berries — strawberries, raspberries, and blueberries all complement the lemon tang beautifully. A simple macerated berry topping (fruit + sugar + lemon juice, rest 30 minutes) elevates the presentation without much effort.
- Whipped cream — a dollop of lightly sweetened whipped cream alongside each slice balances the tartness and richness.
- Chamomile or green tea — delicate floral teas echo the brightness of the lemon without overpowering the subtle cream cheese notes.
- Prosecco or sparkling wine — the acidity and bubbles cut through the rich filling and refresh the palate between bites.
- Lavender honey — a drizzle of lavender-infused honey over the lemon curd topping creates a sophisticated floral-citrus profile that works beautifully for dinner parties.
For a churro-inspired twist on cheesecake flavors, our churro cheesecake bars combine the cinnamon-sugar crunch of churros with a cream cheese filling for an irresistible hybrid dessert.
Frequently Asked Questions
Can I make lemon cheesecake without a water bath?
Yes, but the risk of cracking increases significantly. Without the humidity of a water bath, the outer edges of the cheesecake cook faster than the center, creating tension as the filling sets at different rates. If you skip the water bath, lower the oven temperature to 300°F and bake longer (70 to 80 minutes), then cool very gradually in the oven. Many bakers also set the cheesecake pan on top of a baking sheet of water placed on the rack below as a compromise between a true water bath and dry baking.
How much lemon flavor does this cheesecake have?
With 2 tablespoons of juice and 1 tablespoon of zest in the filling plus the lemon curd topping, this cheesecake has a prominent but balanced lemon flavor — tangy and bright without being mouth-puckeringly sour. For a subtler lemon note, reduce the zest to 1 teaspoon and skip the curd topping. For maximum lemon intensity, add an extra ½ tablespoon of zest to the filling and top generously with curd.
Can I use bottled lemon juice instead of fresh?
Technically yes, but the result will be noticeably less flavorful. Bottled lemon juice lacks the volatile aromatic compounds that give fresh lemon its brightness. More importantly, you cannot get lemon zest from a bottle, and the zest is where the most intense lemon flavor lives. For a dessert that showcases lemon as the star flavor, always use fresh lemons.
Can I make this lemon cheesecake gluten free?
Yes, with two adjustments: substitute the graham cracker crust with gluten-free graham crackers (several brands are available, such as Kinnikinnick or Schar), and omit the 2 tablespoons of all-purpose flour from the filling (it is listed as optional). The cheesecake will still set properly without it, though the texture will be very slightly softer. If you are baking for someone with celiac disease, confirm all other ingredients (including the vanilla extract) are certified gluten free as well.
Why does my lemon curd taste bitter?
Bitter lemon curd almost always comes from white pith in the zest. When grating lemon zest, use a microplane and grate only the bright yellow outer layer — stop as soon as you see white underneath. The pith contains bitter limonin compounds that the cooking process concentrates rather than mellows. Straining the finished curd through a fine mesh sieve also removes any coarse pieces that contribute harsh flavor notes.